


Contractor Verified Pre Demo Bathroom Checklist for Bowmanville Homes
Request Your Free Estimate Today
GET A FREE ESTIMATE →The costliest bathroom renovation mistakes almost always come from the same six sources: skipping proper planning, undersized ventilation, missing waterproofing, moving plumbing without inspecting old lines, hiring on price alone, and skipping the contingency budget. The single best fix is to lock every decision and vet every trade before demolition starts. LA Rocks Renovations, led by Dylan Larocque, sees these patterns across Durham Region homes and can walk you through what to check before you sign anything.
TL;DR:
- Proper planning and vetting of trades before demolition can significantly reduce costs and delays in bathroom renovations.
- Ensuring correct exhaust fan sizing and external venting prevents moisture buildup, with improper setups potentially costing up to $6,000 in mold remediation.
- Waterproofing membranes are essential for preventing leaks and rot, costing between $200 and $500 CAD but saving thousands on repairs later.
- Inspection of older wiring and plumbing before demolition avoids expensive surprises and mid-project scope changes.
- Finalizing layout, materials, and lighting in advance, along with thorough contractor communication, helps prevent costly mistakes and resale value issues.
Table of Contents
- The most common bathroom renovation errors and how to fix them
- How to size and vent a bathroom exhaust fan properly
- Why waterproofing membranes matter more than the tile you choose
- What older Bowmanville homes hide behind the bathroom wall
- Layout mistakes that make a finished bathroom hard to use
- How to vet contractors and avoid permit problems
- Budgeting and scheduling so the project doesn’t stall
- Choosing materials and lighting that hold up over time
- Keeping your bathroom in good shape after the renovation is done
- Design mistakes that hurt daily use and resale value
- Why lighting design deserves as much attention as tile
- Talking to your contractor without the mixed signals
- Why LA Rocks Renovations checks for these mistakes on every job
- Get a straight answer on your bathroom project
- Where these technical claims come from
- Sources
The most common bathroom renovation errors and how to fix them
Every Bowmanville bathroom remodel carries the same risk points, and most of them show up before the first tile goes down. This checklist covers the mistakes that cause the biggest headaches, with a fast fix for each.
- Starting demolition before finishes are chosen. Consequence: change orders and delays. Fix: finalize tile, fixtures, and layout before swinging a hammer.
- Undersized exhaust fans. Consequence: mould and peeling paint within a year. Fix: size at 1 CFM per square foot, minimum 50 CFM, vented outside.
- No waterproofing membrane. Consequence: hidden leaks and rot. Fix: require Schluter-KERDI or Laticrete Hydro Ban behind every tiled wet wall.
- Ignoring old wiring and pipes. Consequence: mid-project scope surprises. Fix: inspect for knob-and-tube and cast-iron before quoting.
- Hiring on price alone. Consequence: uninsured work and no recourse. Fix: get three quotes, confirm licence and insurance.
- No contingency fund. Consequence: stalled projects. Fix: set aside 10 to 15 percent above the quoted price.
- Tight, unusable layouts. Consequence: a bathroom that looks good but functions poorly. Fix: mock up clearances with tape before ordering fixtures.
- Mismatched tile dye lots. Consequence: visible patchwork on walls or floors. Fix: order all tile from one lot before demolition begins.
- Flat, single-source lighting. Consequence: dark corners and harsh shadows at the mirror. Fix: layer general, task, and accent lighting.
- Skipping permits. Consequence: failed resale inspections and forced rework. Fix: confirm in writing who pulls permits and schedules inspections.
How to size and vent a bathroom exhaust fan properly
Ventilation mistakes are the slowest to reveal themselves and the most expensive to ignore. A fan that’s too small, or one that dumps moist air into an attic instead of outside, sets up conditions for persistent humidity that warps cabinetry and peels paint, long before mould becomes visible.
Use these rules when reviewing a quote:
- Size the fan at a minimum of 1 CFM per square foot of floor area, with a floor of 50 CFM even in small bathrooms.
- Add CFM for every foot of duct run and every 90-degree bend, since long or twisty ducts choke airflow.
- Insist on rigid duct vented straight to the exterior, never into an attic space or soffit.
- Consider a humidity sensor or timer switch so the fan runs long enough after a shower, not just while the light is on.
Statistic callout: Poor fan sizing or venting can lead to $1,500 to $6,000 in eventual mould remediation costs, far more than the cost of specifying the right fan from the start. LA Rocks Renovations covers exact fan sizing and duct routing in its guide to choosing the right exhaust fan size.
Why waterproofing membranes matter more than the tile you choose
Tile and grout look watertight, but neither one actually stops water. Waterproofing lives underneath, in a membrane system like Schluter-KERDI or Laticrete Hydro Ban, and that layer is what keeps moisture out of the framing behind your shower wall.
- Require a continuous membrane over the entire wet wall, with seams overlapped and sealed, not just taped at corners.
- Ask for a flood-tested shower pan, held for 24 hours before tile goes on, to catch leaks while they’re still cheap to fix.
- Refuse green board or standard drywall in a wet zone. It absorbs moisture over time even with paint or tile over it.
- For floors, pick small-format tile that can follow the quarter-inch-per-foot slope toward the drain, and check the tile’s DCOF rating for slip resistance.
Pro Tip: Ask your contractor to photograph the membrane installation before tile covers it. It costs nothing and gives you proof the work was done right if a warranty question ever comes up.
Membrane materials typically add $200 to $500 CAD to a shower’s material cost, a small price against a remediation bill that can run into the thousands. For a deeper local breakdown, LA Rocks Renovations has a full waterproofing guide for Bowmanville homeowners.
What older Bowmanville homes hide behind the bathroom wall
Many homes across Durham Region were built before 1950, and that means a real chance of finding knob-and-tube wiring or corroded cast-iron and galvanized plumbing once walls open up. Knob-and-tube can’t legally be covered with insulation, and it almost always needs replacement once it’s exposed during a renovation.
- Ask for an electrical and plumbing inspection before demolition, not after walls are already open.
- Budget for cast-iron or galvanized pipe replacement now. Doing it during the renovation is far more cost-efficient than tearing open finished walls later.
- Treat any surprise wiring or pipe issue as a contingency-fund expense, not a change-order argument with your contractor.
Bringing in a specialist early avoids the worst version of this problem: a mid-project stop while everyone scrambles to figure out who’s paying for what.
Layout mistakes that make a finished bathroom hard to use
A bathroom can look great in the plans and still feel cramped the moment it’s built, usually because clearances got sacrificed for a bigger vanity or a fancier tub. The National Kitchen and Bath Association’s guidelines exist for a reason: a toilet needs at least 15 inches from its centre line to the nearest wall or fixture, and every fixture needs roughly 21 inches of clear floor space in front of it to use comfortably. Shower entries generally need at least 24 inches of clear opening so getting in and out doesn’t feel like a squeeze.
- Mock up the layout with painter’s tape on the floor before ordering a single fixture.
- Check rough-in locations against the actual fixtures you’re buying, since dimensions vary between brands.
- In a tight room, consider a pocket door, an outswing door, or a sliding barn-style door instead of a standard inswing that eats into usable floor space.
For homes where every inch counts, LA Rocks Renovations’ small bathroom layout ideas covers layout tricks specific to older Durham Region floor plans.
How to vet contractors and avoid permit problems
Hiring is where most renovation regret starts, and choosing based on price alone is the single most common reason for it.
- Get three written quotes covering identical scopes, so you’re comparing apples to apples.
- Confirm licensing and liability insurance directly, and ask to see a finished project in person if possible.
- Check references from recent clients, not just a portfolio of photos.
- Confirm in writing who pulls the permit and how inspections get scheduled. Skipping this can void a warranty or create resale headaches later.
- Agree on a change-order process before work starts, and hold the final payment until the punch list is complete.
Pro Tip: A contractor who resists giving you a written scope and payment schedule is telling you something about how the rest of the project will go.
Budgeting and scheduling so the project doesn’t stall
Set aside 10 to 15 percent of your budget as contingency, and lean toward the higher end in an older home where hidden wiring or plumbing is likely. Labour and materials typically make up the bulk of the invoice, with fixtures and finishes layered on top.
- Late changes cost more than early ones, since materials may need reordering and trades need to be rescheduled.
- Respect cure times. Grout needs roughly 72 hours before a shower sees water, and rushing it causes porous, discoloured grout that has to be redone.
- Tie payments to milestones, not a calendar date, and get the full schedule in writing before work starts.
Statistic callout: Renovations without disciplined planning commonly run 20 to 35 percent over budget, almost always from decisions made after demolition instead of before it. LA Rocks Renovations’ timeline guide for Bowmanville bathroom renovations breaks down a realistic schedule by phase.
Choosing materials and lighting that hold up over time
Porcelain tile, quartz counters, and sealed or engineered wood handle bathroom humidity far better than their natural-stone or solid-wood equivalents. Check the tile’s PEI rating for wear resistance and its DCOF rating for slip resistance on floors, especially near the tub or shower entry.
- Confirm dye lot and stock quantity before ordering. Reordering mid-project can mean a visibly different shade on the same wall.
- Layer your lighting: general ceiling light, task lighting at the mirror, and accent lighting if the design calls for it.
- Look for fixtures with a CRI of 90 or higher and a colour temperature around 3000K for accurate skin tones at the mirror.
- Use a wet-location rated fixture inside or directly above the shower.
LA Rocks Renovations’ guide to durable bathroom flooring for Durham Region homes covers which materials perform best against local humidity swings through the seasons.
Keeping your bathroom in good shape after the renovation is done
The best waterproofing and materials in the world still need upkeep, and skipping basic maintenance is how a beautiful renovation starts looking tired within a couple of years.
Run your exhaust fan for at least 20 minutes after every shower, or set a timer switch to do it automatically. This is the single easiest habit for protecting the waterproofing and paint you just paid for. Wipe down glass shower doors and tile after use to cut down on hard water spots and soap scum buildup, especially if Bowmanville’s water runs hard in your area.
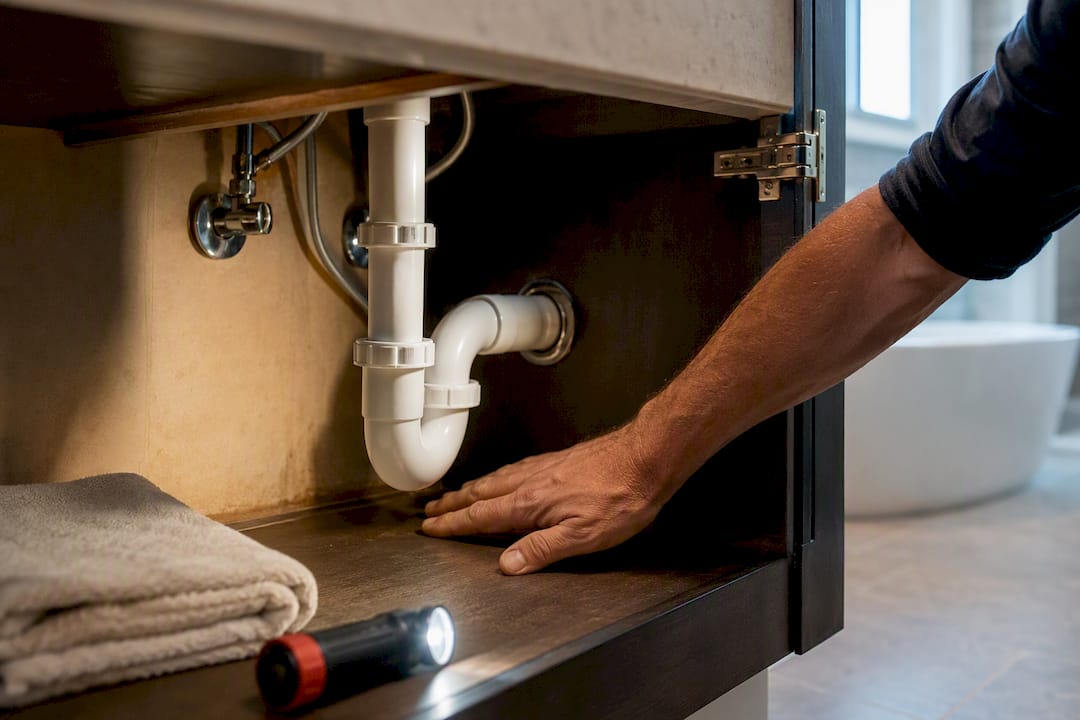
Re-caulk the tub and shower joints every one to two years, even if nothing looks wrong. Caulk fails from the inside before it shows visible cracking, and a five-minute recaulk job is dramatically cheaper than a leak repair. Check under the vanity and around the toilet base every few months for soft spots, discolouration, or a faint musty smell, since those are early warning signs of a slow leak.
Clean grout lines with a pH-neutral cleaner rather than harsh acidic products, which can break down grout sealant over time and leave it vulnerable to staining and moisture. Reseal natural stone surfaces annually if your renovation included them, since sealant wears thin with regular cleaning and shower steam.
Finally, keep a copy of your renovation contract, product specifications, and any warranty documents in one folder. If something needs attention two years down the road, having the exact fan model, tile brand, or membrane system on hand saves a lot of guesswork.
Design mistakes that hurt daily use and resale value
Some choices look striking in photos and cause real problems in daily life or when you eventually sell. A shower with no bench or niche forces every bottle onto the floor. A vanity with a single sink in a household of four creates a bottleneck every morning. Both are the kind of thing a buyer notices on a walkthrough, even if they can’t articulate why the room feels off.
Oversized soaker tubs are a common resale trap. They eat floor space, take a long time to fill, and many buyers today would rather have that square footage back for a larger shower. Similarly, all-white or all-dark colour schemes with no material contrast can make a small room feel flat rather than bright, despite the intent.
Skipping storage is another frequent miss. A gorgeous floating vanity with no medicine cabinet or linen storage nearby means everything ends up on the counter within a month. Buyers and appraisers both notice storage, or the lack of it.
Resale value also takes a hit when a bathroom’s finishes clash with the rest of the home. A stark, ultra-modern bathroom dropped into a century home can actually reduce a buyer’s perceived value of the whole property, because it signals the renovation wasn’t planned with the house’s character in mind.
The fix for most of these is the same one that prevents cost overruns: finalize the full layout and material palette before committing to demolition, ideally with input from someone who has seen how these choices play out after move-in.
Why lighting design deserves as much attention as tile
Lighting gets treated as an afterthought in a lot of bathroom renovations, and it shouldn’t be. A single centre ceiling fixture leaves the mirror area in shadow, no matter how nice the vanity looks.
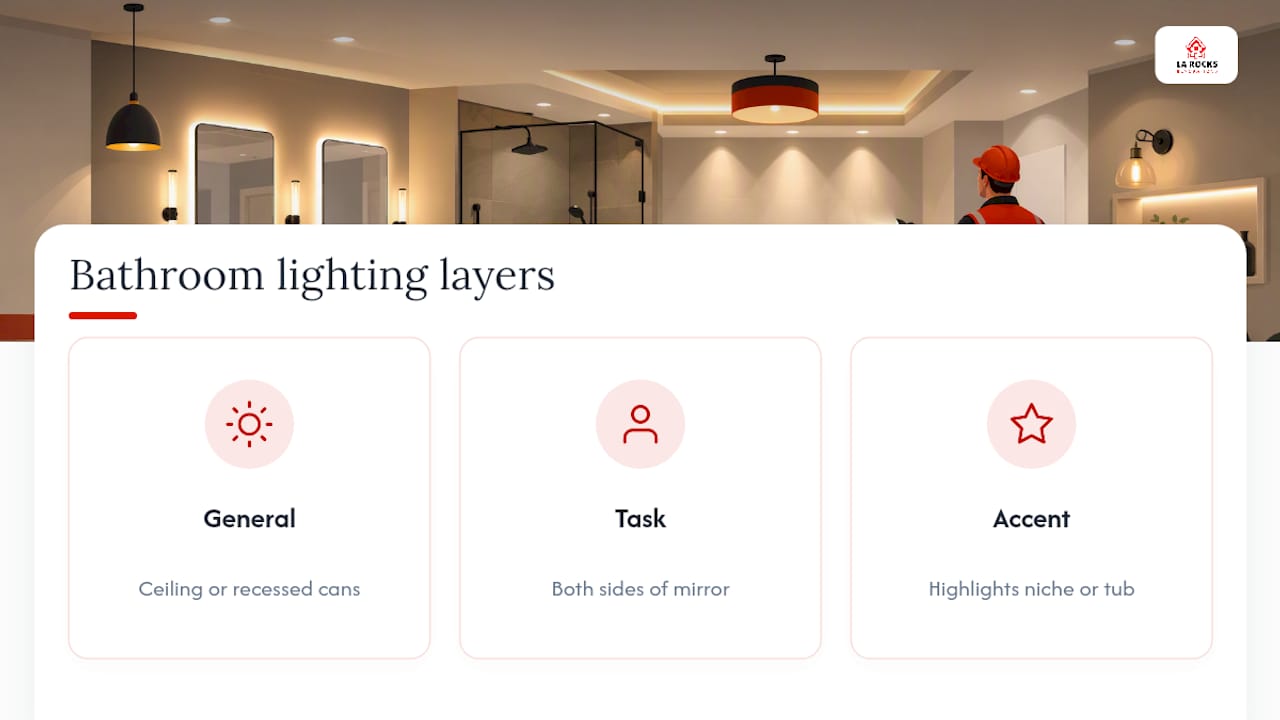
Effective bathroom lighting works in three layers. General lighting fills the room evenly, usually from a ceiling fixture or recessed cans. Task lighting sits at the mirror, ideally on both sides of the face rather than only above it, since overhead-only lighting casts unflattering shadows. Accent lighting, while optional, can highlight a niche, a freestanding tub, or an architectural feature.
Colour temperature matters more than most homeowners expect. Lighting around 3000K with a CRI of 90 or higher renders skin tones and makeup accurately, which matters at a bathroom mirror more than almost anywhere else in the house. Cooler, bluish light can make the whole room feel clinical rather than inviting.
Fixture placement inside the shower needs a wet-location rating, since standard fixtures aren’t built to handle direct moisture exposure safely. Placement height and spacing at the vanity also matter. Sconces mounted too close together or too high on the wall create hot spots and shadows instead of even, usable light.
Getting this right during the design phase costs very little extra. Getting it wrong means living with a mirror you can’t apply makeup or shave in properly for years, or paying to have electrical work redone later.
Talking to your contractor without the mixed signals
Most renovation disputes trace back to a conversation that never happened, not a contractor acting in bad faith. Assumptions on both sides fill the gaps, and by the time anyone notices, the tile is already installed.
Put everything in writing before work begins: the full scope, the material list with model numbers, the payment schedule, and how change orders get priced and approved. A verbal agreement about swapping a tile pattern feels harmless in the moment and becomes a dispute later if nobody documented the price difference.
Set a communication rhythm early. A quick weekly check-in, even five minutes, catches small misunderstandings before they become expensive ones. Ask your contractor how they prefer to communicate daily updates, whether that’s text, phone, or a shared project app, and stick to it rather than mixing channels.
When something looks different than you expected mid-project, raise it immediately rather than waiting until the end. A tile spacing issue is a five-minute fix on day one and a full teardown on day twenty. Bring reference photos to every design conversation, since “modern farmhouse” means something different to every person in the room.
Finally, ask questions when a quote seems vague. “Allowance for fixtures” should come with a dollar figure and examples of what that allowance actually buys, not a number pulled from thin air.
Why LA Rocks Renovations checks for these mistakes on every job
Dylan Larocque and the LA Rocks Renovations team have walked through enough Durham Region bathrooms, from Bowmanville century homes to newer Clarington builds, to know that the same handful of mistakes cause most of the regret. That’s why every project starts with the checks covered here rather than a rush to demolition. For the full pre-bid checklist, see LA Rocks Renovations’ complete bathroom renovation checklist for Bowmanville homeowners.
— Dylan Larocque
Get a straight answer on your bathroom project
LA Rocks Renovations builds every bathroom quote around the exact mistakes covered above, with permits pulled properly, licensed and insured trades on site, and waterproofing systems like Schluter-KERDI or Hydro Ban specified before a single tile is ordered. That’s the real difference between a quote built on guesswork and one built on a proper inspection of your home’s wiring, plumbing, and layout first.
If your home was built before 1950, that inspection matters even more, since knob-and-tube wiring and cast-iron plumbing are common finds once walls open up in Bowmanville and across Durham Region. LA Rocks Renovations also handles the flooring, painting, and finishing work that rounds out a renovation, from durable bathroom flooring options to the trim and paint that pull a finished room together.
Request a free estimate through Larocksrenovations and get a written scope, a realistic timeline, and a quote that already accounts for the surprises older homes tend to hide.