


How to Choose the Right Exhaust Fan Size for Your Bathroom
Request Your Free Estimate Today
GET A FREE ESTIMATE →According to the Home Ventilating Institute, bathrooms under 100 sq ft follow this formula directly, while larger rooms require fixture-based add-ons. Always round up and build in headroom for duct losses.
Two quick examples:
- Powder room, 35 sq ft: 35 CFM calculated, but the 50 CFM minimum applies. Buy a 50 CFM fan.
- Standard bathroom, 7 ft × 10 ft (70 sq ft): 70 CFM calculated. Buy a 70–80 CFM fan to allow for duct losses.
Pro Tip: Never buy the exact calculated CFM. Ducting, elbows, and grille resistance all reduce delivered airflow once the fan is installed. It is sensible to select a fan rated somewhat above your calculated minimum to account for reductions in airflow due to ducting and installation conditions.
Key takeaways
Size your bathroom exhaust fan at 1 CFM per square foot, with a 50 CFM minimum, and always buy a fan rated higher than your calculated number to account for real-world duct losses.
| Point | Details |
|---|---|
| Baseline sizing rule | Use 1 CFM per square foot; apply a 50 CFM minimum for any bathroom. |
| Build in headroom | Buy a fan rated somewhat above your calculated minimum to offset duct and elbow losses. |
| Noise and efficiency | Choose ≤3 sones for intermittent use; look for ENERGY STAR and HVI certification. |
| Controls are critical | A timer or humidity sensor set to run at least 20 minutes after use is as important as fan size. |
| LA Rocks Renovations | Provides sizing, HVI-verified selection, correct venting, and post-install checks across Durham Region. |
Table of Contents
- How do you calculate the CFM your bathroom actually needs?
- Quick sizing chart for common bathroom types
- What installation factors change how much CFM you actually need?
- How do noise and energy efficiency affect which fan you should choose?
- What fan types and features are worth considering?
- Venting and installation best practices for Canadian homes
- Contractor tips from LA Rocks Renovations on real-world sizing
- When should you DIY and when should you hire a pro?
- LA Rocks Renovations can size and install your bathroom fan correctly
- Sources
How do you calculate the CFM your bathroom actually needs?
Three methods cover most residential situations. Use the one that matches your room.
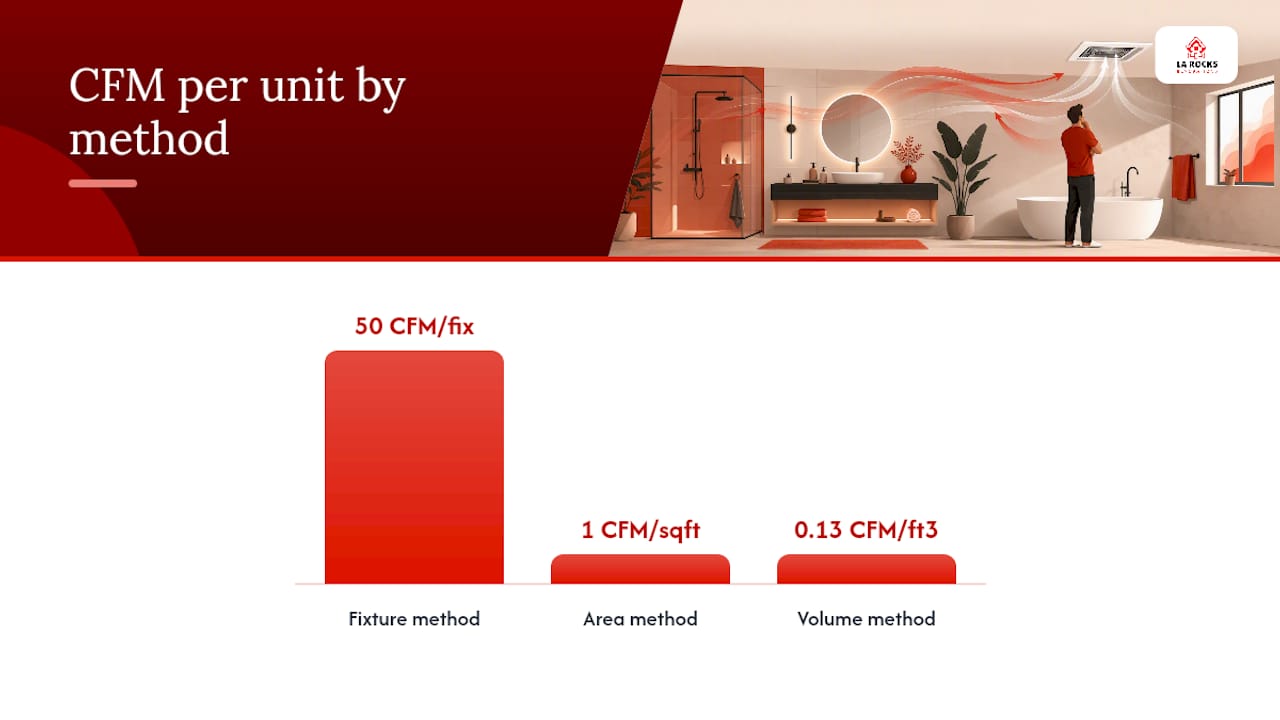
Method 1: Area method (rooms under 100 sq ft)
- Measure the bathroom’s length and width in feet.
- Multiply length × width to get floor area in square feet.
- Apply 1 CFM per square foot.
- If the result is below 50 CFM, use 50 CFM as the minimum.
Example: 8 ft × 9 ft = 72 sq ft → 72 CFM (round up to a 80 CFM fan for headroom).
Method 2: Fixture method (rooms over 100 sq ft)
For larger bathrooms, the HVI recommends adding capacity per fixture rather than relying on area alone:
- Count each toilet, shower, and standard bathtub: add 50 CFM each.
- Count each jetted or whirlpool tub: add 100 CFM each.
- Sum the fixture CFM totals.
Example: Master bath with one toilet, one shower, one standard tub, and one jetted tub: 50 + 50 + 50 + 100 = 250 CFM total.
Method 3: Volume method (tall ceilings or unusual rooms)
The volume method is suggested for bathrooms with ceilings above 8 ft, involving calculation based on room volume divided by a factor to estimate required ventilation rate.

Pro Tip: The IRC 2024 code standard sets a legal floor of 50 CFM intermittent or 20 CFM continuous for bathrooms without openable windows. That is a minimum, not a target. Size for your room, not for the inspector.
| Method | Best for | Formula |
|---|---|---|
| Area | Rooms under 100 sq ft | Floor area (sq ft) × 1 CFM |
| Fixture | Rooms over 100 sq ft | 50 CFM per toilet/shower/tub; 100 CFM per jetted tub |
| Volume | Tall ceilings (above 8 ft) | Cubic feet ÷ 7.5 |
Quick sizing chart for common bathroom types
Use this as a starting point before accounting for duct runs and ceiling height.
Deviate upward from these numbers when:
- Ceiling height exceeds 8 ft (use the volume method instead).
- The bathroom has more than two fixtures.
- The duct run to the exterior is longer than 25 ft or includes multiple elbows.
- The toilet is in a separate enclosed compartment (it benefits from its own dedicated fan).
The Broan-NuTone buying guide suggests 70–80 CFM for mid-size rooms as a practical band, which aligns with the area method plus a modest buffer for real-world losses.
What installation factors change how much CFM you actually need?
The calculated CFM is what the fan must deliver at the grille, not what the nameplate says. Several factors reduce that delivered number.
- Duct length: Every extra foot of duct adds resistance. Runs longer than 25 ft can meaningfully reduce airflow; contractors often specify fans rated 80–110 CFM to guarantee 50 CFM at the grille on long runs.
- Elbows: Each 90-degree elbow is roughly equivalent to adding several feet of straight duct. Two or three elbows on a single run add up quickly.
- Flexible ducting: Corrugated flex duct creates far more friction than smooth rigid metal. Use rigid ducting wherever possible.
- Grille resistance: The decorative grille itself restricts airflow slightly. Cheap grilles with small openings make this worse.
- Enclosed toilets and separate showers: These compartments need their own air exchange; a single fan in the main room may not pull enough air through a closed door.
Pro Tip: Always look for the HVI-certified CFM rating at a stated static pressure, not just the nameplate number. That tested figure is what you can actually count on once the fan is connected to real ductwork.
How do noise and energy efficiency affect which fan you should choose?
A fan that sounds like a jet engine gets switched off. That defeats the entire purpose of having ventilation.
Building America and ENERGY STAR guidance recommends:
- ≤3 sones for intermittent use (switched on manually for showers and baths).
- ≤1 sone for continuous operation (fans running around the clock or on a timer).
Sones are a linear scale: 2 sones is twice as loud as 1 sone. Most quality fans from Broan-NuTone and Panasonic now offer models in the 0.3–1.5 sone range, which is quiet enough that occupants forget the fan is running. That matters because a quiet fan gets used consistently, and consistent use is what prevents moisture damage, mould, and poor air quality.
ENERGY STAR certification adds a second layer of assurance: certified fans are tested for both airflow delivery and power draw, reducing the risk that a fan underperforms once installed. Lower wattage also means lower operating costs over the fan’s lifespan, which adds up in a bathroom that runs a fan multiple times daily.
Statistic callout: ENERGY STAR recommends selecting an intermittent fan rated at least 70 CFM to ensure code-level delivery after accounting for duct losses, per Building America Solution Center guidance.
What fan types and features are worth considering?
Ceiling-mounted vs. inline fans
Standard ceiling-mounted fans are the most common choice and suit most residential bathrooms. The fan motor sits directly in the ceiling housing, and the grille faces into the room. Sizing follows the CFM methods above.
Inline fans mount in the attic or crawlspace and connect to one or more grilles via ductwork. They are quieter at the grille because the motor is remote, and one inline unit can serve multiple bathrooms or a large spa bath. Sizing for inline units must account for the total duct length from each grille to the fan, and the fan’s rated CFM must cover the combined load of all connected spaces.
Combination units
Light/fan/heater combinations are popular in smaller bathrooms. The trade-off is that the shared housing often reduces the fan’s HVI-rated CFM compared with a standalone unit. Panasonic’s homeowner guidance specifically flags this: always confirm the HVI-listed airflow for the exact combination model, not just the fan’s standalone spec.
Features worth having
- Timer switches: Run the fan for a set period after you leave the room.
- Humidity sensors: Automatically activate when moisture rises and shut off when it drops.
- Motion sensors: Useful for guest bathrooms where occupants forget to switch the fan on.
- Integrated LED lighting: Reduces the need for a separate light fixture in small bathrooms.
Venting and installation best practices for Canadian homes
Correct venting is non-negotiable. A fan that exhausts into an attic, crawlspace, or garage creates moisture damage and mould, and violates code.
- Always exhaust to the exterior. The IRC 2024 standard requires termination to the outside; Canadian building codes align with this requirement.
- Use rigid metal ducting. Smooth-wall rigid duct preserves airflow far better than flex duct.
- Minimise elbows. Plan the shortest, straightest route from the fan to the exterior termination.
- Install a backdraft damper. This prevents cold Canadian winter air from flowing back through the duct when the fan is off. Most quality fans include one; verify it is present.
- Choose the right exterior termination. A louvred wall cap or roof cap with a built-in damper suits most Canadian climates. Avoid terminating under soffits where exhaust air can re-enter the attic.
- Check the door gap. Without a source of makeup air, the fan works against a partial vacuum and underperforms. The HVI recommends at least ¾ in of clearance under the bathroom door, or a transfer grille, to allow replacement air to enter. For guidance on door types that accommodate this clearance, bathroom door selection is worth reviewing before you finalise your door choice.
Pro Tip: Ask your installer to confirm the duct route before any walls are closed. Changing a duct path after drywall is up costs significantly more than planning it correctly the first time.
Contractor tips from LA Rocks Renovations on real-world sizing
Nameplate CFM is a bench rating measured under ideal conditions. Once a fan is connected to real ductwork with real elbows and a real grille, delivered airflow is lower. LA Rocks Renovations recommends choosing an HVI-certified fan with a CFM rating higher than your calculated minimum to absorb those losses and still meet ventilation requirements.
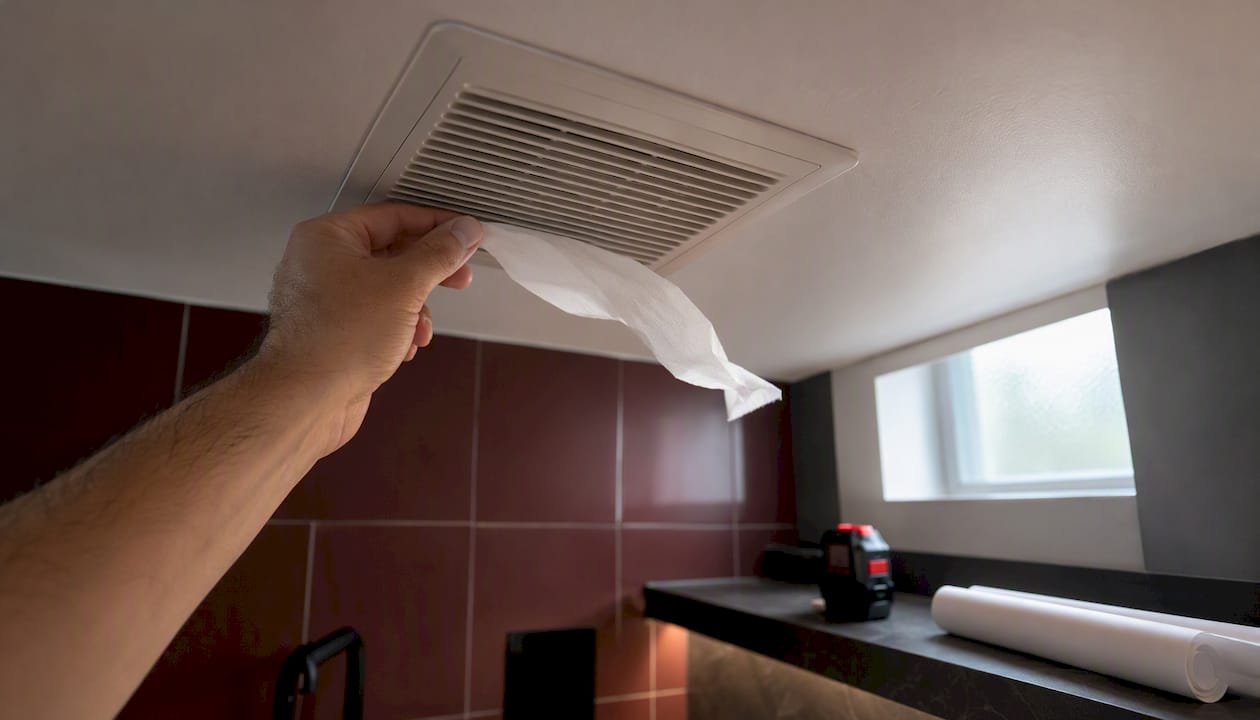
On-site, a contractor can verify delivered airflow with a flow hood or by holding a tissue at the grille to confirm consistent draw. Neither method replaces a proper measurement, but both catch obvious underperformance before the job is signed off.
Controls matter as much as fan size. A correctly sized fan that runs for only two minutes after a shower does not remove enough moisture. HVI guidance recommends a minimum 20-minute run time after use. Timer switches and humidity sensors make this automatic.
Pro Tip: Avoid the common bathroom renovation mistake of treating the fan as an afterthought. Fan placement, duct routing, and control selection should be decided at the planning stage, not after the tile is in.
Contractor checklist for homeowners:
- Confirm the fan’s HVI-certified CFM rating before purchasing.
- Verify the duct route is rigid metal with the fewest possible elbows.
- Confirm exterior termination with a backdraft damper.
- Install a timer or humidity sensor, not just a standard switch.
- Check door clearance for makeup air.
- Ask for a post-install airflow check before the job closes.
When should you DIY and when should you hire a pro?
Some tasks are well within reach for a capable homeowner:
- Measuring the bathroom and calculating required CFM.
- Selecting an HVI-certified, ENERGY STAR-qualified fan from a reputable brand like Broan-NuTone or Panasonic.
- Swapping an existing grille or replacing a like-for-like fan in the same housing.
Other tasks carry real risk or complexity that warrants hiring a licensed contractor:
- Running a new duct through an insulated attic in a Canadian winter climate.
- Cutting a new roof or wall penetration for exterior termination.
- Wiring a new circuit or adding a timer/humidity control where no existing wiring supports it.
- Verifying that installed CFM meets Ontario Building Code requirements and documenting it for a permit.
LA Rocks Renovations handles all of these scenarios for homeowners across Durham Region, Bowmanville, Clarington, and surrounding communities. For a small bathroom renovation where layout and venting need to be coordinated together, having one contractor manage both avoids the gaps that lead to moisture problems later. Where permits apply, check with your local municipality; Durham Region building departments can confirm whether a permit is required for your specific scope.
LA Rocks Renovations can size and install your bathroom fan correctly
Getting the fan size right on paper is one thing. Getting it right on the wall, vented correctly to the exterior, with a timer that actually runs it long enough, is another. LA Rocks Renovations provides bathroom renovations in Durham Region that include fan sizing, HVI-verified product selection, rigid duct installation, exterior termination, and controls setup.
Local knowledge matters in Canadian climates: backdraft dampers, insulated duct sleeves through cold attics, and roof cap placement all affect long-term performance. The team at LA Rocks Renovations brings that experience to every project, whether it is a straightforward fan swap in Bowmanville or a full master bath build in Clarington. Contact LA Rocks Renovations for an on-site assessment and a clear quote.
Sources
- Bathroom Exhaust Fans - Home Ventilating Institute
- Bathroom Exhaust Fans | Building America Solution Center
- Energystar
- Exhaust Fan Buying Guide