


Small Bathroom Layout Ideas That Maximize Every Inch
Request Your Free Estimate Today
GET A FREE ESTIMATE →
The most impactful small bathroom layout ideas come down to a handful of decisions made before a single tile is set. Get these right and even a 5×8 bathroom feels open and purposeful.
- Group all plumbing fixtures along one wet wall to cut pipe runs and avoid costly structural work
- Replace the bathtub with a walk-in or corner shower to reclaim a significant amount of usable floor area
- Choose wall-hung or compact fixtures; a wall-hung toilet saves several inches of floor depth
- Use recessed niches, floating vanities, and tall slim cabinets to move storage off the counter and onto the walls
- Install frameless glass enclosures, oversized mirrors, and large-format tiles to visually expand the space
- Layer lighting at three levels (ambient, task, accent) using neutral white bulbs in the 3000K–3500K range
- Plan door clearances carefully; a standard 32-inch inswing door can consume 8 square feet of usable floor space
- Keep walking paths wide enough for comfortable daily use, with at least moderate clearance recommended.
Table of Contents
- What are the most effective small bathroom layout plans?
- Storage solutions that keep small bathrooms clear and functional
- Design tips that make a small bathroom feel larger
- Ventilation, waterproofing, and materials that protect your investment
- What LA Rocks Renovations has learned from small bathroom renovations in Durham Region
- How to incorporate accessibility into a small bathroom layout
- Budget planning for a small bathroom renovation in Canada
- Key takeaways
- Your small bathroom renovation, done right in Durham Region
What are the most effective small bathroom layout plans?
Small bathrooms are generally defined as spaces under 50 square feet. The classic 5×8 footprint (40 sq ft) is the most common in Canadian homes, though narrower configurations like 5×7 or 4×8 are not unusual in older builds across Durham Region.
| Layout Type | Typical Dimensions | Fixtures Included | Best For |
|---|---|---|---|
| Single-wall | 4×8 ft or narrower | Toilet, vanity, shower in one line | Very narrow rooms, basement bathrooms |
| Three-quarter | 5×7 or 5×8 ft | Toilet, sink, shower stall (no tub) | Most common small bathroom remodel |
| Long narrow | 4×10 ft | Toilet at one end, vanity mid, shower far end | Older homes with corridor-style layouts |
| Wet room | 5×8 ft or larger | Open shower zone, toilet, vanity | Modern renovations, accessibility needs |
| Corner shower | 5×8 ft | Corner shower unit, toilet, vanity | Maximizing floor space in square rooms |
The three-quarter layout is the most practical choice for most small bathroom remodel ideas in Canadian homes. Removing the tub frees 12–15 square feet and allows for a larger vanity or a linen niche without relocating any plumbing. Door selection matters just as much as fixture placement. Pocket doors or outward-swinging doors are worth the added cost in rooms under 40 square feet, where a standard inswing door simply eats too much of the floor.
Storage solutions that keep small bathrooms clear and functional
Clutter is the fastest way to make a small bathroom feel smaller than it is. The fix is almost always vertical.
- Recessed shower niches: Built between studs, a standard niche runs 12–14 inches wide, 18–24 inches tall, and 4 inches deep. Plan the location before framing, not on tile day.
- Floating vanities: Mounting the vanity off the floor visually opens the room and makes cleaning easier. Pair it with a mirrored medicine cabinet above to double your storage without adding bulk.
- Tall slim cabinets: A 12-inch-wide floor-to-ceiling cabinet beside the toilet uses dead vertical space that would otherwise go to waste.
- Over-toilet shelving: Open shelves above the toilet work well for towels and décor, provided the items stored there are used regularly.
- Outside the bathroom: Extended storage in a hallway closet or built-in unit just outside the door is often a better solution than cramming more cabinetry into an already tight space.
Keep countertops as clear as possible. A single soap dispenser and a hand towel are all that should live on the vanity surface. Everything else belongs in a cabinet or niche.
Design tips that make a small bathroom feel larger
Visual expansion is a real tool, not just a decorating concept. The right finishes and fixtures can make a 5×8 bathroom read as noticeably more spacious.
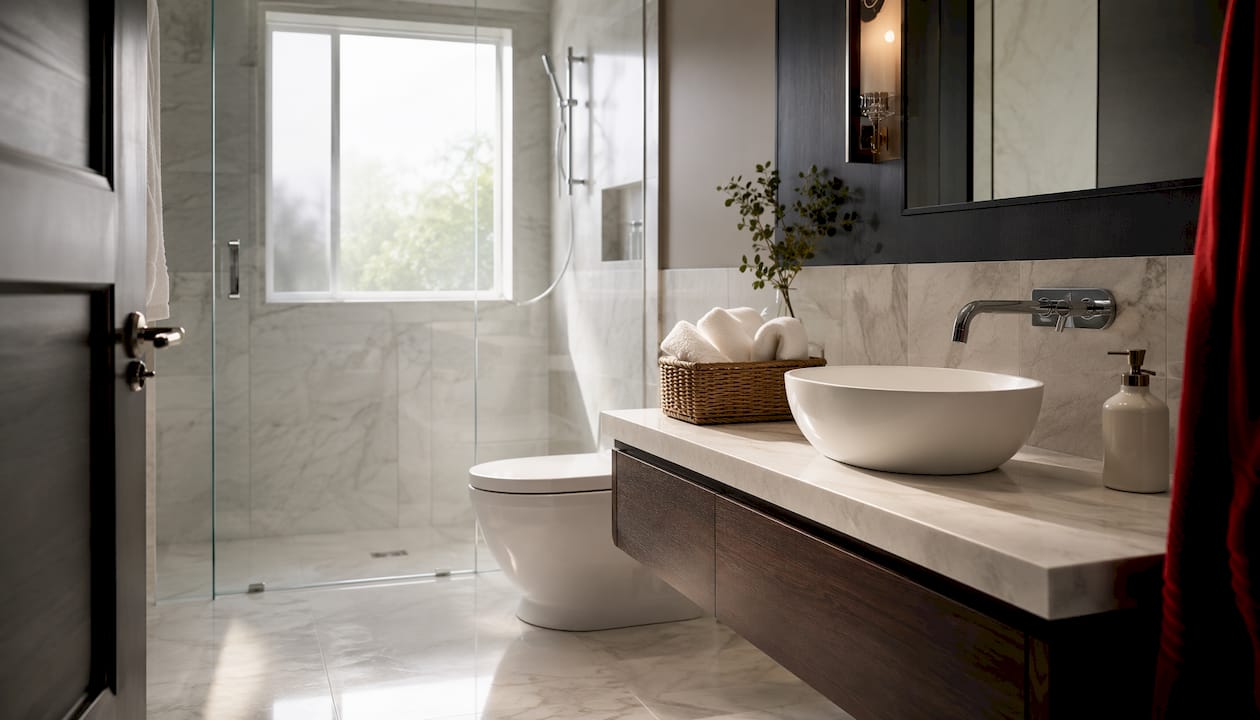
Large-format tiles in the 12×24-inch range or larger reduce the number of grout lines on floors and walls, which calms the visual noise and creates a more open feel. Running the same tile from floor to wall without a break adds perceived height. Reserve mosaic tile for small accent areas like a niche back wall; covering every surface in small tiles makes a compact room feel busier.
Frameless glass shower enclosures are one of the highest-return investments in a small bathroom renovation. They eliminate the visual barrier of a frame or curtain, letting the eye travel the full depth of the room. A full-wall mirror behind the vanity works the same way, effectively doubling the perceived width of the space.
Lighting deserves more attention than it typically gets. Layered lighting with recessed ceiling cans, sconces flanking the mirror, and LED strip lighting under the vanity eliminates shadows and makes the room feel clean and open. Neutral white bulbs in the 3000K–3500K range are the right choice; warmer yellows make white surfaces look dingy, and cooler blues feel clinical.
For 2026, the dominant design direction in small bathrooms is warm minimalism: matte black or brushed nickel fixtures against light stone-look tile, with a single dark accent wall balanced by strong lighting. It reads sophisticated without requiring a large footprint.
Ventilation, waterproofing, and materials that protect your investment
These are the two areas where small bathroom renovations most often go wrong, and both failures are invisible until the damage is done.
Waterproofing means a professional-grade membrane applied behind shower walls before any tile goes up. Grout and tile are not waterproof on their own. Without a proper membrane, water migrates through grout joints, saturates the substrate, and causes rot and mould behind surfaces that look perfectly fine from the front.
Ventilation is the other half of moisture control. A bathroom fan must be sized for the room’s actual cubic footage and ducted to the exterior, not into the attic. A 5×8 bathroom with 8-foot ceilings requires at least a 320 CFM fan, and a model with a built-in humidity sensor removes the guesswork entirely by running automatically when moisture levels rise.
Pro Tip: When reviewing your renovation contract, confirm in writing exactly where waterproofing starts and stops, what membrane product will be used, and how the exhaust fan will be ducted. A contractor who cannot answer these questions specifically is a risk.
For materials, large-format porcelain tile holds up well in small, high-humidity spaces. Brushed nickel and matte black fixtures resist water spotting better than polished chrome. If you are framing new walls during the renovation, add blocking at 32–48 inches off the floor for future grab bars or shelving. It costs almost nothing during framing and saves significant work later.
What LA Rocks Renovations has learned from small bathroom renovations in Durham Region
Small bathrooms punish guesswork more than any other room in the house. The margin for error in a 5×8 space is genuinely narrow.
Fixture sizing is where budgets quietly inflate. A vanity that is two inches too wide forces a plumbing relocation; moving plumbing can add $1,000–$3,000 to a renovation budget. Keeping fixtures along the existing wet wall is the single most cost-effective layout decision available.
For Durham Region homeowners specifically, the combination of cold winters and older housing stock means ventilation and waterproofing are not optional upgrades. Homes in Bowmanville and Clarington with original 1970s or 1980s bathroom framing often have no blocking and undersized exhaust fans. Addressing both during a renovation protects the investment for decades.
LA Rocks Renovations handles bathroom renovations in Durham Region from layout planning through final installation, with a written scope that specifies waterproofing details, fan sizing, and clearances before work begins.
How to incorporate accessibility into a small bathroom layout
Accessibility features are easier and cheaper to build in during a renovation than to retrofit later. In a small bathroom, the key is choosing features that serve everyone, not just those with mobility challenges.
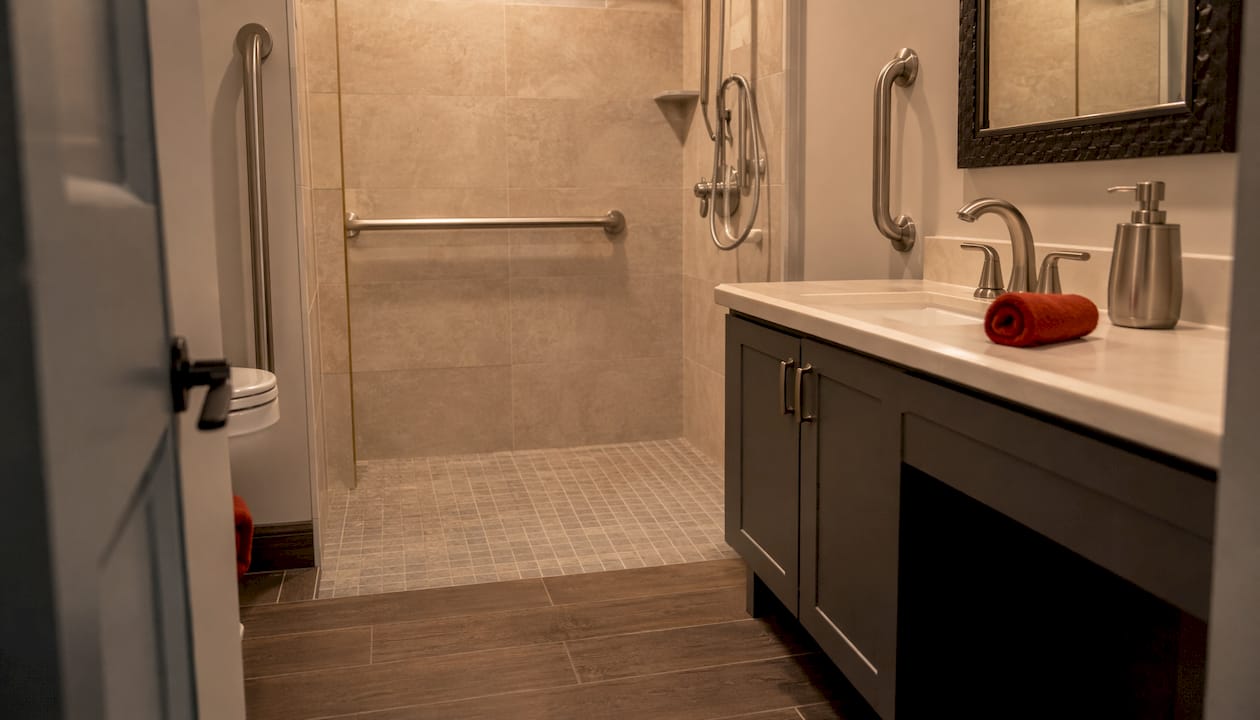
A curbless shower entry is the most valuable accessibility upgrade in a compact layout. It eliminates the trip hazard of a threshold, simplifies cleaning, and works equally well for a young family and an aging homeowner. Pair it with a fold-down teak bench inside the shower and you have a fixture that is both accessible and appealing.
Blocking in the walls during framing, as noted above, is the low-cost foundation for future grab bars. The National Building Code of Canada sets minimum clearance requirements for accessible bathrooms, but even in non-accessible renovations, planning 36-inch walking paths and a comfort-height toilet (17–19 inches) makes daily use noticeably more comfortable for everyone. Lever-style faucet handles and a handheld showerhead are small additions that cost little and add real function.
Budget planning for a small bathroom renovation in Canada
A realistic budget for a small bathroom renovation in Canada depends heavily on whether plumbing moves and what finish level you choose. Keeping fixtures on the existing wet wall is the most reliable way to control costs.
Mid-range small bathroom renovations in Ontario typically run between $8,000 and $15,000 for a full 5×8 gut-and-replace with no plumbing relocation. Moving a toilet or shower drain to a new location adds cost quickly, which is why the wet-wall grouping principle matters so much in budget planning. Finish upgrades like heated floors, custom tile work, or a frameless glass enclosure push costs toward the higher end of that range.
Set aside 10–15% of your total budget as a contingency. Older homes in Durham Region regularly reveal surprises behind walls: inadequate subfloor thickness, missing blocking, or outdated plumbing that needs upgrading to meet current code. A contingency fund means those discoveries are a manageable inconvenience rather than a project-stopping crisis.
Prioritise spending on waterproofing, ventilation, and tile work. These are the elements that determine how long the renovation holds up. Fixtures and hardware can be upgraded later; the substrate and moisture management systems cannot.
Key takeaways
The most durable small bathroom renovations combine smart layout planning, proper waterproofing, and right-sized fixtures to deliver a space that functions well and holds up for years.
| Point | Details |
|---|---|
| Wet wall grouping saves money | Keeping fixtures along one wall avoids plumbing relocation costs of $1,000–$3,000. |
| Three-quarter layout gains space | Removing the tub frees 12–15 square feet for a larger vanity or linen niche. |
| Ventilation sizing matters | A 5×8 bathroom with 8-foot ceilings needs at least a 320 CFM exterior-vented fan. |
| Waterproofing is behind the tile | A professional-grade membrane is required; grout and tile alone do not stop water migration. |
| LA Rocks Renovations | Handles full small bathroom renovations in Durham Region with written scopes covering waterproofing, fan sizing, and clearances. |
Your small bathroom renovation, done right in Durham Region
Small bathroom renovations reward careful planning and punish shortcuts. LA Rocks Renovations brings both the technical knowledge and the hands-on experience to get the layout, waterproofing, and finishes right the first time, without the costly mid-project surprises that come from skipping the planning stage.
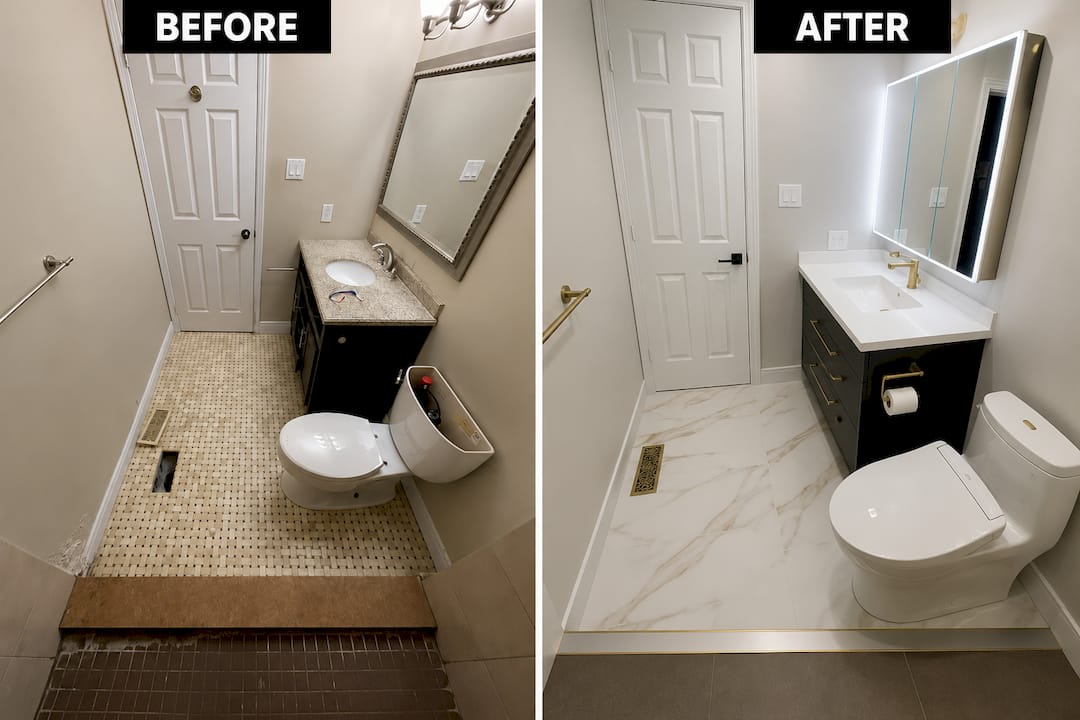
From fixture selection and layout planning to waterproofing, tile installation, and final trim, the team at LA Rocks Renovations manages every stage of the project. Homeowners across Bowmanville, Clarington, and the wider Durham Region trust LA Rocks Renovations for clear communication, quality workmanship, and results that hold up. If your bathroom needs a full renovation or a targeted upgrade, contact LA Rocks Renovations for a free estimate and a written scope before any work begins.