


How to Paint Over Oil-Based Paint the Right way
Dylan LarocqueRequest Your Free Estimate Today
GET A FREE ESTIMATE →Yes, you can paint over oil-based paint — but only with the right preparation. Skipping steps is the single most common reason paint peels within months. The reliable sequence is short: confirm the existing finish with a denatured alcohol test, clean with TSP or a phosphate-free substitute, de-gloss by sanding with 180–220 grit sandpaper, apply a bonding or stain-blocking primer, then finish with two or more topcoats.
Here is the quick-start checklist before you read further:
- Test: Rub a cotton ball soaked in denatured alcohol on the surface. Paint that lifts or smears is latex; paint that stays hard is oil-based.
- Clean: Wash the surface with TSP or a phosphate-free TSP substitute to remove grease, wax, and contaminants.
- Sand: Scuff the entire surface with 180–220 grit sandpaper until it looks uniformly dull.
- Prime: Apply one to two coats of a bonding primer rated for glossy, non-porous surfaces.
- Topcoat: Apply two or more coats of your chosen finish, allowing each coat to dry fully.
Key takeaways
Painting over oil-based paint succeeds when you follow the full sequence: test, clean, sand, prime with a bonding primer, and topcoat with two or more coats — skipping any step is what causes failures.
| Point | Details |
|---|---|
| Test before you buy anything | Use the denatured alcohol rub test to confirm the existing finish is oil-based before choosing products. |
| Clean and de-gloss are both required | TSP or a phosphate-free substitute removes contamination; 180–220 grit sanding creates the mechanical grip the primer needs. |
| Bonding primer is non-negotiable | Self-priming paints cannot replace a dedicated bonding primer like Zinsser Bulls Eye 1-2-3 or Benjamin Moore Fresh Start on slick oil surfaces. |
| Cure time beats dry time | Wait the full manufacturer cure window after priming before topcoating — dry to the touch is not the same as cured. |
| LA Rocks Renovations | Serves Durham Region homeowners with full-service interior and exterior painting, including surface prep and disposal. |
Table of Contents
- Why oil-based paint is harder to paint over than latex
- How do you know if your existing paint is oil-based?
- How to paint latex over oil-based paint: the full DIY process
- How to repaint with oil-based (alkyd) paint over existing oil-based paint
- Special surfaces: trim, cabinets, and stained wood
- Can you skip sanding? Liquid de-glossers and adhesion promoters
- Common failures: peeling, alligatoring, tannin bleed, and yellowing
- When should you hire a pro instead of doing it yourself?
- The prep work matters more than the paint brand
- LA Rocks Renovations handles the prep, the priming, and the finish
- Sources
Why oil-based paint is harder to paint over than latex
Oil-based paint does not simply dry the way latex does. Latex cures by water evaporation, leaving a slightly flexible film. Oil-based paint undergoes a chemical hardening process called oxidative polymerisation, producing a dense, enamel-like film that is non-porous and very slick. That slick surface is the root of the problem.
Water-based (latex or acrylic) paint has no mechanical grip on a smooth, non-porous oil film. Without proper preparation, alligatoring and peeling are the predictable result — the new coat literally cannot bond to the old one.
The risk is highest on:
- Trim and mouldings: High-gloss oil finishes on baseboards and door casings are the slickest surfaces in most homes.
- Kitchen cabinets: Grease and cleaning products add a contamination layer on top of the already-slick film.
- Doors: Constant contact and temperature cycling stress the paint film at every edge.
A matte wall painted with oil-based paint decades ago is far more forgiving than a semi-gloss cabinet door painted with alkyd last year. The glossier and harder the existing coat, the more preparation the new coat needs.
How do you know if your existing paint is oil-based?
Identifying the existing finish before you buy a single litre of primer saves you from choosing the wrong preparation method.
- Denatured alcohol rub test (most reliable). Dampen a cotton ball with denatured alcohol or 70% isopropyl rubbing alcohol. Rub firmly on an inconspicuous spot for 20–30 seconds. If paint transfers to the cotton ball, the finish is latex. If the surface stays hard and nothing transfers, it is oil-based. Test at least two or three spots — older homes often have mixed layers where someone painted latex over oil years ago.
- Check the age and location. Homes built before the mid-1990s almost always have oil-based paint on trim, doors, and cabinets. Interior walls may have been repainted with latex since then, but the trim is often original.
- Look for yellowing. Oil-based finishes yellow over time, particularly in low-light areas like hallways and closets. A cream or off-white trim that has turned distinctly yellow is a strong visual indicator.
- Feel the hardness. Oil-based finishes feel harder and more brittle than latex. Pressing a fingernail firmly into an inconspicuous spot: latex dents slightly; oil-based does not.
Safety note: Work in a ventilated area when using denatured alcohol. Wear nitrile gloves and keep the bottle away from open flames. If you are testing multiple rooms, open windows and take breaks.
How to paint latex over oil-based paint: the full DIY process
This is the path most homeowners choose — water-based (latex or acrylic) paint over existing oil-based surfaces. Switching from oil to water-based requires a bonding primer formulated for glossy, non-porous surfaces, and the primer must cure fully before topcoating.
Materials you will need
- TSP (trisodium phosphate) or a phosphate-free TSP substitute
- Denatured alcohol (for the test)
- 180–220 grit sandpaper or sanding sponges
- Tack cloths
- Bonding primer (see product examples below)
- Quality latex or acrylic topcoat
- PPE: nitrile gloves, safety glasses, N95 respirator (especially when sanding), drop cloths
Step-by-step workflow
- Test the surface with the denatured alcohol method described above. Confirm you are working with oil-based paint before proceeding.
- Clean thoroughly. Mix TSP or a phosphate-free substitute according to package directions and wash the entire surface. Pay extra attention to kitchen surfaces, door handles, and any area with visible grease. Rinse well and allow to dry completely — 24 hours minimum.
- Sand to de-gloss. Using 180–220 grit sandpaper, scuff the entire surface until it looks uniformly dull. You are not stripping the paint; you are creating mechanical “tooth” for the primer to grip. Latex paint will not chemically bond to cured oil-based paint, so this mechanical roughening is non-negotiable. For final smoothing before topcoat, use 220 grit.
- Wipe clean. Remove all sanding dust with a tack cloth. Even a thin layer of dust will compromise primer adhesion.
- Apply bonding primer. Apply one to two coats of a bonding primer rated for slick or non-porous surfaces. Bonding primers prevent peeling and chipping during curing — this is not a step you can replace with a self-priming paint. Self-priming paints lack the adhesion chemistry needed for slick oil surfaces.
- Allow full primer cure. Dry time and cure time are different. A primer may feel dry to the touch in one to two hours, but full cure — when the film reaches its maximum hardness and adhesion — often takes longer depending on the product and conditions. Check the manufacturer’s data sheet and wait the full recommended cure window before topcoating.
- Apply two or more topcoats. One to two primer coats and two topcoats is the standard recommendation for a durable finish. Allow each coat to dry per the manufacturer’s guidance before applying the next.
Primer options available in Canada
| Primer | Type | Best for |
|---|---|---|
| Zinsser Bulls Eye 1-2-3 | Water-based bonding primer | General interior surfaces, walls, trim |
| Benjamin Moore Fresh Start | Acrylic bonding primer | Trim, cabinets, previously painted surfaces |
| BEHR Bonding Interior/Exterior Primer | Acrylic bonding primer | Multi-surface, available at Home Depot Canada |
| BEHR Multi-Surface Stain-Blocking Primer | Stain-blocking primer | Stained wood, tannin-prone surfaces |
Pro Tip: For trim and cabinets, finish with a water-based enamel topcoat rather than standard latex wall paint. Water-based enamels level better, dry harder, and are far easier to clean — giving you the smooth, enamel-like result that oil-based paint is known for, without the solvent cleanup or yellowing risk.
How to repaint with oil-based (alkyd) paint over existing oil-based paint
Oil-over-oil is the simpler adhesion path. The existing and new coats share the same resin chemistry, so bonding is more natural. The trade-off is fumes, longer recoat windows, and the risk of yellowing in low-light spaces.
Materials
- Mineral spirits (for brush and roller cleanup)
- 180–220 grit sandpaper
- Respirator rated for solvent vapours (not just an N95)
- Adequate ventilation: open windows, exhaust fan
Steps
- Confirm the existing coat is fully cured. Oil-based paint continues to harden chemically for 7–30 days depending on the formula. Recoating too early risks cracking if the two formulas are incompatible. Check the original product’s data sheet if you know the brand; otherwise wait a full 30 days.
- Clean the surface with a mild detergent or mineral spirits to remove grease and wax. Rinse and dry completely.
- Light scuff-sand with 180–220 grit to dull the gloss and improve adhesion. You do not need to remove the existing coat — just break the surface sheen.
- Spot-fill any cracks, chips, or holes with an oil-compatible filler. Sand smooth when dry.
- Prime if needed. For surfaces with tannin staining or heavy discolouration, apply a stain-blocking primer before the topcoat. Otherwise, a light scuff and clean surface is sufficient for oil-over-oil.
- Apply thin coats. Oil-based paint levels beautifully but takes longer to dry. Apply thin, even coats and allow the full recoat window — typically 24 hours or more — between applications.
Trade-offs at a glance:
- Water-based over oil: More prep required, but no yellowing, low VOCs, water cleanup, and a harder finish with the right enamel topcoat.
- Oil over oil: Easier adhesion, less prep, but strong fumes, solvent cleanup, longer drying, and yellowing risk in low-light areas.
Professional painters generally favour water-based finishes for interior work because of the lower VOC profile and easier cleanup, provided the bonding primer step is not skipped.
Special surfaces: trim, cabinets, and stained wood
Not every surface responds the same way to the standard process. High-contact and stain-prone surfaces need adjustments.
Trim and high-gloss mouldings
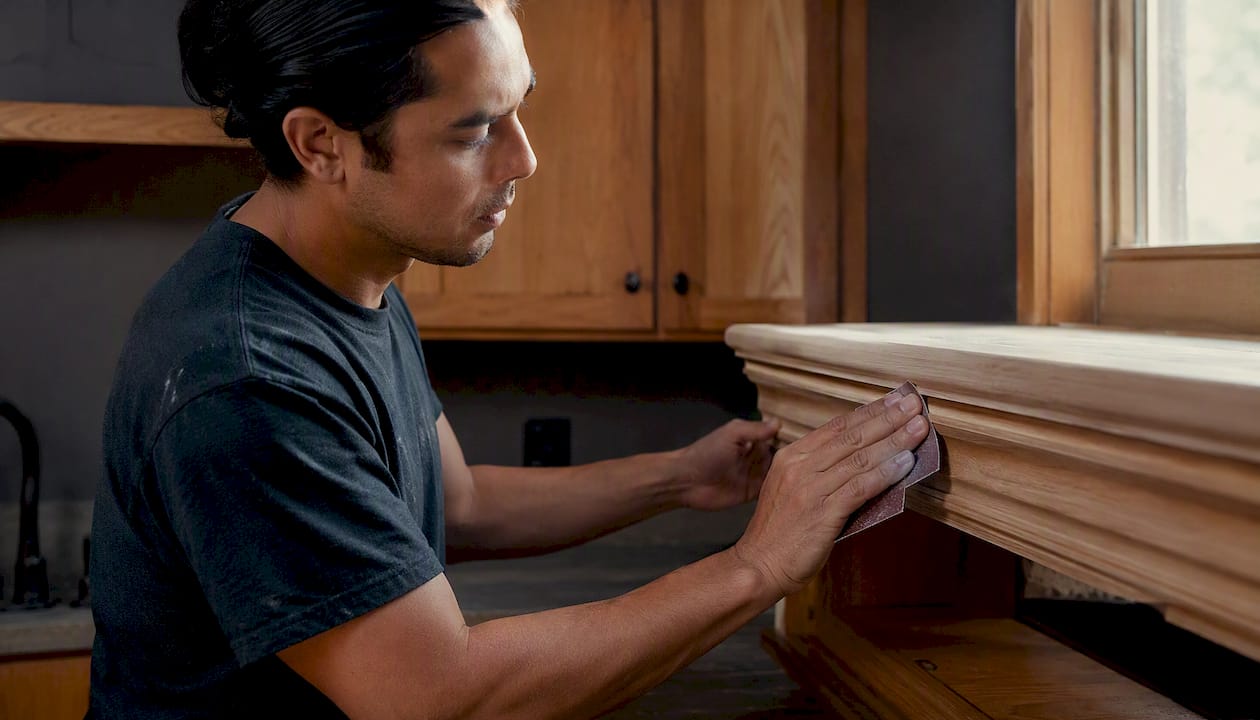
Spot-sanding is not enough here. Sand the entire length of each piece of trim to a uniform dull finish. Any glossy patch left behind will show as a sheen variation under the new coat and will eventually peel. Use 180 grit to de-gloss, then 220 grit to smooth before priming.
Kitchen cabinets
Cabinets are the most demanding surface in the house. The workflow is:
- Remove all hardware and doors before starting.
- Degrease thoroughly — TSP or a dedicated cabinet degreaser, not just a wipe-down.
- Sand all faces, edges, and recesses with 180–220 grit. Cabinet edges and inside corners are where adhesion fails first.
- Apply a bonding primer or a BEHR Acrylic-Alkyd Enamel Undercoater — this hybrid product offers oil-like levelling with water cleanup, which suits cabinet work well.
- Finish with a water-based enamel for durability and cleanability.
If you are also considering replacing rather than repainting cabinet doors, painting versus replacing old doors is worth reviewing before committing to a full repaint.
Stained or knotty wood beneath paint
When the substrate is stained wood or contains knots, a bonding primer alone will not stop tannin bleed-through. Tannins migrate through standard primers and cause brown or yellow staining on the topcoat. Use a dedicated stain-blocking primer — the BEHR Multi-Surface Stain-Blocking Primer & Sealer is available at Home Depot Canada and handles medium-to-heavy staining. The same principle applies to deck and wood staining projects where tannin control is part of the prep.
Exterior surfaces
Multiple layers of old oil-based paint on exterior wood or siding can hide adhesion problems that only appear after the first winter freeze-thaw cycle. If the existing paint is already cracking, flaking, or showing signs of moisture damage, spot-priming over it will not hold. Full stripping to bare wood or professional assessment is the safer route before applying any new finish.
Can you skip sanding? Liquid de-glossers and adhesion promoters
Liquid de-glossers (sometimes called liquid sandpaper) use solvents to chemically etch the surface and create a slightly roughened profile without abrasive sanding. They are useful for:
- Detailed mouldings and carved trim where sanding is impractical.
- Small touch-up areas where full sanding is disproportionate to the repair.
- Surfaces where dust generation is a concern (near HVAC returns, for example).
How to use a liquid de-glosser:
- Work in a well-ventilated space and wear nitrile gloves and safety glasses.
- Apply with a clean cloth, rubbing in the direction of the grain or profile.
- Allow the recommended dwell time (typically 10–15 minutes) and do not rinse — the etched surface is ready for primer.
- Apply your bonding primer immediately after; do not let the de-glossed surface sit overnight.
Adhesion promoters are additives mixed into primer or paint to improve grip on slick surfaces. They can help in low-stress situations but are not a substitute for mechanical sanding on high-contact surfaces like cabinet doors or heavily used trim. For those surfaces, sanding plus a dedicated bonding primer remains the most reliable approach.
Common failures: peeling, alligatoring, tannin bleed, and yellowing
Most paint failures over oil-based surfaces trace back to one skipped step. Here is how to read the symptoms:
- Peeling in sheets: Almost always poor prep — contamination left on the surface, insufficient sanding, or no bonding primer. Strip back to sound substrate, re-clean, sand, prime, and recoat.
- Alligatoring (scaly, reptile-skin cracking): Typically caused by applying a new coat over an uncured oil layer, or by incompatible resin systems. Skipping preparation steps often produces short-term success followed by large-scale failure. Remove all failing paint, confirm the substrate is sound, and start the prep sequence from scratch.
- Tannin bleed-through: Brown or yellow staining appearing through the topcoat, caused by painting over stained wood without a stain-blocking primer. Apply a stain-blocking primer over the affected area, allow full cure, and recoat.
- Yellowing: A known characteristic of oil-based topcoats in low-light areas. If yellowing is already present on the existing coat, switching to a water-based enamel topcoat will stop further yellowing on the new finish.
Before repainting any failed surface:
- Do an adhesion test: press a piece of tape firmly onto the surface, then pull it off sharply. If paint lifts with the tape, the existing coat is not sound and must be removed.
- Spot-sand a small area and check whether the surface dulls evenly — uneven sheen means contamination is still present.
- Verify primer coverage by checking for any glossy patches before topcoating.
When should you hire a pro instead of doing it yourself?
DIY works well for straightforward projects: a single room of trim in good condition, a few cabinet doors, or a wall that needs refreshing. The calculation changes when any of these apply:
- Multiple failing layers: If the existing paint is already peeling or cracking across a large area, full stripping is often necessary. Stripping oil-based paint safely requires proper containment, respirator use, and compliant disposal of solvent-soaked materials. ProductCare Ontario provides local guidance on paint and hazardous-waste drop-off across the province.
- Working at height: Ladders on stairwells or two-storey exteriors carry real fall risk. Professionals carry liability coverage; homeowners do not.
- Spray application for cabinets: A brush-and-roller finish on cabinets is achievable but rarely matches the smoothness of a controlled spray finish. Professionals use spray equipment in contained environments to eliminate brush marks entirely.
- Ventilation limits: Solvent-based primers and oil-based topcoats produce fumes that can accumulate quickly in small, enclosed spaces. If you cannot maintain adequate cross-ventilation throughout the job, that is a genuine safety concern.
- Time constraints: A full cabinet repaint, done properly, takes several days when cure times are respected. If the kitchen needs to be functional by a specific date, professional scheduling and faster-drying product selection make a real difference.
For interior painting services in Durham Region, a professional assessment also covers surface condition, product selection, and disposal — details that add up quickly on a larger project.
The prep work matters more than the paint brand
Here is the honest take: most paint failures over oil-based surfaces are not caused by choosing the wrong topcoat brand. They are caused by underestimating the preparation. A mid-range latex topcoat applied over a properly cleaned, sanded, and primed surface will outlast a premium paint applied over a glossy, contaminated one.
The conventional advice to “just use a bonding primer” is correct but incomplete. The primer only works if the surface underneath it is clean and mechanically de-glossed. A bonding primer applied over a greasy, unscuffed oil surface will peel just as reliably as latex applied directly. The sequence matters as much as the products.
The other thing homeowners consistently underestimate is cure time. Dry to the touch is not the same as cured. Applying a topcoat over a primer that has dried but not cured is one of the most common causes of adhesion failure — and it looks fine for weeks before it fails. Waiting the full cure window is not overcaution; it is what separates a paint job that lasts five years from one that needs redoing in eighteen months.
LA Rocks Renovations handles the prep, the priming, and the finish
Proper preparation for oil-based surfaces is time-consuming and unforgiving. LA Rocks Renovations provides full-service interior painting in Durham Region — from surface assessment and TSP cleaning through sanding, priming, and topcoat application. The team handles product selection, cure-time scheduling, and compliant disposal of solvent materials, so you do not have to manage any of it.
Homeowners in Bowmanville, Clarington, Newcastle, Oshawa, Whitby, Ajax, Pickering, and across Durham Region can request a painting quote in Bowmanville or contact LA Rocks Renovations directly for an on-site assessment. The estimate covers surface condition, scope, timeline, and a clear price — no guesswork on what the job actually involves. For trim and moulding work that goes beyond repainting, the trim and baseboard installation service is available for surfaces that are better replaced than repainted.
Sources
- Painting over oil-based paint | Glidden
- Solved! The Rules for Painting Over Oil-Based Paint - Bob Vila
- Can you use latex paint over oil-based paint? | The Spruce