


Exterior Paint for Wood: What Homeowners Need to Know
Dylan LarocqueRequest Your Free Estimate Today
GET A FREE ESTIMATE →Acrylic latex expands and contracts with the wood through freeze-thaw cycles, resists UV fade, and breathes well enough to prevent moisture from getting trapped beneath the film. That flexibility is not a bonus feature; it is the reason the finish survives a Canadian winter without cracking.
Here is the short version you can act on or hand to a contractor:
- Primer: Always prime bare wood. Use a stain-blocking primer on cedar or redwood; use a bonding primer on glossy previously painted surfaces.
- Sheen: Flat or low-lustre for siding; semi-gloss or gloss for trim and doors.
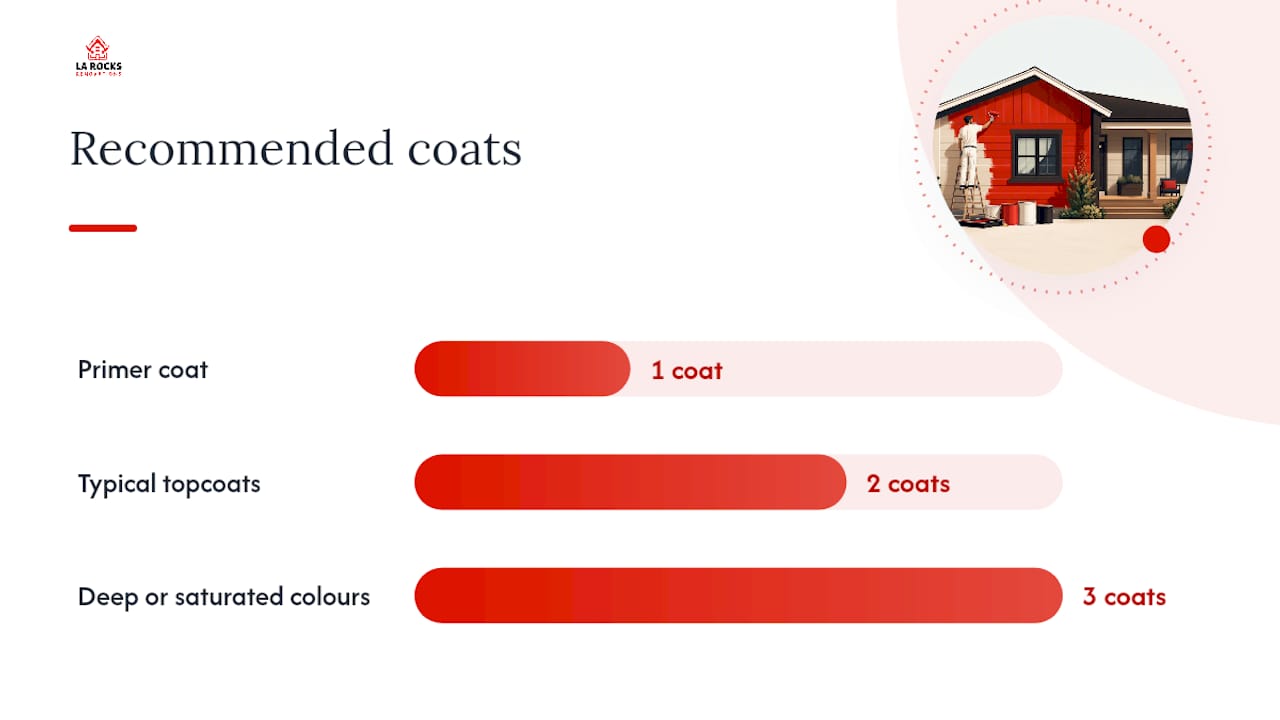
- Coats: One primer coat plus two topcoats is the standard system for bare or weathered wood.
- DIY vs. pro: Single-storey, straightforward siding is manageable for a confident DIYer. Multi-storey, complex prep, or rot repair calls for a professional.
- Exceptions: Use an elastomeric coating when you need to bridge hairline cracks on a stable, well-drained wall. Use a solid stain on rough-sawn cedar fencing or decking where a penetrating finish suits the texture better.
Key takeaways
| Point | Details |
|---|---|
| Best formulation | Choose 100% acrylic latex for siding and trim; solid stain for rough cedar fences and decks. |
| Prep is non-negotiable | Clean, dry, and repair the substrate before priming; moisture below 15% is the target. |
| Always prime | Use a stain-blocking primer on cedar/redwood and an acrylic primer on bare or pressure-treated wood. |
| Application climate limits | Apply above 10°C substrate temperature; avoid rain within the product’s stated rain-resistance window. |
| LA Rocks Renovations | Handles full exterior painting in Durham Region, including prep, priming, and premium acrylic application. |
Table of Contents
- What paint formulations work best on exterior wood?
- How do you prepare exterior wood before painting?
- How do you choose the right exterior paint for your project?
- Which Canadian paint brands and product lines should you consider?
- How do you apply exterior paint to wood correctly?
- How long does exterior paint on wood last in Canada?
- Why crack resistance matters so much for wood in Canadian climates
- When should you hire a pro for exterior painting?
- Professional exterior painting in Durham Region
- Sources
What paint formulations work best on exterior wood?
Not every can on the shelf is the right fit for wood. Understanding the four main formulation types saves you from a costly redo.
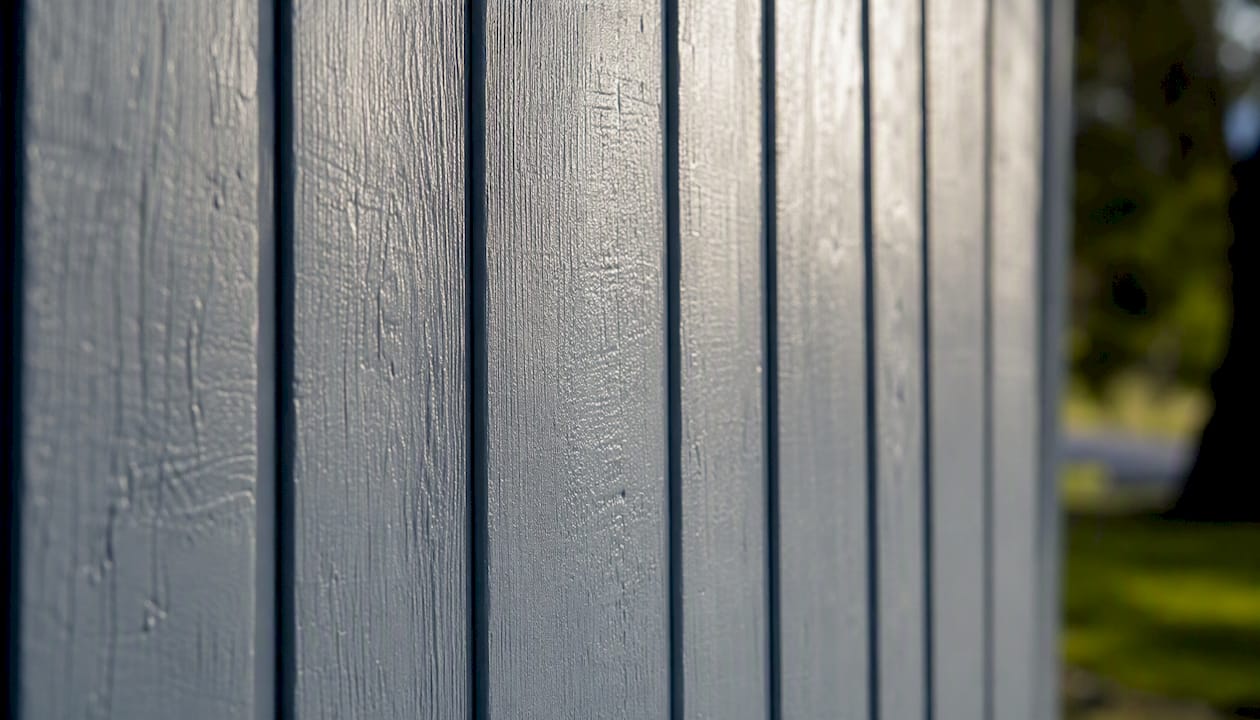
It stays flexible as temperatures swing, resists mildew, and holds colour under UV exposure. For most projects in Canada, this is the formulation to start with. Consumer Reports’ long-term weathering tests confirm that crack resistance and film flexibility are the top lab predictors of long exterior paint life, particularly in freeze-thaw climates.
Alkyd/oil-based enamel still has a place on doors and trim where a harder, smoother film is desirable. The tradeoff is real: alkyds yellow under UV, become brittle over time, and require solvent cleanup. Most contractors have moved to water-based alkyd hybrids that offer a similar hard finish with easier application and lower VOCs.
Elastomeric coatings build a thick, rubber-like film that can bridge hairline cracks. They work well on stable walls with controlled interior moisture, but elastomeric coatings can trap moisture in substrates where vapour drive is an issue, which leads to bubbling and adhesion failure. Specify them carefully, not as a default upgrade.
Solid stains and penetrating finishes suit rough-sawn cedar, fencing, and decking where a film-forming paint would peel as the wood moves. Solid stains penetrate the surface fibres rather than sitting on top, so they wear rather than crack or peel. Expect a 4–6 year lifespan before recoating, compared to a multi-year lifespan for a well-applied acrylic paint system on smooth siding.
| Formulation | Best for | Crack/peel resistance | Primer needed | Common sheens | Canadian climate fit |
|---|---|---|---|---|---|
| 100% acrylic latex | Siding, trim, doors | High (flexible film) | Yes, always | Flat to gloss | Excellent |
| Alkyd/oil enamel | Trim, doors | Moderate (hardens over time) | Yes | Semi-gloss, gloss | Fair (yellows, brittle) |
| Elastomeric | Cracked stable walls | Very high (bridging) | Alkali-resistant or bonding | Flat, low-lustre | Good if moisture controlled |
| Solid stain | Fences, rough cedar, decks | N/A (penetrates, wears) | Recommended | Flat | Very good |
How do you prepare exterior wood before painting?
Surface preparation drives more paint failures than any other factor. Professional contractors attribute the majority of exterior paint failures to poor prep or residual moisture, not the paint itself. Follow these steps in order.
- Inspect the substrate. Check for rot, soft spots, loose boards, and failed caulking. Probe suspicious areas with a screwdriver. Replace any rotted wood before you pick up a brush. Identify tannin-rich species (cedar, redwood) and pressure-treated lumber, as each needs a specific primer.
- Clean the surface. Wash with a detergent solution and a stiff brush, or use a pressure washer. Keep pressure below 1,500 PSI on wood to avoid raising the grain or forcing water into joints. For mildew, apply a diluted bleach solution (one part bleach to three parts water) or a commercial mildewcide, scrub, and rinse thoroughly. Allow several days for the substrate to dry completely before priming; painting over damp wood is the fastest route to peeling.
- Sand and scrape. Scrape all loose or flaking paint down to a firm edge. Sand smooth surfaces lightly with 80–120 grit to improve adhesion. Feather the edges of scraped areas so the new coat lies flat. On previously painted surfaces in good condition, a light scuff-sand is enough.
- Repair and caulk. Fill cracks and gaps with a 100% exterior acrylic or polyurethane caulk rated for exterior use. Use a backer rod in gaps wider than 6 mm before caulking. Re-caulk all window and door perimeters, corner boards, and any joint where two materials meet.
- Prime correctly. Bare wood always needs primer. Use a stain-blocking oil-based or shellac primer on cedar and redwood to prevent tannin bleed-through; on heavy tannin substrates, two primer coats are often required. For pressure-treated lumber, allow the wood to weather for at least 60–90 days before painting, then apply an acrylic primer formulated for treated wood. Use a bonding primer on any glossy previously painted surface.
Pro Tip: Check substrate moisture with an inexpensive pin-type moisture metre before priming. Painting over anything higher is a gamble that rarely pays off.
How do you choose the right exterior paint for your project?
Use this checklist in-store or when reviewing a product online. It covers the decisions that actually affect how long the finish lasts.
| Selection criterion | What to look for |
|---|---|
| Substrate type | Siding, trim, cedar, pressure-treated, or rough-sawn? Match the formulation to the surface. |
| Binder quality | Label must say “100% acrylic” for latex paints. |
| Mildew resistance | Look for built-in mildewcide; critical for shaded or north-facing walls. |
| Flexibility/elongation | Check the TDS for elongation percentage; higher is better for wood movement. |
| UV fade warranty | Premium lines offer 10-year colour fade protection; confirm it covers your sheen choice. |
| Low-temp application | Most acrylics require a minimum 10°C substrate temperature; some lines allow lower. |
| Rain resistance | Some products claim resistance as early as a short rain resistance window under specific conditions; verify on the TDS. |
| VOC content | Low-VOC options are available across most premium lines; relevant for enclosed areas or sensitive households. |
| Sheen | Flat/low-lustre for siding; semi-gloss or gloss for trim and doors. |
Coverage math: Divide your total surface area (in square metres) by the label coverage rate (in m²/L) to get litres needed per coat. A standard 3.78 L can covers roughly 33–37 m² on smooth siding per coat; rough or porous surfaces absorb more and will reduce that figure noticeably.
When to hire a pro: if the project involves a full house, anything above the first storey, significant rot repair, or surfaces requiring scaffolding, the cost of renting equipment and the risk of an uneven finish typically outweigh the savings of doing it yourself.
Which Canadian paint brands and product lines should you consider?
These lines are widely available at Canadian retailers and cover the most common exterior wood applications. Always pull the manufacturer’s technical data sheet (TDS) for the specific product you buy; application temperature, coverage, and warranty details vary by product, not just by brand.
Manufacturer product pages list practical attributes such as stain blocking, low-temperature application windows, mildew resistance, and tannin-blocking that you should confirm on the can or TDS before purchasing.
For cedar and redwood specifically, Benjamin Moore Aura Exterior and Behr Dynasty both list tannin-blocking capability; confirm this on the TDS and plan for two primer coats on raw cedar regardless. For a deeper look at how the top two premium brands compare on performance and price, the Benjamin Moore vs. Sherwin-Williams breakdown on the LA Rocks Renovations blog is worth reading before you commit.
How do you apply exterior paint to wood correctly?
Good preparation and the right product only deliver a durable finish if the application is done properly. Here is the process from first coat to final inspection.
Choosing your tools:
- Brush: Use a 2.5"–4" angled sash brush for cutting in around trim, windows, and corners. A quality synthetic brush holds more paint and releases it evenly.
- Roller: A 19 mm (¾") nap roller covers smooth to lightly textured siding well. For rough-sawn cedar or board-and-batten, move to a 25 mm (1") nap. For deep texture, a nap of at least ¾" and brush work in joints or profiles gives the best penetration.
- Sprayer: Airless sprayers speed up large siding jobs significantly, but always back-roll immediately after spraying to work paint into the wood grain and avoid a surface-only film. Spraying without back-rolling is one of the most common causes of premature peeling on wood.
Application steps:
- Apply primer coat and allow full dry time per the TDS before topcoating. Do not rush this step.
- Apply the first topcoat in long, even strokes following the wood grain. Work in manageable sections to maintain a wet edge and avoid lap marks.
- Allow the first topcoat to dry to the recoat window specified on the label, typically 4–6 hours for acrylic latex under ideal conditions.
- Apply the second topcoat. Deep or saturated colours may require a third coat for full hide; the TDS will note this.
- Inspect edges, end grain, and any repaired areas for thin spots and touch up before the paint fully cures.
Environmental limits to respect:
- Minimum substrate temperature: 10°C for most acrylics (some premium lines allow lower; confirm on TDS).
- Avoid painting in direct hot sun, which causes the surface to skin over before the paint can penetrate.
- Do not apply when rain is forecast within the rain-resistance window for your product. Some lines claim resistance in as little as a short rain resistance window under specific conditions, but always verify this on the TDS rather than relying on marketing copy alone.
- Ideal relative humidity: below 85%.
Safety and disposal:
- Wear a respirator (N95 minimum) when spraying; eye protection and nitrile gloves throughout.
- Use drop cloths and plastic sheeting to contain overspray and protect landscaping.
- Never pour leftover paint or solvent down a drain. Seal cans tightly and store in a frost-free location for touch-ups. Bring unwanted paint to a municipal hazardous waste drop-off; most Ontario municipalities run household hazardous waste events seasonally.
How long does exterior paint on wood last in Canada?
That range narrows quickly when prep is skipped, a lower-grade product is used, or the home faces severe weather exposure on a south or west elevation.
Annual and seasonal maintenance keeps the system performing at the upper end of that range:
- Annual visual inspection: Walk the perimeter each spring after the last freeze. Look for cracking, peeling, chalking, or mildew growth, particularly on the bottom 90 cm of siding, around eaves, and at flashing interfaces where water tends to collect.
- Soft wash: Every 1–2 years, wash siding with a mild detergent solution to remove dirt, mildew spores, and oxidation before they degrade the film.
- Touch-ups: Address any cracked caulking, bare spots, or chipped paint promptly. A small tube of matching paint and a quality brush can extend the system’s life by years.
- Re-caulking: Expect to re-caulk window and door perimeters every 5–7 years, or sooner if you see cracking or separation.
- Full repaint trigger: Widespread chalking, peeling across more than 20–25% of a wall, or bare wood showing through are signs the system has reached the end of its life.
For budgeting, premium exterior acrylic paints in Canada typically run $45–$95 per 3.78 L can depending on the brand and line. A full repaint of an average two-storey home in Durham Region requires professional assessment for an accurate quote, but planning for two coats of a premium product plus primer gives you a realistic material baseline.
Why crack resistance matters so much for wood in Canadian climates
Cracking resistance is the critical attribute for exterior paints because cracks expose siding to water; flexible films that tolerate expansion and contraction reduce long-term structural damage. Consumer Reports’ multi-year weathering tests paint panels on a roof for several years to simulate real-world exposure, and paints that resist cracking consistently outperform in freeze-thaw and UV conditions.
Wood moves. It expands in summer humidity and contracts in winter cold, and in Canada that cycle is more extreme than in most climates. A rigid paint film cannot keep up with that movement; it cracks, water enters, and the freeze-thaw cycle widens the crack from the inside. Once water reaches bare wood, rot and mildew follow.
A high-quality 100% acrylic exterior paint maintains enough elasticity to flex with the substrate rather than against it. When you are reading a product label or TDS, prioritise elongation percentage and crack-resistance claims over colour-range size or sheen variety. Those two metrics are the most reliable predictors of how the paint will perform after its third or fourth Canadian winter.
When should you hire a pro for exterior painting?
LA Rocks Renovations works with homeowners across Durham Region on exterior painting projects every season, and the honest answer is that the scale and complexity of the job matter more than any other factor when deciding between DIY and hiring a professional.
Hire a professional when:
- The project covers a full house or more than one storey.
- Scaffolding or a boom lift is required for safe access.
- There is rot, significant substrate damage, or failed caulking that needs repair before painting.
- The wood species (cedar, redwood) requires careful tannin management and primer sequencing.
- You want a warranty-backed finish with documented prep and product records.
DIY is reasonable when:
- The project is a single-storey outbuilding, fence, or deck.
- The substrate is in good condition with minimal prep required.
- You are comfortable working safely on a ladder and have time to do the prep properly.
The finish quality gap between a rushed DIY job and a professionally applied system is most visible within the first two winters. Prep shortcuts, thin primer coats, and painting outside the temperature window are the three most common DIY mistakes, and all three show up as peeling by spring.
Professional exterior painting in Durham Region
Choosing the right paint is only half the equation. Getting it applied correctly, over properly prepared wood, is what determines whether that finish lasts 7 years or 10.
LA Rocks Renovations offers professional exterior painting services across Durham Region, including Bowmanville, Clarington, Newcastle, Oshawa, Whitby, Ajax, and Pickering. The team handles full prep, including rot assessment, caulking, and priming, using premium acrylic systems matched to your specific substrate. Before you sign any exterior painting contract, ask your contractor these questions:
- What prep steps are included, and will you replace failed caulking?
- Which paint line and primer will you use, and can I see the TDS?
- What is the warranty on the workmanship, and does the paint manufacturer’s warranty apply?
- Are you insured, and can you provide proof of liability coverage?
Ready to get a clear scope and quote for your home? Contact LA Rocks Renovations to discuss your project and what a properly prepped, professionally applied exterior paint system looks like for your specific wood siding.
If you also need caulking and sealing work done before painting, that can be bundled into the same project scope.
Sources
- 3 Best Exterior Paints of 2026, Lab‑Tested and Reviewed - Consumer Reports
- Painting exterior brick — CompositePaint guide
- Painting exterior brick: how to prepare and paint — The Spruce
- How to paint exterior brick house | Constructli
- BEHR ULTRA® Exterior Paint - Stain Resistant Paint | Behr
Always pull the manufacturer’s technical data sheet for the exact product you purchase; application temperature ranges, coverage rates, and warranty terms vary by specific product, not just by brand line.