


Crown Molding Styles for Homeowners: A Room-By-Room Guide
Request Your Free Estimate Today
GET A FREE ESTIMATE →For most homes, a cove or ogee profile in polyurethane covers the widest range of rooms and ceiling heights without fighting the existing trim package. Traditional homes suit ogee, dentil, or egg-and-dart detail. Contemporary spaces call for flat, stepped, or reveal-based profiles. Coastal and humid climates favour PVC over solid wood.
- Cove moulding for transitional living rooms and bedrooms
- Ogee or dentil for formal dining rooms and entryways
- Flat or stepped profiles for modern kitchens and open-concept spaces
- Built-up compound crown for high ceilings and grand foyers
- Flexible PVC profiles for bathrooms, kitchens, and curved walls
One caveat for each: humidity rules out most solid wood in bathrooms, low ceilings shrink your safe projection size, and mismatched trim vocabulary (mixing a Victorian crown with Craftsman casings) reads as a mistake even when each piece looks good alone.
Key Takeaways
Choosing the right crown moulding style comes down to matching profile weight and material to your ceiling height, room humidity, and existing trim package.
| Point | Details |
|---|---|
| Match the trim package | Pick a crown profile that suits your existing baseboards and casings, not a photo you liked online. |
| Size to ceiling height | Use roughly 1 inch of crown height per foot of ceiling above 8 feet as a starting rule. |
| Choose material by moisture exposure | Use PVC or polyurethane in bathrooms and kitchens; avoid MDF and solid wood in humid rooms. |
| Plan lighting before installing | Order a profile with a wire chase and top ledge if you want integrated LED cove lighting. |
| Bring in a pro for complex work | LA Rocks Renovations handles plaster profiles, reveals, and curved runs that go beyond a DIY-friendly weekend project. |
Table of Contents
- Common crown molding styles and where each one belongs
- Which material should you choose for crown moulding?
- How do you pick the right crown moulding size?
- What does crown moulding installation actually cost?
- What crown moulding trends work in modern homes?
- When should you hire a professional for crown moulding?
- Where did crown moulding styles come from?
- How do you maintain crown moulding once it’s installed?
- How does lighting change the look of crown moulding?
- What’s the one crown moulding mistake homeowners keep making?
- Want a trim specialist to handle the details for you?
- Where to look next for profiles and materials
- Sources
Common crown molding styles and where each one belongs
Every style family says something different about a room, and picking the wrong one is the fastest way to make a fresh renovation look dated on day one.
Traditional profiles carry the most visual weight. Ogee crown uses an S-curved profile that catches shadow beautifully in rooms with 9-foot-plus ceilings and formal proportions, think dining rooms and primary bedrooms in older character homes. Egg-and-dart adds a repeating oval-and-arrow detail along the lower edge, historically found in Georgian and Colonial Revival houses; it works best where you already have detailed door and window casings to match. Dentil moulding brings small, evenly spaced blocks resembling teeth (hence the name) and reads as classical or Colonial. It suits entryways and formal living rooms with at least 9 feet of ceiling height, since anything shorter crowds the repeating pattern.
Transitional profiles bridge old and new. A plain cove profile curves smoothly from wall to ceiling with no ornament, which makes it the safest default for bedrooms, hallways, and living rooms in almost any house built after 1980. A lighter ogee, sometimes called ogee-light, keeps the curve but drops the secondary reeding, giving you classic shape without a heavy, historic look.
Modern profiles strip the ornament entirely. Flat crown uses a single angled or squared plane. Stepped crown creates one or two clean shelf-like breaks instead of a curve. Chamfer profiles cut a simple 45-degree bevel. These common crown moulding types suit open-concept kitchens, condos, and new-build homes with 8-foot ceilings, where anything heavier would visually shrink the room.
Specialty options solve specific problems. Built-up crown stacks two or three smaller profiles to create a custom, oversized cornice, common in foyers with tall ceilings where a single off-the-shelf piece looks thin. Flexible moulding bends around curved walls or archways where rigid wood or MDF simply cannot follow the radius. Lighting cove profiles include a flat upper ledge specifically built to hide an LED strip, a detail worth planning before drywall goes up rather than retrofitting later.
Dentil and egg-and-dart detail are almost always a professional install because coping the repeating pattern around inside corners takes practice. Flat and cove profiles are the most forgiving for a first DIY attempt.
Pro Tip: Match your new crown to the dominant trim package already in the room, your baseboards and door casings, not to a single piece of furniture or a photo you liked online. A profile that clashes with your existing baseboard height or edge style will look wrong no matter how nice it is on its own, since professionals consistently recommend matching scale and edge treatment across the whole trim package.
Which material should you choose for crown moulding?
Material choice comes down to three questions: how much moisture will hit this room, how ornate a profile do you want, and what’s your budget per linear foot.
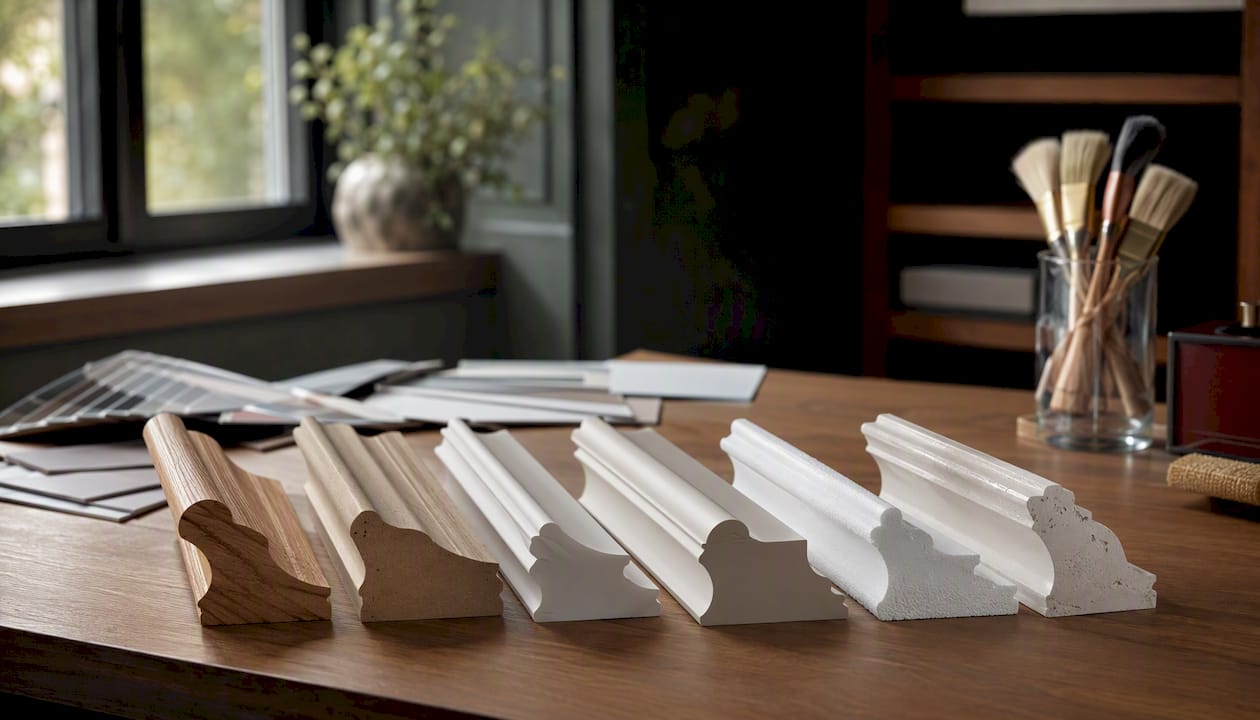
Solid wood offers the best paint-and-stain flexibility and the most authentic look for period homes, but it costs the most and moves with humidity swings, which can open joints over time. MDF (medium-density fibreboard) is cheaper, paints beautifully, and resists warping better than solid wood, but it swells and disintegrates if it gets wet, so keep it out of bathrooms entirely. Polyurethane is lightweight, pre-primed, and holds fine detail almost as well as plaster at a fraction of the cost, making it a strong all-purpose choice for interior rooms. PVC resists moisture completely and is the recommended material for high-humidity spaces like bathrooms and kitchens. Polystyrene is the lightest and least expensive option but dents easily and shows glue lines more than poly. Plaster delivers the most ornate, historically accurate detail available, but it’s heavy, expensive, and fragile enough that most homeowners reserve it for a single statement room.
| Material | Best for | Moisture suitability | Relative cost |
|---|---|---|---|
| Solid wood | Period homes, stain-grade finishes | Poor in humid rooms | High |
| MDF | Painted trim, budget projects | Avoid in bathrooms | Low to medium |
| Polyurethane | Most interior rooms, detailed profiles | Good | Medium |
| PVC | Bathrooms, kitchens, humid climates | Excellent | Medium to high |
| Polystyrene | Simple profiles, tight budgets | Fair | Low |
| Plaster | High-end, ornate historic detail | Poor, avoid moisture | Very high |
Nearly every common crown moulding type sold today falls into one of these six categories, and mixing materials within the same room (say, wood baseboards with a PVC crown) is fine as long as the paint finish matches.
How do you pick the right crown moulding size?
Ceiling height sets your ceiling on projection size before you even think about style. As a starting rule, aim for roughly 1 inch of crown height for every foot of ceiling height above 8 feet, adjusted for the weight of your other trim.
- 8-foot ceilings: stick to 2 to 3.5 inches of crown height. Anything larger visually lowers the ceiling and crowds the corners.
- 9-foot ceilings: 3.5 to 5 inches works well, enough presence to register from across the room without overwhelming it.
- 10-foot-plus ceilings: 5 to 8 inches, or a built-up compound profile combining two or three pieces for real architectural weight.
- Check projection versus spring angle: a deeper projection (how far the moulding sticks out from the wall) reads heavier even at the same height, while a steeper spring angle (the tilt between wall and ceiling) makes a profile look taller than its actual dimension.
- Balance against your baseboard: as a rule of thumb, crown height should roughly match or sit just under your baseboard height so neither element dominates the room.
Before you shop, run through this checklist: measure your ceiling height and note it, measure your existing baseboard and casing width, decide on paint versus stain, check the room for humidity exposure, and confirm whether any walls curve or run long enough to need seams.
What does crown moulding installation actually cost?
Material cost, profile complexity, and ceiling height are the three biggest cost drivers. A simple cove profile in MDF costs far less per linear foot than a built-up compound cornice in stain-grade wood, and a 10-foot ceiling requiring scaffolding or extra ladder work adds labour time a standard 8-foot room never needs.
Other factors that push costs up:
- Curved walls or archways requiring flexible moulding or extra seams
- Integrated LED lighting channels that need coordination with an electrician
- Drywall repair or skim-coating before trim can go up cleanly
- Multiple inside and outside corners requiring precise coping cuts
A single average-sized room typically takes a full day for material prep, cutting, and installation, longer if drywall repair or a lighting channel is involved. Flat and cove profiles are the most DIY-friendly for a confident weekend project. Compound angles, plaster, curved runs, or anything requiring a reveal at the drywall stage is where most homeowners call in a contractor.
What crown moulding trends work in modern homes?
Flat and stepped profiles with crisp square edges dominate current builds, often painted the exact same colour as the ceiling to blur the line between wall and crown entirely. Shadow gaps, also called reveals, have become a signature contemporary detail: a narrow recessed line, typically a quarter- to half-inch wide, replaces the moulding altogether for a minimalist look. Integrated LED cove lighting pairs naturally with these flatter profiles, turning the crown into a light source rather than just a decorative cap.
For pairing: craftsman homes do well with simple stepped or square profiles rather than ornate curves. Traditional homes should stick with ogee or dentil rather than forcing a flat modern edge onto a Victorian room. One clear “don’t”: avoid dropping a heavily ornate plaster-style profile into an otherwise minimalist, flat-trim home. The mismatch is one of the fastest ways to make a renovation look unplanned.
When should you hire a professional for crown moulding?
Call a contractor when your project involves plaster profiles, compound-angle returns, curved wall runs, or a shadow-gap reveal that needs coordination during drywall finishing, these all demand tools and timing most homeowners don’t have on hand.
When you do interview a trim contractor, ask:
- Do you handle both the trim installation and any required drywall repair?
- What’s included in the quote: material, labour, caulking, and paint touch-up?
- How do you handle corners on walls that aren’t perfectly square?
- Can you coordinate with an electrician if I want a lighting channel?
Homeowners can usually prep by clearing the room and confirming ceiling height and paint colour in advance; the contractor typically handles measuring, cutting, coping, and finish caulking.
Where did crown moulding styles come from?
Crown moulding traces back to classical Greek and Roman architecture, where a cornice capped columns and rooflines with carved detail meant to be viewed from a distance. Egg-and-dart and dentil patterns both originated in this era and carried through centuries of European design largely unchanged in their basic geometry.
Georgian and Colonial architecture in Britain and its colonies adopted these classical profiles for interior use during the 1700s, scaling them down for room-sized ceilings rather than exterior building facades. Victorian homes in the 1800s pushed ornamentation further, layering built-up profiles with multiple bands of detail to signal wealth and craftsmanship, a trend that arrived in North America through pattern books and mail-order millwork catalogues.
Cultural variation shows up clearly across regions. French and Mediterranean interiors favoured plaster crown with sculptural, hand-finished detail, a tradition still visible in high-end restoration work today. Craftsman-style homes in early-1900s North America rejected Victorian excess entirely, favouring simple, flat, and stepped profiles that echoed the movement’s honest-materials philosophy, a direct ancestor of the flat modern profiles trending again now. Mid-century modern design dropped crown moulding almost entirely in favour of clean wall-to-ceiling transitions, which explains why so many 1960s and 1970s homes have no crown at all and why adding it today means choosing a style that respects that plainer original architecture rather than fighting it.
How do you maintain crown moulding once it’s installed?
Maintenance needs differ sharply by material, so know what you installed before you reach for a cleaning product.
Solid wood needs periodic dusting and, in stained applications, an occasional wipe with a wood-safe cleaner. Watch for hairline gaps opening at joints during dry winter months. That’s normal wood movement and usually just needs a touch-up bead of paintable caulk rather than a full repair.
MDF and polyurethane hold paint well for years but should never be scrubbed with an abrasive pad, which can dull the finish or expose the substrate at high points. A microfibre cloth and mild soap and water handle routine dust and grease buildup near kitchens.
PVC is essentially maintenance-free from a moisture standpoint. Wipe with a damp cloth as needed. It won’t warp or rot, which is exactly why it earns its place in bathrooms.
Plaster is the most delicate of the group. Avoid pressure-washing or aggressive scrubbing, dust gently with a soft brush, and address any cracks quickly since moisture intrusion into plaster is far harder to repair than in synthetic materials.
Across every material, repaint or refinish crown moulding on the same cycle as your walls and ceiling; mismatched sheen or yellowing paint on trim is one of the more common giveaways of an otherwise well-maintained room. Caulking at the top and bottom seams also degrades over years of temperature swings, so a fresh bead every five to ten years keeps the line looking crisp and blocks dust and moisture from working into the joint.
How does lighting change the look of crown moulding?
Light direction and colour temperature change how a crown profile reads far more than most homeowners expect. A deeply carved ogee or dentil profile relies on raking light, light hitting it at a low angle from a window or a well-placed fixture, to throw shadows that make the detail pop. Flat, overhead lighting washes that same profile out and makes an expensive, detailed moulding look flat and cheap.
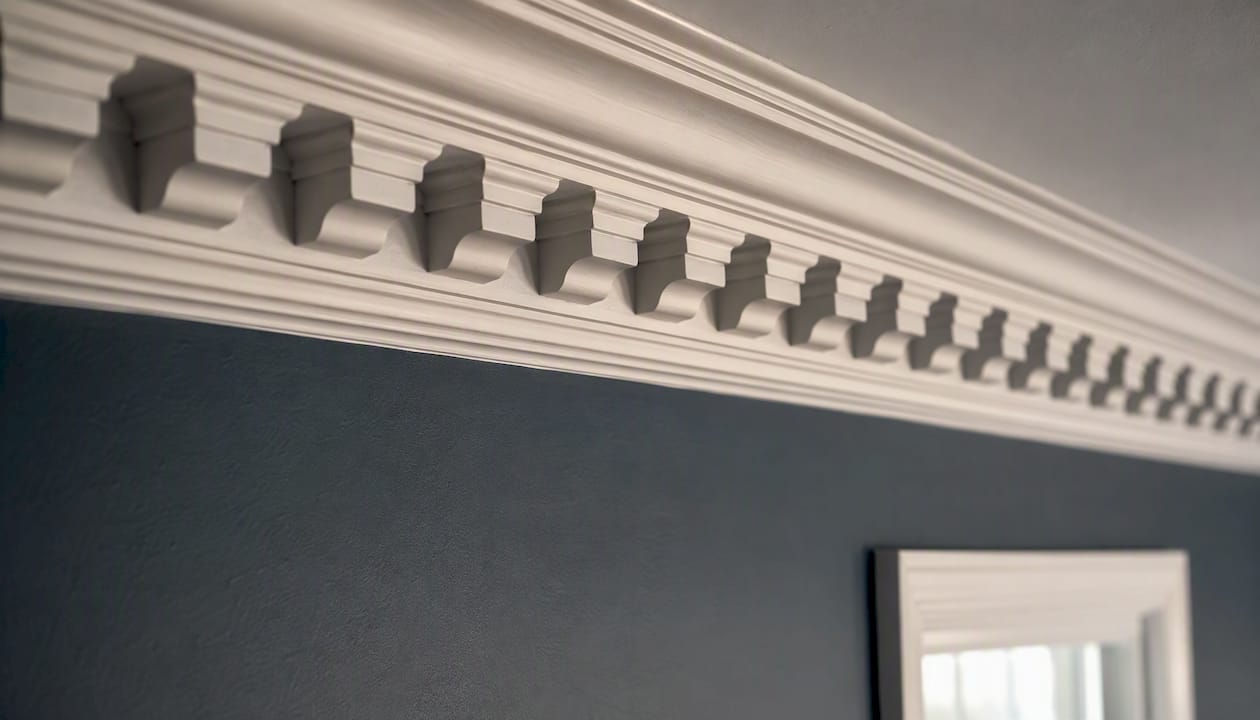
Modern lighting cove profiles flip that relationship entirely by turning the crown itself into the light source. Profiles built with a top ledge and a wire chase hide an LED strip that washes the ceiling with indirect light, creating a soft glow that makes ceilings feel higher and rooms feel larger without a single visible fixture. This only works cleanly with a profile designed for it from the start; retrofitting a lighting channel into a solid ogee or dentil profile after the fact rarely looks intentional.
Warm white LED strips (around 2700K to 3000K) suit traditional and transitional rooms, while a slightly cooler tone works better in modern spaces with flat, minimalist trim. Either way, plan your lighting choice at the same time you choose your profile, not after the crown is already installed.
What’s the one crown moulding mistake homeowners keep making?
The most common error is chasing a single trendy profile without checking it against the baseboards and casings already in the room. We’ve seen clients swap out a plain cove crown for an ornate built-up profile, only to have it clash with simple, flat baseboards installed a decade earlier. In one recent job, a homeowner planning a heavily detailed dentil crown switched to a simple stepped profile instead once we matched it against their existing door casings, and the result looked far more cohesive and cost less to install.
Want a trim specialist to handle the details for you?
Choosing between six materials and a dozen profile families is one thing. Cutting a perfect inside corner on a compound-angle ogee, or coordinating a drywall finisher to build a clean quarter-inch reveal, is another. LA Rocks Renovations handles the full scope: trim and baseboard installation, custom millwork and moulding, drywall finishing for reveal-ready walls, and finish painting so the crown you picked actually looks the way it did in your head.
A site visit typically covers your ceiling height, existing trim package, room humidity, and any lighting plans, then you get a straightforward quote covering material, labour, and finish work with no surprise line items later. If you’re planning a basement remodel and want the trim package figured out from the framing stage onward, start with our basement renovation services and we’ll walk you through profile and material options that suit the space before drywall even goes up.
Where to look next for profiles and materials
For deeper style comparisons and profile libraries, browse the crown molding styles guide and check current door and trim pairings for coordinating your full trim package. Look for sample photos, spec sheets, and installation guides on any supplier page before ordering.
Sources
- What is the best material for your crown moulding? — Architectural Depot
- Crown molding styles guide — Mouldings One
- Crown molding styles: types, materials, and how to choose the right one — D and G Flooring
- Types of crown molding — Family Handyman
- Curving architectural reveal beads — Trim-Tex