


Drywall Finishing Levels for Homeowners: What to Specify
Request Your Free Estimate Today
GET A FREE ESTIMATE →Levels 0 through 5 describe a progressive scale of joint compound application and surface preparation, and for most painted interior walls in a Canadian home, Level 4 is sufficient. Level 5 becomes necessary when you are applying high-gloss, semi-gloss, or dark paint, or when a room has critical grazing light that rakes across the wall surface. The choice matters because the wrong level either wastes money on unnecessary prep or leaves visible joint banding under a glossy finish.
Three questions drive the decision before anything else:
- Paint sheen: flat or matte paints are forgiving; high-gloss and dark colours expose every surface irregularity.
- Lighting: standard overhead lighting is tolerant; windows that cast raking light across a wall are not.
- Budget and timeline: each step up the scale adds compound coats, sanding time, and sometimes a full skim coat.
Quick reference by space: Level 0 for temporary construction; Level 1 for concealed plenum areas; Level 2 for garages and tile substrates; Level 3 for heavy-texture finishes; Level 4 for most living spaces with flat or eggshell paint; Level 5 for ceilings, feature walls, and any surface receiving gloss or dark paint under critical light.
Table of Contents
- What do the drywall finishing levels actually include?
- How drywall finishing is actually performed
- How do you choose the right finish level for each room?
- What does each finish level cost and how long does it take?
- How to brief a contractor on the finish level you want
- How professional renovators in Durham Region apply these standards
- Key takeaways
- The finish level conversation most homeowners skip
- Professional drywall finishing in Durham Region from LA Rocks Renovations
- Authoritative references and further reading
What do the drywall finishing levels actually include?
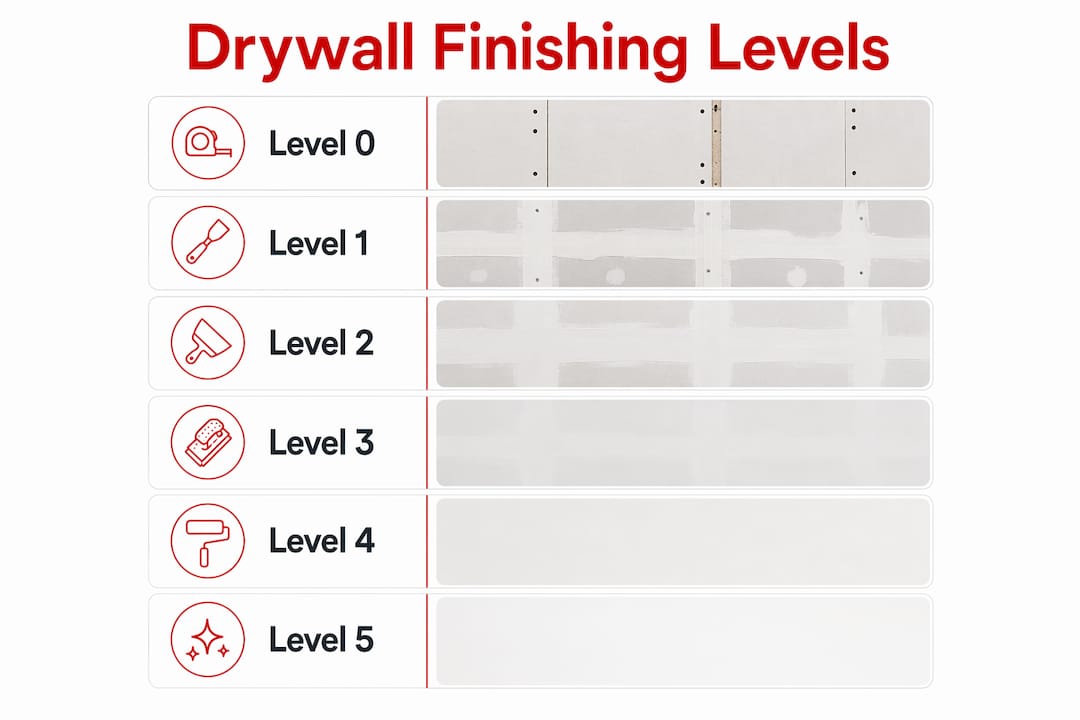
The Gypsum Association’s GA-214 standard is the industry reference that contractors and designers use across North America. It defines six levels, numbered 0 through 5, each specifying exactly what compound work is required. Think of it as a shared specification language: when you write “Level 4” in a contract, every qualified finisher knows precisely what that means.
Level 0: no finish required
No taping, no compound, no accessories. Level 0 applies to temporary construction or spaces where the final decoration has not yet been determined. You will see it on hoarding walls and demountable partitions that may be reconfigured.
Level 1: tape embedded, no covering required
All joints and interior angles receive tape embedded in joint compound. Tool marks and ridges are acceptable because this level is intended for concealed spaces: plenum areas above suspended ceilings, attics, building service corridors. In some parts of Canada it is called “fire-taping,” though it does not on its own satisfy fire-resistance assembly requirements.
Level 2: one coat over tape and fasteners
Tape is embedded and immediately wiped with a joint knife, leaving a thin coating of compound over joints and angles. Fastener heads and accessories receive one coat of compound. Tool marks and ridges are still acceptable. Level 2 suits garages, warehouse storage, and tile substrates where surface appearance is secondary.
Level 3: two coats, smooth surface required
One additional coat of compound goes over all joints and angles beyond the embedding coat. Fastener heads receive two separate coats. The surface must be smooth and free of tool marks and ridges. Level 3 is the right call for walls that will receive heavy spray or hand-applied texture, or commercial-grade wallcoverings. It is not appropriate for smooth-painted surfaces.
Level 4: three coats, the standard for most homes
Two separate coats of compound are applied over flat joints beyond the embedding coat; interior angles receive one additional coat. Fastener heads and accessories get three coats. The surface is smooth and free of tool marks. Level 4 suits flat, matte, or eggshell finishes under typical lighting conditions, and it is the baseline for most residential living rooms, bedrooms, hallways, and kitchens. A quality undiluted latex drywall primer is required before painting.
Level 5: full skim coat, the highest standard
Everything in Level 4, plus a thin skim coat of joint compound trowel-applied to the entire surface. This skim coat is not a measurable mil thickness; it is a film-like layer that conceals the texture difference between dried compound and the face paper of the board. A primer-surfacer can substitute for a hand-applied skim coat. Level 5 is required for gloss, semi-gloss, or enamel paints, for dark colours, and for any surface under critical lighting. Ceilings commonly warrant Level 4 at minimum, and high-exposure ceilings often move to Level 5 because grazing light from windows or pot lights highlights every imperfection.
| Level | What is included | Coat counts (fasteners) | Typical uses | Imperfection tolerance | Recommended paint sheens / primer |
|---|---|---|---|---|---|
| 0 | Nothing | None | Temporary construction | N/A | N/A |
| 1 | Tape embedded | Optional one coat | Plenums, attics, concealed areas | Tool marks and ridges acceptable | N/A |
| 2 | Tape embedded and wiped; one coat over fasteners | 1 coat | Garages, tile substrates | Tool marks and ridges acceptable | N/A |
| 3 | Embedding coat + one additional coat over joints; two coats over fasteners | 2 coats | Heavy texture, commercial wallcovering | No tool marks or ridges | Primer required before texture or paint |
| 4 | Embedding coat + two additional coats over flat joints; three coats over fasteners | 3 coats | Most residential walls and ceilings, flat/eggshell paint | No tool marks or ridges | Latex drywall primer; flat, matte, eggshell |
| 5 | Same as Level 4 plus full-surface skim coat or primer-surfacer | 3 coats + skim | Critical-lighting walls, ceilings, gloss/dark paint | No tool marks or ridges; uniform porosity required | Latex drywall primer or primer-surfacer; all sheens including gloss and semi-gloss |
How drywall finishing is actually performed
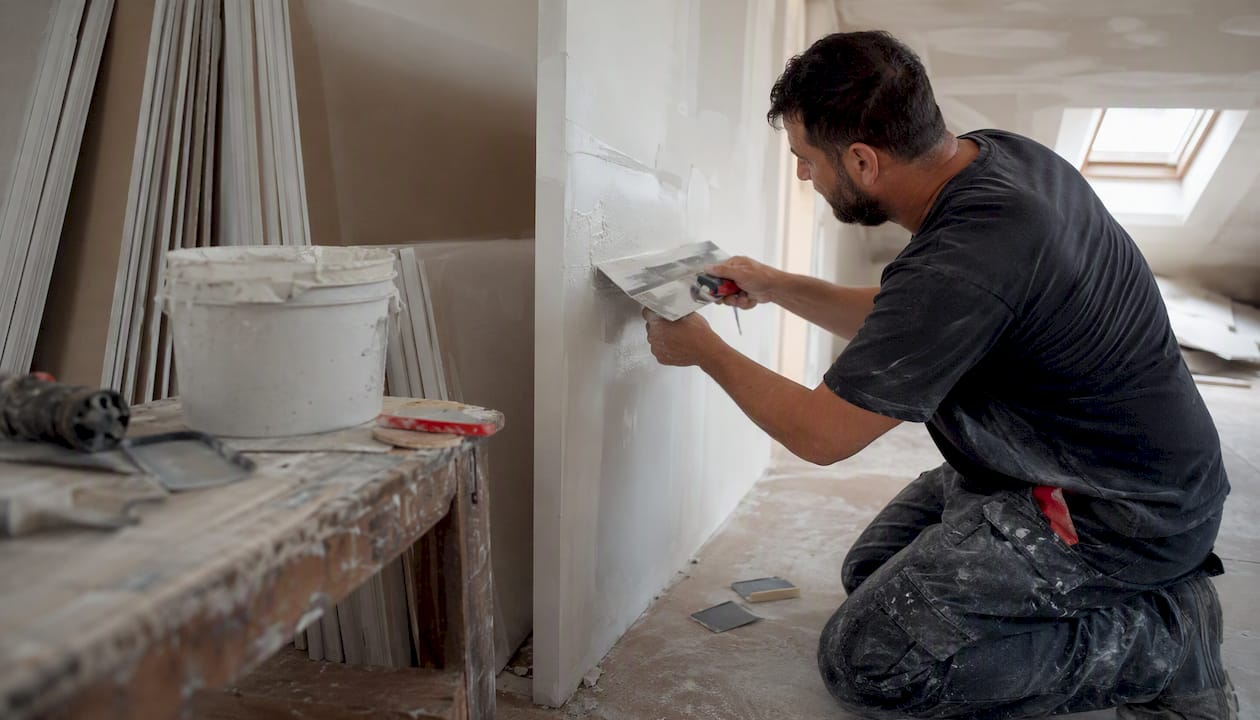
The finishing workflow follows a clear sequence: taping, filling, finishing coats, sanding and feathering, and an optional skim coat or primer-surfacer. Each stage builds on the last, and skipping or rushing any one of them shows up in the final painted surface.
Taping
The finisher embeds paper or fibreglass mesh tape into a bed of joint compound over every joint and interior angle. Paper tape is the professional standard for flat joints because it resists cracking; fibreglass mesh is common for repairs. The tape is immediately wiped flat with a joint knife to remove air pockets and excess compound.
Fill coats and finishing coats
After the tape coat dries, successive fill coats are applied with progressively wider knives, feathering the compound out to blend with the board face. Each coat must dry fully before the next is applied. Setting-type joint compounds chemically harden and allow faster recoat times than air-drying all-purpose compounds, which makes them useful for early coats on tight schedules. All-purpose compounds are preferred for final coats because they sand more easily and produce a smoother feathered edge.
Pro Tip: Watch for screw heads that are not recessed flush with the board face before any compound is applied. A finisher should run a broad knife across the surface to catch protruding fasteners and set them properly. A screw that is proud of the surface will telegraph through every coat and show under paint.
Sanding and skim coats
Between coats and after the final coat, the finisher sands or poles the surface to remove ridges and feather transitions. For Level 5, a skim coat of compound is trowel-applied across the entire surface. Professional finishers often back-roll trowel-applied skim coats or apply a high-binder primer-surfacer to equalise porosity and prevent flashing under low-VOC or high-gloss paints. The goal is a surface where the compound and the board face paper absorb paint at the same rate, so joints do not photograph through the finish.
One thing worth knowing: a higher finish level cannot correct poor framing or board installation. Bowed studs, improperly fastened boards, and misaligned corners create waves and ridges that compound alone cannot hide. The quality of the substrate is the foundation of the finish.
How do you choose the right finish level for each room?
Match the finish level to the paint sheen and the lighting conditions in the room. Flat or matte paint under standard overhead lighting tolerates Level 4. High-sheen paint, dark colours, or a room with windows that cast raking light across the walls requires Level 5. Getting this decision right before work starts saves you from expensive remediation after paint goes on.
A practical decision checklist:
- Identify the final decoration. Will the wall be painted, textured, or covered with wallcovering? Heavy wallcovering can mask Level 3; smooth gloss paint needs Level 5.
- Assess the lighting. Walk the room at different times of day. If sunlight or artificial light grazes the wall at a low angle, treat it as a critical-lighting condition.
- Choose your paint sheen. Flat and matte are forgiving. Eggshell is borderline. Satin, semi-gloss, and gloss all demand Level 5.
- Consider the room’s visibility and scrutiny. A main-floor hallway or open-concept living area gets more scrutiny than a utility room or basement storage space.
- Set your budget and timeline. Level 5 adds at least one full additional stage of work. For a large open-plan ceiling, that cost is real.
Room-by-room guidance
Ceilings are the most unforgiving surface in the house because light from windows and pot lights rakes across them. Level 4 is the minimum; Level 5 is the right call for any ceiling in a room with significant natural side-lighting.
Living rooms and bedrooms with flat or eggshell paint are well served by Level 4. If you are planning a feature wall with a dark or saturated colour, move that wall to Level 5.
Hallways often have long uninterrupted wall runs that catch light from end windows. Level 4 with a flat paint is usually fine; if the hallway has a sidelight or transom, treat it as critical lighting.
Kitchens under upper cabinets rarely need Level 5 because the cabinet soffits break up the wall plane. Open walls above counters that receive direct window light are a different matter.
Basements used as living space typically call for Level 4. Utility areas and mechanical rooms can stop at Level 2. For basement renovation projects that include a finished rec room or home office, Level 4 is the standard starting point.
Garages are Level 2 territory unless you are finishing a garage conversion to living space.
Pro Tip: Before committing to a finish level for the whole room, ask your contractor to prepare a small mock-up panel in the actual space using the planned lighting. View it at different times of day and under the same bulb type you plan to install. What looks acceptable under construction lighting can look very different under a warm LED pot light at night.
The GA-214 standard specifically recommends on-site mock-ups so that the client and contractor agree on the appearance of Level 4 or Level 5 in the room’s actual lighting before full rollout. This one step prevents most finish disputes.
What does each finish level cost and how long does it take?
Cost and time rise with each level because more compound coats, more sanding passes, and a possible skim coat all add labour and material. Level 5 carries a meaningful premium over Level 4, and that gap widens on large open surfaces like vaulted ceilings or open-concept main floors.
The main cost drivers for any finishing project:
- Labour rates: finishing is skilled work; rates in Durham Region reflect the local trades market and vary by season and contractor availability.
- Square metres of surface: more surface area means more compound, more sanding, and more time.
- Ceiling versus wall: ceilings cost more per square metre because of the physical demands and the higher scrutiny they receive.
- Number of cuts, angles, and returns: complex rooms with coffered ceilings, bulkheads, or many inside and outside corners take longer to tape and finish than simple rectangular rooms.
- Framing and board condition: if studs are bowed or boards are not properly fastened, the finisher must address those issues before compound work begins, adding time and cost.
- Environmental controls: drywall compound requires stable temperature and humidity to cure properly. In Canadian winters, heating a space to maintain the right conditions adds to project overhead.
- Material choice: setting-type compounds shorten elapsed drying time and can compress a multi-day schedule, but they cost more per unit than all-purpose compounds.
On scheduling: a standard Level 4 finish on a typical room typically spans several days when you account for drying time between coats. Level 5 adds at least one full day for the skim coat and an additional sanding pass. Using quick-setting compounds for early coats and reserving topping compounds for final feathering is a common professional approach to keeping the schedule tight without sacrificing surface quality.
A note on regional pricing in Canada: labour and material costs vary considerably across the country, and even within Ontario. Homeowners in Durham Region, Bowmanville, and Clarington should request itemised quotes from local contractors rather than relying on national averages. The variables above, particularly ceiling complexity and environmental controls in winter months, can shift the final number significantly.
How to brief a contractor on the finish level you want
The most common source of finish disputes is a vague scope. Specifying a level by number, agreeing on a mock-up, and tying payment milestones to inspections removes most of the ambiguity before work starts.
A short sample specification you can include in an estimate request:
Questions to ask every contractor before signing:
- How many coats of compound do you apply over flat joints and over fastener heads at the specified level?
- What compounds do you use for embedding, fill coats, and finishing coats?
- Is priming included in your scope, or is it the painter’s responsibility?
- How do you handle the mock-up process, and what constitutes approval?
- What is your touch-up and warranty policy if joint banding appears after painting?
- How do you price repairs to framing or board installation defects discovered during finishing?
- What environmental controls do you put in place during cold or humid weather?
A sample contract clause worth requesting:
Photographs of the approved mock-up, signed and dated by both parties, are the single most effective way to prevent disputes at the end of a project. Ask your contractor to take them and share copies with you before work proceeds.
How professional renovators in Durham Region apply these standards
Local renovators working in Durham Region, Bowmanville, and Clarington follow the same GA-214 framework, but the Canadian climate adds a practical layer to the process. Humidity control is not optional here: compound applied in a cold, damp space during a November or February renovation can take significantly longer to cure, and inadequate drying between coats leads to cracking and poor adhesion.
LA Rocks Renovations begins every finishing project with a site assessment. That means checking framing for bowed studs and confirming that all boards are properly fastened before any compound touches the wall. Protruding screws and uneven framing are corrected at this stage because no amount of compound work will hide a structural irregularity once paint goes on.
The typical project sequence runs: site assessment and framing check, mock-up panel in the target room under the planned lighting, client approval of the mock-up, full finishing to the agreed level, priming, and then handoff to the painting crew. For Level 5 projects, the primer-surfacer or skim coat is included in the finishing scope, not left as an afterthought for the painter. Coordinating the finisher and the interior painting crew under one project plan avoids the common problem of a painter discovering inadequate prep only after the first coat of paint reveals joint banding.
Seasonal scheduling matters too. In Durham Region, the best windows for finishing work are late spring through early fall, when ambient humidity is stable and spaces can be ventilated without introducing cold air. Winter projects are entirely manageable with proper temporary heating and dehumidification, but those controls need to be factored into the project cost and timeline from the start.
The drywall finishing work LA Rocks Renovations performs covers the full range from Level 2 utility finishes in garages and mechanical rooms through Level 5 for feature walls and critical-lighting ceilings. Mock-ups are a standard part of the process, not an add-on.
Key takeaways
Specifying the correct drywall finish level before work begins is the single most effective way to avoid costly remediation after paint is applied.
| Point | Details |
|---|---|
| Level 4 for most rooms | Three coats over fasteners, smooth surface, suits flat and eggshell paint under normal lighting. |
| Level 5 for critical conditions | Adds a full-surface skim coat; required for gloss, semi-gloss, dark colours, or raking light. |
| Always request a mock-up | View the approved panel in the room’s actual lighting before full application begins. |
| Check framing and boards first | Bowed studs and improperly fastened boards cannot be corrected by compound work alone. |
| LA Rocks Renovations for Durham Region | LA Rocks Renovations handles Level 0–5 finishing, mock-ups, and primer coordination across Durham Region. |
The finish level conversation most homeowners skip
Most homeowners ask about paint colours long before they think about finish levels. That order of operations is backwards. The paint sheen you choose determines the finish level you need, and the finish level determines a meaningful portion of your project budget. Getting that conversation right at the estimate stage, rather than after the painter calls to say the joints are showing, is where the real money is saved.
There is also a tendency to treat Level 5 as a luxury upgrade rather than a technical requirement. It is not optional when you are applying semi-gloss paint to a ceiling with pot lights, or a deep charcoal to a feature wall in a room with a large west-facing window. The physics of raking light are unforgiving, and no amount of additional paint coats will hide a surface that was not prepared to the right standard.
The mock-up recommendation in GA-214 is worth taking seriously. A 600 mm × 900 mm panel costs very little in time and material, and it gives both the homeowner and the contractor a shared reference point that removes ambiguity from the acceptance conversation. Contractors who resist mock-ups are worth questioning; contractors who propose them without being asked are worth keeping.
One practical note on ceilings: they are consistently underspecified. Homeowners budget for Level 4 walls and Level 4 ceilings, then discover that the pot lights in the living room turn every joint into a shadow line. If the room has any directional lighting, the ceiling warrants serious consideration for Level 5, and that cost should be in the estimate from day one.
Professional drywall finishing in Durham Region from LA Rocks Renovations
LA Rocks Renovations offers drywall finishing across the full Level 0–5 range for homeowners in Bowmanville, Clarington, and Durham Region. Every project includes a pre-job site assessment, a mock-up panel for client approval, and full coordination with the painting crew so that primer and paint sheen are matched to the agreed finish level from the start.

Whether you are finishing a new basement, refreshing a main-floor living area, or tackling a feature wall that needs Level 5 prep for a dark or high-gloss paint, the team handles the full scope: framing checks, compound work, skim coats, and interior painting coordination. For basement renovation projects, the finish level is confirmed in the pre-job meeting so the budget reflects the actual scope before work begins.
To request a quote or a mock-up estimate, contact LA Rocks Renovations with your room dimensions, the finish level you have in mind, and whether a mock-up is part of your request. The team serves Durham Region, Bowmanville, Clarington, and surrounding communities.
Authoritative references and further reading
The standards and trade documents below are the primary sources for the specifications discussed in this article. Saving or printing the relevant pages before your contractor meeting gives you a concrete reference point for scope discussions.
- GA-214 “Recommended Levels of Finish” (Gypsum Association): The definitive industry standard for Levels 0–5. This is the document to cite when writing a finish specification or reviewing a contractor’s scope. The Gypsum Association (gypsum.org) publishes updates periodically; confirm you are referencing the current edition.
- GA-214-2021 (American Gypsum): The 2021 edition of the standard with updated language on Level 4 and Level 5 requirements, including guidance on paint sheen compatibility.
- CGC/USG Finishing Drywall Systems — Canadian Construction Handbook, Chapter 5: The Canadian edition of the USG installation and finishing guide. Particularly useful for compound selection, setting-type versus all-purpose products, and the finishing level matrix with product recommendations.
- Drywall Technical Brief (Dunn-Edwards): Practical guidance on primer-surfacer selection, skim coat technique, and how surface porosity affects paint performance under gloss and semi-gloss finishes.
- Flawless Drywall Finish (Fine Homebuilding): A trade-level walkthrough of pre-finish checks, framing correction, and the compound application sequence that professionals use to achieve Level 4 and Level 5 results.
- Painting and Decorating Contractors of America (pcapainted.org) and the Drywall Finishing Council (dwfc.org): Both organisations publish supplementary guidance on finish standards and paint system compatibility. Their resources are useful when coordinating between a finishing contractor and a painting contractor on the same project.
When writing a specification or preparing for a contractor discussion, print the GA-214 level definitions and the finishing level matrix from the CGC/USG Canadian handbook. Having both documents on site during the mock-up review gives you and your contractor a shared reference and reduces the chance of a scope misunderstanding.