


Aging In Place Bathroom: Your Practical Canadian Guide
Request Your Free Estimate Today
GET A FREE ESTIMATE →A well-planned aging in place bathroom comes down to five non-negotiables: a curbless shower, properly anchored grab bars, comfort-height fixtures, non-slip flooring rated DCOF 0.60 or higher, and layered lighting that eliminates shadowed corners. Get those five right and you address the vast majority of fall risk in the home’s most dangerous room. Falls affect a significant portion of adults aged 65 and older each year, and the bathroom is where most of them happen.
Before you call a contractor, run through these highest-impact upgrades first:
-
Install a curbless or low-threshold shower with a linear drain
-
Anchor grab bars into structural blocking at 33–36 inches from the floor
-
Replace standard toilet with a comfort-height model (17–19 inches seat height)
-
Swap flooring for a DCOF 0.60+ rated tile or waterproof vinyl
-
Add layered lighting: ambient, task, and a night-light path
-
Fit a handheld showerhead on a slide bar with thermostatic anti-scald control
LA Rocks Renovations handles every one of these upgrades for Durham Region homeowners, from a targeted safety refresh to a full accessible bathroom remodel.
Table of Contents
-
Layout rules and dimensions to confirm before you get quotes
-
LA Rocks Renovations: accessible bathroom renovations in Durham Region
What every aging-in-place bathroom must include
Accessible bathroom design is not about adding equipment after the fact. The features that genuinely reduce fall risk need to be planned into the structure from the start, because retrofitting them later costs significantly more.
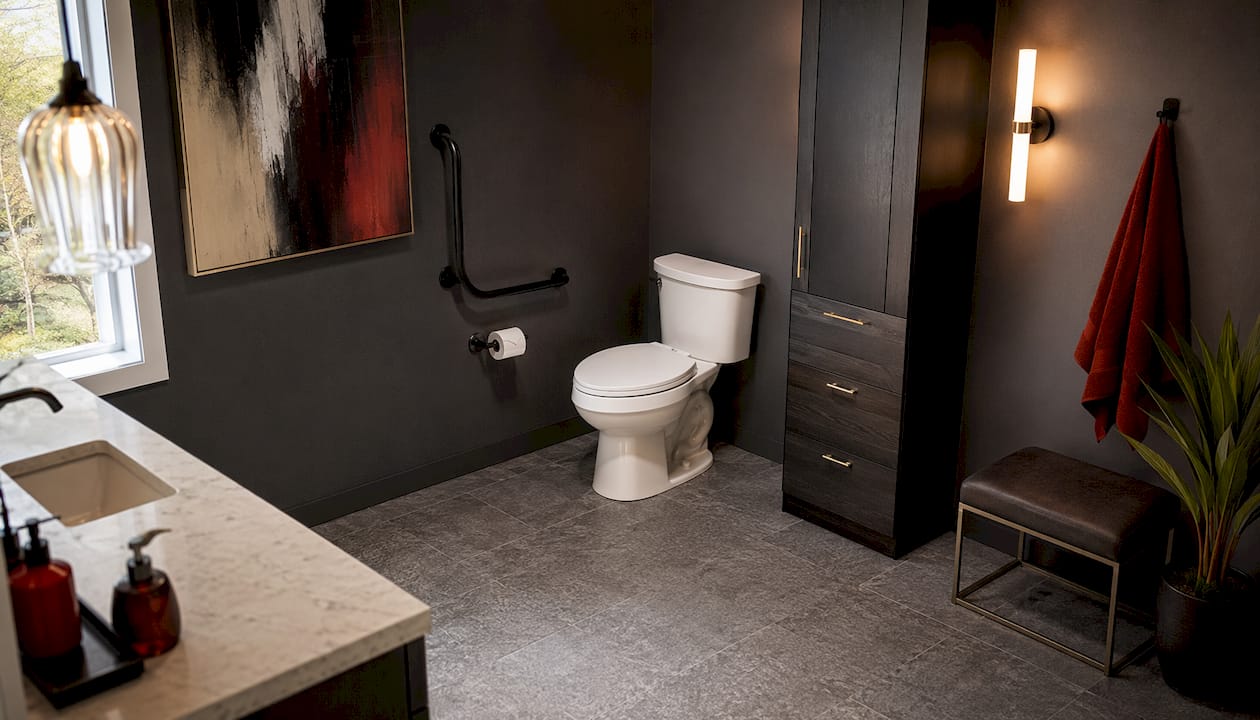
Grab bars
Grab bars are only as safe as what they are anchored into. Structural blocking installed during a remodel — typically 2x10 or 2x6 lumber set horizontally at an appropriate height — is the correct method. Bars anchored to drywall alone will pull free under load. Plan blocking at the toilet, shower entry, and along the shower wall. A 1.25–1.5 inch diameter bar in a satin or brushed finish blends with any modern design.
Comfort-height toilet and transfer space
Comfort-height toilets sit somewhat higher than standard models from floor to seat, compared with 14–15 inches for a standard model. That extra height makes standing and sitting far easier for anyone with reduced hip or knee mobility. Allow sufficient clear side space for a transfer from a wheelchair or walker.
Vanity and door considerations include space and accessibility
A roll-under vanity with knee clearance suitable for a wheelchair user or someone who needs to sit while grooming is recommended. An offset drain keeps plumbing out of the knee space. For doorways, a finished clear opening wide enough to comfortably allow walkers and wheelchairs is the practical minimum. Outward-swinging or pocket doors are worth the extra cost: an inward-swinging door can trap a person who has fallen against it.
Choosing the right interior door swing is one of the most overlooked decisions in an accessible bathroom renovation, yet it directly affects how quickly help can reach someone in an emergency.
Emergency alert systems
A well-designed accessible bathroom considers both the primary user and a potential caregiver. Mount an emergency pull cord or push-button alert within reach of the shower floor and beside the toilet, at a height of 6 inches from the floor. Monitored wireless alert devices are a practical alternative where hardwiring is not feasible.
Pro Tip: Install blocking in every wall during the renovation, even where you do not plan bars today. Future-proofing costs almost nothing at rough-in stage and avoids a costly wall tear-out later.
Layout rules and dimensions to confirm before you get quotes
Comparable quotes require a shared scope. Bring these numbers to every contractor conversation so you are comparing the same project.
| Dimension | Minimum | What it enables |
|---|---|---|
| Door clear opening | 34 inches | Walker and wheelchair access |
| Shower footprint (seat + transfer) | 36 × 60 inches | Seated showering with transfer space |
| Shower footprint (roll-in wheelchair) | 60 × 60 inches | Full wheelchair roll-in |
| Toilet side clearance | 17–19 inches | Lateral transfer from wheelchair |
| Roll-under vanity knee space | 27 inches high × 30 inches wide | Seated grooming |
| Turning radius (wheelchair) | 60-inch diameter | Independent manoeuvring |
A few practical notes before you measure:
-
Measure the finished clear opening of the door, not the frame width. A 36-inch frame typically yields a 34-inch clear opening after the door and hardware.
-
For a single-user bathroom, a 36 × 60 inch shower is workable. If caregiver assistance is likely, plan for 60 × 60 inches.
-
Small bathrooms in older Durham Region homes often need a wall moved to achieve a 60-inch turning radius. Confirm this with your contractor before finalising the budget.
The small bathroom renovation strategies used in compact Bowmanville homes often apply directly here: reconfiguring the door swing and relocating a vanity can free up the turning radius without touching load-bearing walls.
Designing the shower — the highest-risk zone
The shower is where most bathroom falls occur, and grab bars alone are not enough. Drainage, lighting, tile traction, and seating placement each carry equal weight.
Drainage: linear over centre
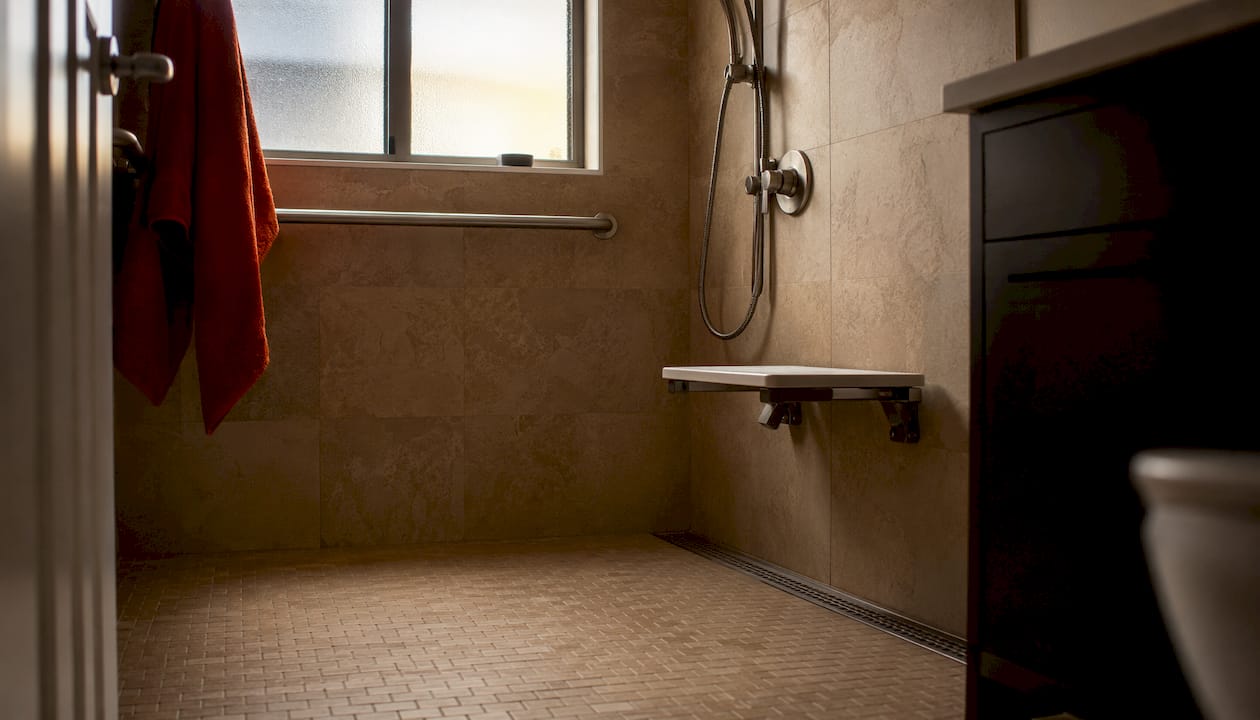
Linear drains are the professional choice for curbless showers because they permit a single consistent slope across the entire floor. A centre drain requires four slopes converging at a point, creating a subtle bowl that destabilises a shower chair or walker. A linear drain placed at the back or side wall keeps the floor flat and predictable underfoot.
Tile traction: the DCOF standard
Many homeowners assume matte tiles are slip-resistant. They are not always. Professionals specify a Dynamic Coefficient of Friction (DCOF) of 0.60 or higher for senior-safe wet shower floors, well above the industry minimum of 0.42. Ask your tile supplier for the DCOF rating on the spec sheet before purchasing.
Seating
A fold-down teak or composite bench works well in smaller showers; a built-in tiled bench suits larger footprints. Either way, position the seat at 17–19 inches from the floor and within reach of the grab bar and handheld showerhead. The seat should sit beside, not directly under, the showerhead spray.
Fittings
-
Thermostatic anti-scald valve: set to a maximum of 49°C (120°F) to prevent burns for users with reduced sensation
-
Handheld showerhead on a slide bar: allows use from seated or standing position
-
Controls mounted 48 inches or lower and reachable from outside the spray zone
Pro Tip: Specify a handheld showerhead with a pause button. It lets a seated bather control water flow without reaching across the shower, which reduces the risk of an off-balance lunge.
Lighting, flooring, and ventilation that reduce risk
Layered lighting
Older adults require substantially more light than younger ones for the same level of detail visibility. A single ceiling fixture leaves the shower bench in shadow. The correct approach is three layers: ambient (general ceiling), task (vanity mirror), and path (night-light at floor level or motion-activated). Contractors recommend dedicated IP65-rated recessed LEDs directly over the shower bench to eliminate the shadowed corners that increase fall risk. Dimmers on the ambient circuit let you adjust for daytime and night navigation.
Flooring choices
For the main bathroom floor, DCOF 0.42 is the minimum; 0.60+ is the target for any wet zone. Practical options include:
-
Porcelain tile with a textured or grip surface: durable, easy to clean, available in large formats
-
Textured natural stone: attractive but requires sealing; confirm DCOF before specifying
-
Waterproof luxury vinyl plank: softer underfoot, warm in winter, and available in DCOF-rated finishes suited to wet areas
Flush transitions between flooring zones eliminate trip hazards at doorways. If the existing bathroom floor is higher than the hallway, a tapered reducer or a full subfloor build-up to match levels is the right fix.
Ventilation
A bathroom exhaust fan rated for the room’s volume (typically 1 CFM per square foot) prevents moisture buildup that makes tile surfaces slippery and promotes mould. Quiet models rated at 1.0 sone or lower are worth the upgrade in a bathroom used by someone who is light-sleeping or sensitive to noise. A humidity-sensing fan that activates automatically removes the reliance on a user remembering to switch it on.
Pro Tip: Position the exhaust fan over the shower, not the toilet, to pull steam out at the source. Most older bathrooms have the fan in the wrong location.
How to keep the look high-end without a clinical feel
The stigma around accessible bathroom design has largely faded. Decorative grab bars and curbless showers are now design statements that support resale value when integrated thoughtfully into the finish palette.
-
Match grab bar finishes to fixtures: brushed gold, matte black, and polished chrome grab bars are widely available and read as intentional design choices, not medical equipment
-
Use large-format wall tile with smaller mosaic floor tile: the visual continuity reads as high-end while the smaller mosaic units provide the grout lines needed for traction
-
Concealed plumbing and wall-hung toilets: raise the toilet to the exact height needed and keep the floor clear for easier cleaning
-
Colour contrast for safety: a seat or grab bar in a contrasting tone helps users with low vision locate fixtures quickly, without looking institutional
-
Consistent hardware throughout: lever-style faucets, D-pull cabinet hardware, and rocker light switches all reduce grip demands and look cohesive
Modern bathroom design trends in Bowmanville show that accessible features and contemporary aesthetics are not in conflict. The right contractor integrates them from the design stage rather than bolting on safety features at the end.
Pro Tip: Ask your contractor for before-and-after photos of accessible bathroom projects specifically. A portfolio that only shows standard renovations tells you little about how they handle blocking, linear drains, and accessible layout.
Typical Canadian costs and realistic timelines
Cost ranges vary by scope, existing conditions, and regional labour rates. The table below reflects general Canadian market ranges; Durham Region pricing is generally consistent with these ranges.
| Scope | Typical cost range (CAD) | Typical timeline |
|---|---|---|
| Safety refresh (grab bars, non-slip mat, handheld showerhead) | $500–$3,000 | 1–2 days |
| Mid-range retrofit (new flooring, comfort-height toilet, blocking, lighting) | $8,000–$18,000 | 1–2 weeks |
| Full curbless remodel (new shower, linear drain, tile, fixtures, blocking) | $18,000–$35,000+ | 3–5 weeks |
| Full gut and reconfigure (wall moves, plumbing relocation, full accessible layout) | $35,000–$60,000+ | 6–10 weeks |
A basic safety package of grab bars, a non-slip mat, and a shower chair addresses most immediate risk at the lower end of that range. A full curbless remodel costs more, but it is a one-time investment that avoids repeated partial upgrades.
What drives cost up:
-
Moving plumbing for a linear drain or relocated toilet
-
Structural work to widen a doorway or remove a wall
-
Installing blocking where none exists (far cheaper to do during a full remodel)
-
Premium tile, fixtures, or custom cabinetry
Permits are required in most Ontario municipalities for plumbing and electrical work. Budget time for permit applications and inspections, especially if the project involves relocating a drain or adding a dedicated circuit for a heated floor.
Pro Tip: Request a detailed project timeline in writing before signing any contract. A contractor who cannot give you a week-by-week schedule is a contractor who has not fully planned your project.
How to plan the project and hire the right contractor
Before the first call
Gather these before contacting any contractor:
-
Measurements: room dimensions, door width (finished clear opening), shower footprint, and ceiling height
-
Photos: existing layout, current fixtures, and any areas of concern (soft subfloor, mould, low ceiling)
-
Care needs: whether a caregiver will assist, whether a wheelchair or walker is in use now or anticipated
-
Preferred finishes: tile style, fixture finish, and any design references
Questions to ask every contractor
-
Do you install structural blocking during the renovation, and what lumber do you use?
-
How do you waterproof a curbless shower — what membrane system and how many layers?
-
Can you specify tiles by DCOF rating, and do you have experience with linear drain installation?
-
Are you covered by WSIB, and can you provide proof of liability insurance?
-
Will you pull the required permits for plumbing and electrical work?
-
Can you provide local references and before-and-after photos of accessible bathroom projects?
Red flags to walk away from
-
Grab bars anchored to drywall with no mention of blocking
-
Vague estimates with no itemised scope of work
-
Cash-only payment requests or pressure to skip permits
-
No WSIB coverage or inability to provide insurance documentation
-
Contractors who dismiss DCOF specifications or have never installed a linear drain
Reviewing common renovation mistakes before your first contractor meeting gives you a clear picture of what to watch for and what questions to press on.
Key takeaways
A safe, stylish aging-in-place bathroom requires structural blocking, a DCOF 0.60+ rated floor, a curbless shower with a linear drain, comfort-height fixtures, and layered lighting — planned together from the start, not added one piece at a time.
| Point | Details |
|---|---|
| Blocking is non-negotiable | Install 2×10 or 2×6 blocking at 33–36 inches during the remodel; retrofitting later costs significantly more. |
| DCOF 0.60+ for wet floors | Matte tile is not automatically slip-resistant; always confirm the DCOF rating before purchasing shower floor tile. |
| Linear drains over centre drains | A single-slope floor with a linear drain keeps shower chairs and walkers stable on a flat surface. |
| Budget realistically | A full curbless remodel in Canada typically runs $18,000–$35,000+; a safety refresh starts around $500–$3,000. |
| LA Rocks Renovations for Durham Region | LA Rocks Renovations handles accessible bathroom renovations in Bowmanville, Clarington, and across Durham Region, from safety retrofits to full remodels. |
Pro Tip: Before requesting quotes, use the complete bathroom renovation checklist to gather your measurements and finish preferences. Contractors give more accurate estimates when the scope is clearly defined from the first conversation.
A contractor’s perspective on what homeowners get wrong
The single most common field issue in accessible bathroom renovations is missing blocking. Homeowners often arrive at a project having already purchased grab bars, only to discover the walls have no structural backing. At that point, the choice is either anchoring bars into studs only (which limits placement) or opening the walls to install blocking after the fact. Both options cost more than doing it right the first time.
The second issue is drainage. A curbless shower sounds straightforward, but the slope and drain type determine whether the floor actually performs safely. A centre drain in a curbless shower creates a subtle bowl that most people do not notice until they place a shower chair on it and feel it rock. A linear drain eliminates that problem entirely, but it requires planning the slope from the beginning of the tile layout, not as an afterthought.
LA Rocks Renovations approaches every accessible bathroom project with a site assessment that confirms blocking locations, subfloor condition, and drain placement before any tile or fixture is ordered. The team documents the project with before-and-after photography and provides a written timeline and payment schedule before work begins. For Durham Region homeowners, that level of planning is what separates a renovation that lasts from one that needs to be redone.
LA Rocks Renovations: accessible bathroom renovations in Durham Region
For homeowners in Bowmanville, Clarington, Newcastle, and across Durham Region, LA Rocks Renovations delivers accessible bathroom renovations that are built to last and designed to look the part. The team handles structural blocking, full waterproofing systems, linear drain installation, DCOF-rated tile and flooring, fixture selection, and coordination of plumbing and electrical trades.
A site visit covers room measurements, an accessibility assessment, a preliminary cost range, and a realistic project timeline. You leave the first meeting with a clear picture of scope and next steps, not a vague ballpark and a handshake. For flooring, the team also supplies and installs waterproof vinyl plank suited to wet bathroom environments, a practical and cost-effective alternative to tile in certain layouts.
Ready to plan your accessible bathroom renovation? Request a quote from LA Rocks Renovations and get a written estimate with a full project scope.
Useful resources and Canadian contacts
-
Universal Design Project — Chapter 6: Bathrooms: universaldesign.org — dimension standards and layout guidance for accessible bathrooms
-
ADA Standards for Accessible Design — Chapter 6 (Bathing Rooms): access-board.gov — the U.S. federal standard widely referenced by Canadian designers and contractors for accessible bathroom dimensions
-
AARP — 14 Bathroom Updates for Aging in Place: aarp.org — practical feature checklist with product guidance
-
National Institute on Aging — Aging in Place: nia.nih.gov — overview of home modification priorities for older adults
-
Ontario Building Code permits: Contact your local municipality (Clarington, Oshawa, Whitby, Ajax, Pickering) to confirm permit requirements for plumbing relocation, electrical circuits, and structural modifications. Permits are typically required for drain relocation, new circuits, and any structural wall work.
-
Interior door selection for accessible bathrooms: One Day Doors & Closets — interior door value guide — guidance on door types that affect both accessibility and home value