


Window Trim Ideas for Homeowners: Styles & How-to
Request Your Free Estimate Today
GET A FREE ESTIMATE →Pick a style family that matches your home’s architecture, then either order materials this week or book a contractor for a firm quote. That single decision, made early, saves most homeowners from the two costliest trim mistakes: buying a profile that clashes with the house, and starting a job before knowing whether it’s actually a weekend project.
- Modern or ranch-style homes: go with a flat, low-profile picture-frame casing, usually moderately wide.
- Staining instead of painting: choose oak or another tight-grain hardwood, never MDF.
- DIY vs pro cue: if every window opening in the room is square and the wall is drywall (not plaster or stucco), a picture-frame casing is a realistic weekend DIY project. Anything layered, arched, or touching exterior siding is pro territory.
The single biggest trim mistake homeowners make isn’t picking the “wrong” style. It’s picking a profile that has nothing to do with the rest of the house. A heavy colonial casing on a 1990s ranch bungalow looks like it was bolted on as an afterthought, because it was.
Table of Contents
- 15 window trim ideas to steal for your next project
- What do casing, stool, apron, and jamb actually mean?
- Which trim material and finish should you choose?
- How does exterior trim differ from interior trim?
- How do you choose the right trim profile for your home?
- Can you install window trim yourself?
- What does window trim cost, and when should you hire a pro?
- How LA Rocks Renovations approaches window trim projects
- Key takeaways: pick, prepare, proceed
- A note from LA Rocks Renovations on window trim
- Ready to move from ideas to installation?
- Frequently asked questions about window trim ideas
- Sources
15 window trim ideas to steal for your next project
Trim is one of the few renovation details that changes a room’s entire character for a relatively small material cost. Below are 15 style directions worth considering, organized by where they shine and how hard they are to pull off yourself.
- Craftsman casing. Wide, flat boards with a simple head cap. Best for bungalows and Arts and Crafts style homes. Works in poplar, oak, or engineered wood. DIY-friendly if you’re comfortable with a miter saw.
- Colonial casing. Ornate, layered profile with rounded detailing. Best for traditional or heritage homes. Typically pine or poplar, painted. Pro recommended, since the layered cuts need tight joinery.
- Modern/ranch flat trim. Clean, unadorned boards with square edges. Best for contemporary and mid-century homes, according to Pella’s style guide, which lists ranch alongside craftsman and colonial as the three most requested profiles. Works well in MDF or PVC. DIY-friendly.
- Picture-frame casing. Four mitered boards, no stool or apron. Best for compact rooms or a minimalist look. Any paintable wood species works. DIY-friendly and one of the fastest installs going.
- Farmhouse chunky trim. Wide boards with visible grain left exposed or lightly stained. Best for rustic or transitional kitchens. Requires oak or another attractive hardwood since the grain is the point. Pro recommended for stain-grade joinery.
- Fluted casing. Vertical grooves milled into the face of the board, often paired with rosette corner blocks. Best for period homes or formal living rooms. Sold pre-milled in pine or poplar. Pro recommended.
- Layered casing. A base casing with a secondary, narrower trim applied on top for depth. Best for homes wanting a custom, higher-end look without full millwork. Works in paintable wood or MDF. Pro recommended.
- Arched or radius casing. Curved top trim following an arched window opening. Best for Mediterranean, Tudor, or custom architectural windows. Requires flexible moulding or custom-milled wood. Pro recommended, no exceptions here.
- Black-contrast trim. Standard casing profile painted matte or satin black instead of white. Best for modern farmhouse and industrial-style rooms. Any smooth paintable material works. DIY-friendly, though cutting in clean lines against the wall colour takes patience.
- Tile surround trim. Tile or stone bordering the window opening instead of wood. Best for bathrooms and kitchens near sinks. Requires waterproof backer board and tile. Pro recommended for waterproofing alone.
- Drywall return. No visible casing at all. The drywall is finished with a smooth radius edge right into the window jamb. Best for ultra-minimalist or modern builds. Requires no trim material, just drywall skill. Pro recommended, since the corner bead work has to be flawless.
- Minimal picture-frame with reveal. A thin picture-frame casing set back slightly from the drywall edge, creating a shadow line. Best for modern homes wanting texture without bulk. MDF or paint-grade wood. Pro recommended for the precise reveal spacing.
- Wide-headed craftsman. Standard craftsman side casing paired with an oversized head casing (5 to 7 inches). Best for taller ceilings that can absorb the extra visual weight. Poplar or MDF. DIY-friendly with careful measuring.
- Slim mid-century trim. Narrow, 2-inch flat casing with almost no reveal. Best for mid-century modern homes with lower ceilings, where bulky trim overwhelms the room. PVC or paint-grade wood. DIY-friendly.
- Reclaimed wood trim. Salvaged barn board or weathered lumber used as casing. Best for cottages, cabins, and farmhouse interiors. Requires sourcing and sometimes de-nailing and planing old material. Pro recommended unless you already have woodworking experience.
Pro Tip: For black-contrast trim, use a satin or semi-gloss finish rather than true matte. Matte black shows every fingerprint and dust particle near a window, where hands and pets tend to congregate.
Pro Tip: If you’re drawn to a drywall return but aren’t ready for that level of finishing work, a slim picture-frame casing painted the exact wall colour gets you 80 percent of the same minimalist effect for a fraction of the labour.
What do casing, stool, apron, and jamb actually mean?
Before choosing a style, it helps to know the five or six parts a contractor will actually be talking about, since “window trim” is really a system of pieces working together.
- Jamb: the flat wood surface lining the inside of the window opening, between the wall and the window sash itself.
- Casing: the visible decorative frame around the window, covering the gap between the jamb and the drywall.
- Head casing: the horizontal casing piece across the top of the window, sometimes wider or more decorative than the side casings.
- Stool: the horizontal shelf-like piece at the bottom of the window that sits on top of the sill and extends past the casing on both sides. This is what most people call the “windowsill” from inside the house.
- Apron: the flat trim piece mounted directly below the stool, against the wall.
- Sill: the exterior-facing sloped piece under the window, distinct from the interior stool.
There are two standard ways to case a window, and the choice affects both the look and the difficulty level. Picture-frame casing wraps all four sides with mitered corners and skips the stool and apron entirely. It reads as clean and modern, and it’s genuinely the easier build for a first-time DIYer because there’s no stool to notch around window hardware. Stool-and-apron casing adds that horizontal shelf at the bottom with an apron underneath, which is more traditional, more substantial-looking, and slightly more work since the stool has to be scribed to fit the wall and window frame precisely, according to one detailed comparison of the two methods.
If you’re picturing this in your head and still not sure which parts are which, sketch a quick diagram of your own window opening and label each piece before you shop for material. It sounds basic, but it’s the fastest way to communicate your project accurately to a lumber yard or a contractor.
Which trim material and finish should you choose?
Material choice comes down almost entirely to one question: are you painting it or staining it? Get that answer first, and the rest of the decision narrows fast.
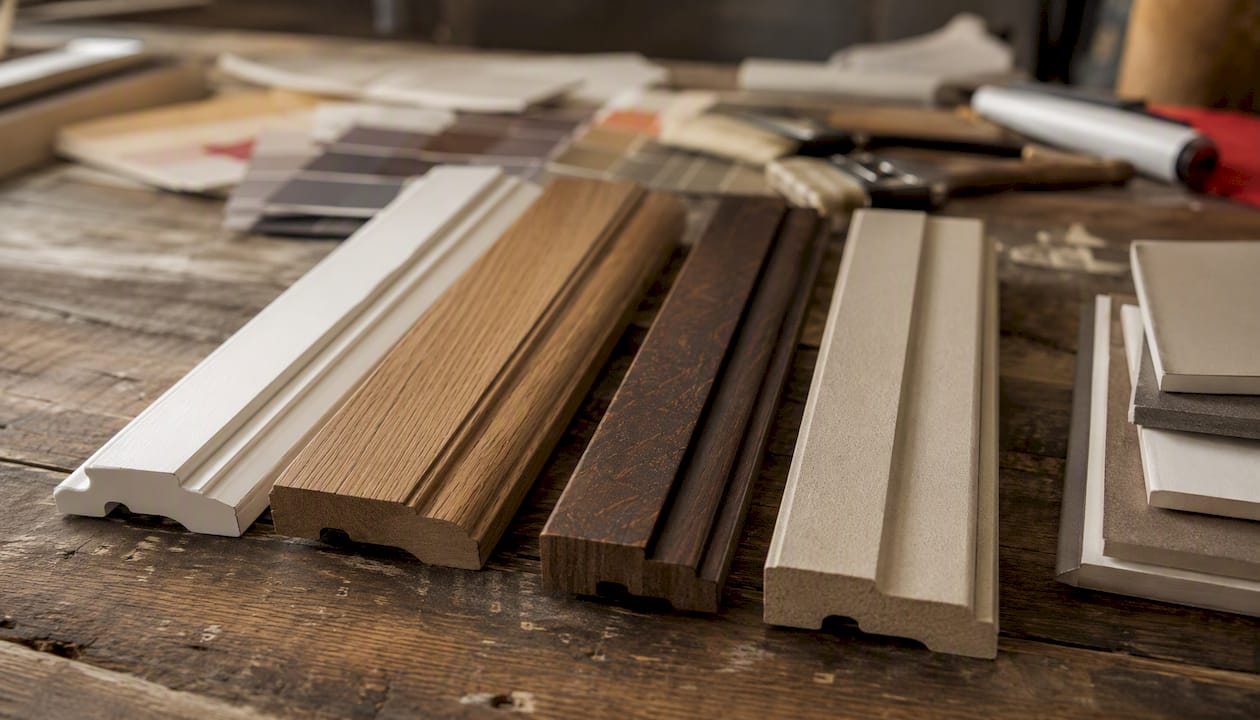
Pine is the most common choice for painted trim because it’s inexpensive and takes paint well, while oak and other tight-grain hardwoods are the standard for stained finishes where you want the wood grain visible, according to This Old House’s material guide. MDF and composite boards are budget-friendly, suited to painted work. MDF does not stain well and can swell when damp, so it belongs nowhere near a bathroom window or an exterior application. Poplar is smoother and preferred for painted trim, which is why it’s often the pick for higher-end painted casing.
For anywhere moisture is a real concern, PVC or vinyl trim resists rot in a way wood-based products simply can’t match.
| Material | Best for | Moisture resistance | Typical cost range |
|---|---|---|---|
| Pine | Painted interior trim, budget projects | Low | Lower cost |
| Poplar | Painted trim, smoother finish than pine | Low to moderate | Moderate cost |
| Oak | Stained trim, visible grain | Moderate | Higher cost |
| MDF/composite | Painted trim only, budget-friendly | Poor (swells with moisture) | Lower cost |
| PVC/vinyl | Exterior trim, bathrooms, moisture-prone areas | Excellent | Moderate to higher cost |
On the finish side, one technique worth knowing about: painting the trim the same colour as the wall but in a different sheen, typically flat on the walls and satin on the trim, creates a subtle, modern depth without the visual break of contrasting colours, a technique House Beautiful highlights among current design trends. It’s a good option for anyone who likes classic white trim but wants something a step more contemporary. If your home leans traditional, stark white trim against a coloured wall remains the more classic route, and it’s genuinely hard to get wrong.
Cost callout: installed trim pricing varies a lot depending on material and profile complexity, and the range is wide enough that getting a firm, itemized quote matters more than trusting a rule-of-thumb number from a different house entirely.
How does exterior trim differ from interior trim?
Exterior trim lives outside in freeze thaw cycles, direct sun, and driving rain, so it has to hold up to a completely different set of stresses than anything inside your living room.
- Weather exposure: exterior trim faces moisture, UV degradation, and temperature swings that interior trim never sees.
- Paint adhesion: exterior paint has to withstand expansion and contraction as temperatures change, which is why exterior-grade paints and primers matter more outside than in.
- Expansion and contraction: wood trim outside swells and shrinks with humidity far more than the same board indoors, which eventually shows up as cracked caulking or paint lines.
- Rot risk: any wood-based exterior trim, even pine, is vulnerable to rot if water finds its way behind it.
For exterior applications, vinyl, cellular PVC, or other synthetic exterior-rated materials hold up far better than untreated wood, since they simply don’t absorb water the way wood fibres do, according to Family Handyman. Interior trim has more freedom: poplar, pine, oak, and MDF all perform well indoors because the environment is stable.
One detail that gets skipped too often: where exterior trim meets siding or stucco, proper flashing and sealant are what actually keep water out, not the trim material alone. A gap around that joint, even a small one, lets water track behind the wall assembly, and no amount of exterior-rated PVC fixes that if the flashing detail was done wrong. Pairing new exterior trim with proper caulking and sealing at every joint is not optional if you want the work to last.

How do you choose the right trim profile for your home?
Run through this checklist before you buy a single board. It takes fifteen minutes and prevents a mismatched, expensive redo.
- What’s your home’s architectural style? A minimalist modern home rarely suits an ornate colonial casing, and forcing that combination usually reads as visually confused rather than upscale, a mismatch Pella specifically warns against.
- What are your ceiling heights? Taller ceilings, roughly nine feet or higher, can carry wider casing (4 to 5 inches) without looking heavy. Standard eight-foot ceilings usually look better with 2.5 to 3.5 inch casing.
- What’s your existing baseboard width? Trim and baseboard should feel like they belong to the same house. When a room already has 5-inch baseboards, matching or coordinating the window casing width keeps the room from feeling randomly assembled.
- Painting or staining? This decision determines your material shortlist before you even look at profiles.
- What’s the room function? Bathrooms and kitchens near sinks need moisture-tolerant materials regardless of the style you like.
- What’s your budget per window? Layered and fluted profiles cost more in both material and labour than a simple picture-frame.
- What’s your realistic DIY skill level? Be honest about whether you’ve used a miter saw before deciding a layered craftsman profile is a first-timer project.
- Consistent proportions matter more than most homeowners expect: mismatched thickness or width between rooms is one of the fastest ways to make a renovated house feel unplanned, a point Metrie’s guide to casing styles makes when discussing whole-home trim language.
- When trim width and baseboard thickness genuinely can’t be matched, a plinth block at the base of the casing is the standard professional fix for a clean transition.
- Before committing, get a physical sample board of your chosen profile and material, and mock up the width on the wall with painter’s tape so you can see it in your actual light before ordering enough for every window in the house.
Can you install window trim yourself?
A basic picture-frame casing on a square, drywalled opening is one of the more approachable carpentry projects for a confident DIYer, and most people can finish one window in an afternoon once they’ve done the first one.
Tools you’ll need:
- Miter saw (a basic 10-inch model handles most residential trim)
- Brad nailer with 1.5 to 2 inch brads, or a hammer and finish nails
- Tape measure and a combination square
- Wood filler and caulk
- Sandpaper (220 grit) and paint or stain plus applicators
- A small pry bar and chisel, useful if you’re removing old trim first
Basic installation sequence for picture-frame casing:
- Measure each side of the window opening precisely, checking that the opening is actually square with a combination square before cutting anything.
- Cut your casing pieces at 45 degree angles for the mitered corners, always cutting slightly long on the first pass so you can trim for a tight fit.
- Dry-fit every piece around the window before nailing anything, checking that the mitered corners close tightly.
- Shim and fasten the casing with your brad nailer, using shims behind the casing where the wall isn’t perfectly flat.
- Caulk the seams where the casing meets the wall and at the mitered corners to hide small gaps and prevent dust and drafts.
- Paint or stain once the caulk and any wood filler have fully cured, usually 24 hours.
Common mistakes to avoid:
- Assuming the window opening is square. Most older homes have settled slightly, and an out-of-square opening throws off every miter cut that follows.
- Rushing the miter joints. A gap of even a sixteenth of an inch at the corner is visible from across the room once painted.
- Using MDF in a bathroom or near a kitchen sink, where it can swell and delaminate within a year or two.
- Skipping the caulk step, which leaves hairline gaps that catch dust and shadow lines under paint.
Realistically, budget half a day for your first window, including painting time, and expect subsequent windows in the same room to go noticeably faster once you’ve worked out the sequence.
What does window trim cost, and when should you hire a pro?
Material-only costs for a single window stay relatively modest with pine, poplar, or MDF, while oak and custom profiles run higher simply because the material itself costs more per foot. Professional installation adds labour on top, and that number moves a lot depending on the profile’s complexity and the condition of the opening, which is why pricing guides consistently present cost as a range tied to material and complexity rather than a flat number per window.
The main cost drivers, in order of impact, are: material choice (oak costs more than pine), profile complexity (layered and fluted trim take longer to install than a picture-frame), and site conditions (an out-of-square opening or old, damaged trim to remove adds labour hours before the new casing even goes up).
Signs it’s time to call a contractor instead of DIYing:
- Visible rot, water staining, or soft wood around the window opening.
- Openings that are noticeably out of square (more than a quarter inch out over the width).
- Plaster walls instead of drywall, which behave differently under a nail gun and often crack unpredictably.
- Detailed layered or fluted profiles that need tight, repeatable joinery across multiple windows.
- Matching existing historic or custom trim elsewhere in the house, where a mismatch will stand out immediately.
If you do bring in a contractor, ask a few direct questions before signing anything: what material do they recommend for this specific room, is the estimate itemized by material and labour, do they handle the painting and caulking as part of the job or separately, and what’s the realistic timeline from measurement to finished paint. A proper estimate should break down material, labour, and any prep work like removal of old trim, not arrive as one bundled number.
How LA Rocks Renovations approaches window trim projects
LA Rocks Renovations handles window trim as part of a broader trim and baseboard installation service across Durham Region, which means the same crew measuring your windows can also make sure new casing lines up with existing baseboard and door trim throughout the house.
What the process typically looks like:
- An in-person site visit to measure every window opening and check for square, rot, or moisture issues before recommending materials.
- A firm, itemized estimate covering material, labour, and finishing, so there are no surprises partway through the job.
- Material selection guidance based on the room (painted poplar for a living room, PVC for a bathroom window, oak for a stain-grade study).
- Coordinated scheduling with interior painting or window replacement if either is part of the same project.
- Full finishing, including caulking, filling, sanding, and cleanup once the trim is installed.
Custom and layered profiles fall under custom trim work and moulding, which covers the fluted, layered, and arched styles that go well beyond a standard picture-frame casing.
Key takeaways: pick, prepare, proceed
Choosing window trim comes down to matching a profile to your home’s architecture, picking a material suited to painting or staining, and being honest about whether the opening and profile are within DIY reach.
- Pick a style family that matches your home’s architecture before shopping for material.
- Pick a material based on finish: pine or poplar for paint, oak for stain, PVC for anywhere near moisture.
- Decide DIY vs hire based on whether the opening is square, drywalled, and the profile is a simple picture-frame.
- Mock it up with a sample board and painter’s tape before ordering enough material for every window.
- Schedule the work, whether that’s a weekend on your calendar or a contractor’s estimate visit.
Pro Tip: Whatever profile you choose, keep the width and thickness consistent with your existing baseboards. A mismatch there is more noticeable than most homeowners expect, and it’s the detail that makes a room feel either finished or slightly off.
| Point | Details |
|---|---|
| Match trim to architecture | Choose a profile family (craftsman, colonial, modern) that fits your home’s existing style. |
| Choose material by finish | Pick pine or poplar for painting, oak for staining, PVC for moisture-prone rooms. |
| Assess DIY feasibility | Square openings and drywall walls make picture-frame casing a realistic weekend project. |
| Know your cost drivers | Material choice, profile complexity, and site condition all move the price. |
| Consider a full-service contractor | LA Rocks Renovations coordinates trim, painting, and caulking as one project across Durham Region. |
A note from LA Rocks Renovations on window trim
The window trim requests that come across our desk most often aren’t about style at all. They’re about mismatches: a homeowner loves a photo of layered colonial trim online, but their home is a 1980s side-split with low ceilings and flat baseboards everywhere else. Making that combination work usually means either scaling the colonial profile way down or steering toward something like craftsman casing instead, which reads as intentional rather than borrowed from a different house.
The lesson we’d pass along to any homeowner starting this project alone: don’t fall in love with a profile before you’ve checked it against your actual ceiling height and existing baseboard. It’s a five-minute check that saves a return trip to the lumber yard. For anything beyond a simple picture-frame casing on a square opening, especially layered work, arched windows, or trim that has to match something already in the house, that’s where bringing in a second set of trained eyes tends to pay for itself.
Ready to move from ideas to installation?
LA Rocks Renovations is the straightforward alternative to piecing a trim project together yourself window by window. Instead of separate trips for materials, a rental miter saw, and a weekend of trial and error, you get one crew that measures, recommends the right material for each room, installs, and finishes the job with caulking and paint included if you want it.
Our trim work covers custom trim and moulding, standard trim and baseboard installation, and coordinated finishing across Durham Region, Bowmanville, Clarington, and the surrounding communities. If you’re planning a larger project that also touches walls or ceilings, our basement renovation services can fold trim work into the same timeline and estimate.
To get a firm quote, reach out with your window count, a few photos of the openings, and the style you’re leaning toward. That’s usually enough for us to schedule a site visit and put together an itemized estimate you can actually plan around.
Frequently asked questions about window trim ideas
What is the most popular window trim style right now? Craftsman and modern flat casing are the two most requested profiles for updated homes, largely because both suit a wide range of architectural styles without looking out of place, according to Pella’s design guide.
Should window trim match the door casing? Yes, in most cases. Keeping window and door casing the same width and profile throughout a home creates a cohesive look, while mixing drastically different profiles between rooms tends to make a house feel unplanned rather than deliberately styled.
Can I use MDF trim in a bathroom? It’s not recommended. MDF absorbs moisture and swells over time, which makes it a poor choice anywhere near a shower, tub, or sink. PVC or a moisture-resistant composite is the safer call for bathroom windows.
How wide should window trim be? Standard interior casing typically runs 2.5 to 3.5 inches wide for eight-foot ceilings, scaling up to 4 or 5 inches for taller ceilings or a craftsman-style profile. The width should also roughly correspond with your existing baseboard thickness for a cohesive look.
Is it cheaper to paint or stain window trim? Painting is usually the more budget-friendly route since it allows lower-cost materials like pine, poplar, or MDF. Staining requires a higher grade of wood, typically oak, to show an attractive grain, which raises the material cost.
How long does it take to install trim around one window? A straightforward picture-frame casing on a square opening usually takes about half a day for a first-time DIYer, including painting time, and goes faster on subsequent windows once you’ve worked out the process.
Sources
A few additional resources are worth a look if you want to go deeper on specific profiles or installation details before committing to a purchase.
- Thisoldhouse
- Interior Window Trim — Family Handyman
- Window Trim Ideas: Your Guide to Interior Window Trim Styles | Pella
- 14 Modern Window Trim Styles That Bring Depth and Texture to a Room
- Todayshomeowner
Manufacturer installation documents and in-store sample galleries are also worth a visit before you buy, since seeing a profile in person, under your own lighting, tells you more than any photo online.