


Vinyl Plank Underlayment: What You Actually Need to Know
Dylan LarocqueRequest Your Free Estimate Today
GET A FREE ESTIMATE →Most floating vinyl plank (LVP) installations without a factory-attached pad benefit from a separate underlayment. If your planks already have a foam, cork, or IXPE pad bonded to the back, skip the separate layer entirely. And if you are doing a glue-down install, no underlayment goes beneath it at all.
Three factors settle the question every time:
-
Plank backing: flip a plank over. A factory-attached pad means no separate underlayment unless the manufacturer’s instructions say otherwise.
-
Subfloor type: concrete slabs need moisture protection regardless of whether the plank has a pad.
-
Installation method: floating bare-backed LVP benefits from a thin underlayment; glue-down LVP does not.
One more thing to keep front of mind: your plank manufacturer’s installation instructions govern warranty coverage. Choosing the wrong underlayment thickness or doubling up pads can void that warranty before a single plank is clicked into place.
Key takeaways
Floating bare-backed LVP needs a thin underlayment (an appropriately thin range); attached-pad planks and glue-down installs do not, and adding one to either risks voiding the manufacturer’s warranty.
| Point | Details |
|---|---|
| The one-sentence rule | Floating bare-backed LVP needs underlayment; attached-pad and glue-down installs do not. |
| Concrete always needs moisture protection | Use a polyethylene moisture barrier sheet or integrated-film underlayment; test the slab first with a calcium chloride or in-slab RH probe. |
| Thickness matters | Stay within 1–a thickness close to the manufacturer’s maximum for most LVP; never use thick laminate underlayment and never exceed the plank manufacturer’s stated maximum. |
| Follow the manufacturer’s instructions | The installation guide governs warranty; product choices that deviate from it can void coverage. |
| LA Rocks Renovations | Provides warranty-aware flooring installation with moisture testing and subfloor prep across Durham Region. |
Table of Contents
-
How do you prepare your subfloor before laying underlayment?
-
When should you hire a flooring contractor instead of doing it yourself?
What types of underlayment work under vinyl plank flooring?
Underlayment materials are not interchangeable. Each one trades off differently between sound control, moisture protection, thermal comfort, and compression resistance under LVP.
IXPE and EVA foam
IXPE (cross-linked polyethylene) foam at an appropriately thin range is the most common choice for bare-backed floating LVP. It resists long-term compression better than standard polyethylene foam, offers moderate sound reduction, and stays thin enough to keep click-lock joints stable. EVA foam behaves similarly but is slightly softer. Both are low-cost, widely available at Home Depot Canada, and easy to cut and lay.
-
Pros: affordable, thin, compression-resistant, often sold with an integrated vapour film
-
Cons: limited acoustic performance compared to cork or rubber; not suitable as a standalone vapour barrier on concrete without an integrated film
Cork
Cork delivers noticeably better impact sound reduction than foam, making it the go-to choice for upper-floor condos or any room where footfall noise is a concern. It also provides a modest thermal benefit underfoot. The trade-off is cost and the need for a separate 6-mil polyethylene vapour barrier when installing over concrete, since most cork rolls do not include an integrated film.
-
Pros: superior acoustic performance, natural material, comfortable underfoot
-
Cons: higher cost per square foot, usually requires a separate vapour barrier on concrete
Rubber
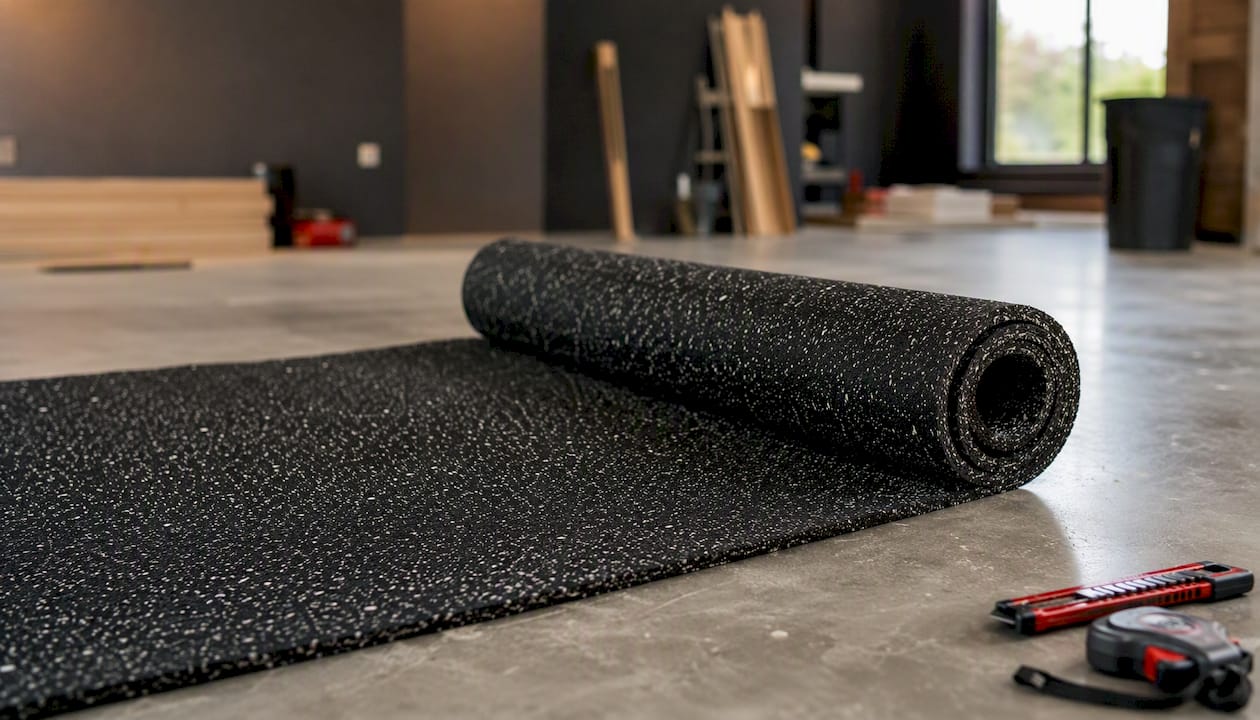
Recycled rubber underlayment sits at the top of the acoustic range and handles heavy traffic well. It is denser and heavier than foam or cork, which makes it harder to cut and lay solo. Like cork, rubber typically needs a separate vapour barrier on concrete.
Recycled fibre and felt
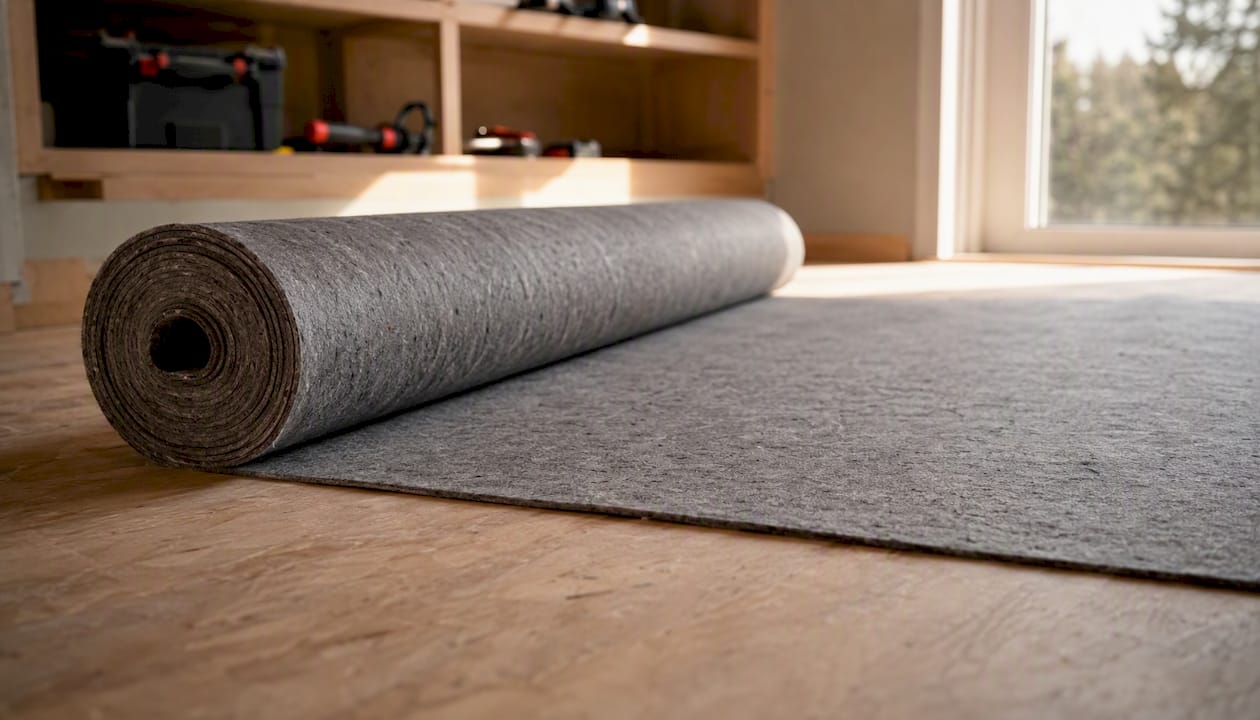
Felt-based underlayments offer good thermal comfort and decent sound absorption. They compress more over time than IXPE or rubber, so they are better suited to wood subfloors than concrete. Felt products with an integrated vapour film are available, but confirm the film’s perm rating meets your plank manufacturer’s spec before buying.
Combination products with integrated vapour film
These rolls bond a foam or IXPE layer to a polyethylene film on the underside, combining cushion and moisture protection in one step. They simplify concrete installs considerably by cutting out the separate vapour barrier step. Products like TrafficMaster AirGuard (available at Home Depot Canada) and Roberts Moisture Barricade fall into this category.
Pro Tip: Flip the underlayment roll so the film side faces down toward the concrete. The cushion layer should always face up, toward the plank. Getting this backwards defeats the moisture protection entirely.
Do you actually need underlayment for vinyl plank?
The short answer depends on three yes/no questions. Work through them in order.
-
Does the plank have an attached pad? If yes, do not add a separate underlayment. Adding one creates too much cushion, flexes the click-lock joints, and typically voids the manufacturer’s warranty. The only exception is when a condo or HOA requires an acoustic-rated layer and the plank manufacturer explicitly permits it.
-
Is the installation glue-down? If yes, no underlayment goes beneath it. Adhesive needs full, direct contact with the subfloor; cushioning under a glue-down floor prevents proper bonding and creates an unstable surface.
-
Is the subfloor concrete? If yes, you need moisture protection regardless of pad situation. A polyethylene moisture barrier sheet or an underlayment with an integrated vapour film is required even under attached-pad planks on concrete.
Three scenarios that clearly call for underlayment:
-
Bare-backed floating LVP on any subfloor
-
Any LVP (including attached-pad) over a concrete slab where moisture protection is needed
-
Condo or HOA installs with a minimum IIC sound rating requirement
Two hard rules to post on the wall:
-
Never lay a separate underlayment under a plank that already has a factory pad.
-
Never use foam underlayment under a glue-down installation.
How do you handle moisture and vapour barriers on concrete?
Concrete is porous. Even a slab that looks and feels dry can emit moisture vapour that works its way up through the floor assembly over months and years. “Waterproof” vinyl does not mean the flooring is immune to this; moisture trapped beneath the planks can cause adhesive failure, mould, and warping at the seams.
How to test your slab before you install
Two methods are accepted in the flooring industry:
-
Calcium chloride test: a sealed dish of calcium chloride sits on the slab for 60–72 hours; the weight gain measures moisture emission rate (MVER). Most LVP manufacturers publish a maximum MVER in their installation instructions.
-
In-slab relative humidity (RH) probe: a probe inserted into a drilled hole measures RH at depth. This method is considered more accurate for thick slabs and is the method referenced in ASTM F2170.
Testing concrete moisture with a calcium chloride or in-slab RH probe is the reliable way to confirm a slab is within a flooring manufacturer’s moisture limits before installing LVP. If the slab fails the test, the flooring cannot go down until the moisture issue is resolved.
Industry guidance: most LVP manufacturers set a maximum in-slab RH or maximum moisture vapor emission rate thresholds specified by the plank manufacturer. Check your specific plank manufacturer’s installation instructions for the exact threshold that governs your warranty.
Vapour-protection options for Canadian homeowners
-
thin polyethylene sheet with moisture barrier properties (e.g., Roberts Moisture Barricade or MoistureBlock polyethylene moisture barrier): the most affordable option. Lay it flat with 6-inch overlaps at seams, tape all seams with moisture-barrier tape, and run it 2–3 inches up the wall before trimming at the baseboard. Place the underlayment on top.
-
Underlayment with integrated vapour film (e.g., TrafficMaster AirGuard, QuietWalk Versa): combines cushion and moisture protection in one roll, reducing installation steps and the chance of a missed seam.
-
Adhesive-approved systems: for glue-down LVP, a moisture-mitigation coating applied directly to the slab replaces the poly sheet. Standard foam underlayment is never used here.
Pro Tip: Never lay two vapour barriers on top of each other. If your underlayment already has an integrated film, do not also lay a separate poly sheet beneath it. Trapping moisture between two barriers creates the exact problem you are trying to prevent.
What thickness of underlayment should you use under LVP?
Thickness is one of the most misunderstood specs in LVP installation. Thicker is not better.
-
1mm: the practical minimum for bare-backed floating LVP; provides basic cushion and sound dampening.
-
an appropriately thin range: the sweet spot for most residential LVP installs. IXPE foam in this range keeps the click-lock system stable while offering meaningful sound reduction.
-
a thickness close to the manufacturer’s maximum: the upper limit most LVP manufacturers permit. Some products allow it; check the installation instructions.
-
thicker underlayment options not generally recommended: generally not compatible with LVP click-lock systems unless the manufacturer explicitly approves it. Thick laminate underlayment designed for hardwood or laminate is a common mistake under LVP and a frequent cause of joint failure.
The total stack height matters too. If a plank has a 1mm factory pad and you add a typical thin underlayment thickness underlayment beneath it, the combined cushion is 2.5mm before the plank itself. That is why most manufacturers prohibit adding any separate underlayment under an attached-pad plank.
Acoustic ratings: IIC and STC explained
-
IIC (Impact Insulation Class): measures how well a floor assembly blocks impact noise (footsteps, dropped objects). Higher is better.
-
STC (Sound Transmission Class): measures airborne sound reduction (voices, music). Also higher is better.
Cork underlayment commonly advertises higher decibel reduction than foam, and some building associations and HOAs require minimum IIC ratings for upstairs installations. If you live in a condo or multi-storey building in Ontario, check your building’s rules before buying. Many require a minimum IIC rating for the complete floor assembly, and the underlayment is a key contributor to reaching that number.
How do you prepare your subfloor before laying underlayment?
Underlayment is not a levelling product. It is primarily for comfort, sound, and moisture control; treat levelling as a separate pre-install step. Skipping subfloor prep is the single most common reason LVP installations fail within the first year.
Flatness tolerance
Many manufacturers specify a flatness tolerance of a typical small flatness tolerance over 10 feet, and underlayment is not a substitute for levelling the subfloor. Always confirm the exact spec in your plank manufacturer’s installation guide, as some products are tighter.
Checking flatness with a straightedge:
-
Lay a 10-foot straightedge (or a taut string line) across the subfloor in multiple directions.
-
Slide a 3/16-inch feeler gauge or a coin stack under the straightedge at the lowest point.
-
Mark any high or low spots with chalk.
-
Grind down high spots on concrete with a floor grinder; fill low spots with a Portland-cement-based patch or self-levelling compound.
-
Allow patch or compound to cure fully before proceeding.
-
Re-check flatness after curing.
Wood subfloor preparation
-
Remove all old flooring and adhesive residue.
-
Inspect every board for rot, delamination, or soft spots; replace damaged sections.
-
Screw down any squeaky or loose boards with deck screws driven flush or slightly below the surface.
-
Fill gaps wider than 1/8 inch with a floor-patching compound.
-
Sweep and vacuum thoroughly; even small debris creates lumps under LVP.
Concrete slab preparation
Best practice is to remove old flooring, inspect the slab, grind or fill problem areas, and verify flatness before installing underlayment and finished flooring. Check for cracks wider than 1/8 inch and fill them with a flexible polyurethane filler. Delaminated or spalling concrete must be repaired before any flooring goes down.
Pro Tip: Perform the moisture test after all grinding and patching is complete, not before. Grinding opens the slab surface and can temporarily change moisture readings. Wait 24 hours after grinding before testing.
Practical tips for laying underlayment and vinyl plank
Getting the underlayment down correctly takes about 20 minutes of focused work. Rushing this step causes problems that show up months later.
-
Orientation: run underlayment rolls perpendicular to the direction of the planks when the manufacturer specifies it. When no direction is given, parallel is fine.
-
Seaming: butt seams tightly together without overlapping the cushion layers. Overlapping foam creates a ridge that telegraphs through the planks.
-
Vapour barrier seams on concrete: overlap poly sheets by at least 6 inches and tape every seam with moisture-barrier tape. Do not leave gaps at walls.
-
Integrated-film underlayment: lay it film-side down, cushion-side up. Tape the seams between rolls with the tape specified by the manufacturer.
-
Do not double up: if the underlayment already has an integrated vapour film, do not also lay a separate poly sheet beneath it. Never stack underlayment under LVP that already has an attached pad, and avoid trapping moisture by doubling vapour barriers.
-
Expansion gaps: leave the expansion gap specified by your plank manufacturer (typically 1/4 inch) at all walls and fixed objects. The underlayment runs to the wall; the plank does not.
-
Doorways and stairs: cut the underlayment cleanly at doorway thresholds and use the appropriate transition strip. For stairs, most LVP manufacturers recommend a separate stair-nose profile and direct adhesive; underlayment does not typically wrap over stair nosings.
-
Acclimate the planks first: let LVP planks sit in the installation room for 24–48 hours before laying them. This reduces expansion after install.
Pro Tip: Sequence your work: prep the subfloor first, then lay the vapour barrier (if separate), then the underlayment, then start planks. Never lay underlayment over a subfloor you have not yet verified as flat and dry.
Always read and follow the plank manufacturer’s installation instructions. They govern your warranty, and they sometimes override general best practices for that specific product.
Which underlayment products can you buy in Canada?
The five products below are available through Home Depot Canada and other Canadian flooring retailers. Each suits a different install scenario.
| Product | Best for | Thickness | Vapour protection | Sound claim | Warranty note |
|---|---|---|---|---|---|
| QuietWalk Versa | Floating LVP, upper floors, condos | a typical thin underlayment thickness | Integrated film | Higher IIC/STC claims among foam products | Check plank manufacturer’s max thickness |
| Roberts Moisture Barricade (polyethylene moisture barrier) | Concrete slab vapour barrier under any LVP | N/A (sheet only) | Yes, standalone poly | None (not a cushion layer) | Use with separate underlayment on top |
| MoistureBlock polyethylene moisture barrier | Concrete slab vapour barrier | N/A (sheet only) | Yes, standalone poly | None | Use with separate underlayment on top |
| Besso a typical thin underlayment thickness vinyl underlayment | Bare-backed floating LVP on wood or concrete | a typical thin underlayment thickness | Varies by SKU; confirm before buying | Moderate foam-level reduction | Confirm compatibility with plank brand |
| TrafficMaster AirGuard | Floating LVP over concrete (all-in-one) | a typical thickness compatible with the manufacturer instructions | Integrated film with Microban antimicrobial | Moderate | Verify plank manufacturer permits 3mm |
A few selection cues worth knowing:
-
Integrated-film rolls (QuietWalk Versa, TrafficMaster AirGuard) are the fastest option for concrete installs because they combine cushion and vapour protection in one step, reducing installation steps and the chance of a missed seam.
-
Cork or rubber products deliver the best acoustic performance for upper-floor or condo installs but usually require a separate poly vapour barrier on concrete.
-
Thin IXPE foam (an appropriately thin range) is the right call for most bare-backed floating LVP installs where acoustic performance is not the primary concern.
-
Standalone polyethylene moisture barrier sheets (Roberts Moisture Barricade, MoistureBlock) are the most affordable vapour-barrier option and work under any cushion layer on concrete.
Home Depot Canada lists underlayment product categories designed for luxury vinyl plank, including recycled fibre, foam layers with integrated vapour barriers, and subfloor prep products. Always cross-reference the product spec sheet against your plank manufacturer’s installation instructions before purchasing.
Quick buying checklist for underlayment in Canada
Use this list at the store or on a product page before adding anything to your cart.
-
Plank backing confirmed: flip a plank. If there is a factory pad, you likely need no separate underlayment (confirm with the manufacturer’s instructions).
-
Max underlayment thickness checked: look up the plank manufacturer’s maximum permitted underlayment thickness. Write it down before shopping.
-
Vapour barrier need assessed: is the subfloor concrete? If yes, confirm whether the underlayment has an integrated film or whether you need a separate polyethylene moisture barrier sheet.
-
IIC/STC requirement noted: does your building or HOA specify a minimum IIC rating? If yes, check the underlayment’s published IIC contribution.
-
VOC rating checked: if indoor air quality is a concern, look for products labelled GREENGUARD Gold certified or FloorScore certified. Both certifications indicate low VOC emissions and are relevant for Canadian homes with children or allergy sensitivities.
-
Roll coverage calculated: measure the room in square feet, add 10% for waste and cuts, and confirm the roll covers that area. Most rolls are sold in 100–200 sq ft increments.
-
Cost per square foot compared: divide the roll price by its coverage area. Integrated-film products cost more per roll but eliminate the cost of a separate poly sheet.
-
Return policy confirmed: check the retailer’s return policy for opened rolls. Home Depot Canada and most flooring suppliers accept returns on unopened rolls; opened rolls are generally final sale.
When should you hire a flooring contractor instead of doing it yourself?
Most straightforward floating LVP installs over a flat, dry wood subfloor are manageable for a confident DIYer. Several situations, though, shift the risk calculus enough that hiring a professional is the smarter call.
-
Failing moisture test: if the slab exceeds the manufacturer’s moisture limit, the problem needs to be diagnosed and resolved before flooring goes down. A professional can identify whether the source is a drainage issue, a hydrostatic pressure problem, or a curing issue, and recommend the right mitigation.
-
Major self-levelling work: pouring and feathering self-levelling compound over a large area requires experience to get right. Uneven compound creates the same flatness problems you were trying to fix.
-
Condo acoustic compliance: meeting a specific IIC target for a condo board requires selecting the right combination of plank, underlayment, and sometimes a resilient mat. A professional can calculate the assembly and document compliance.
-
Warranty-sensitive installs: if the flooring is high-value and the manufacturer’s warranty requires documented moisture testing and certified installation, a contractor can provide that paper trail.
-
Complex transitions and stairs: doorway transitions, stair nosings, and multi-room layouts with different subfloor heights require precise cuts and the right profiles. Mistakes here are visible and expensive to fix.
What a professional brings to a flooring install: in-slab RH testing with calibrated probes, warranty-aware product selection matched to the specific plank brand, guaranteed subfloor flatness within manufacturer tolerances, licensed subfloor repairs, and a documented moisture report you can keep on file. For homeowners in Durham Region, LA Rocks Renovations handles all of this as part of a complete flooring installation service, including subfloor assessment and moisture testing coordination before any product goes down.
For below-grade installs in particular, where concrete moisture risk is highest, pairing flooring work with a basement renovation assessment can catch drainage and waterproofing issues before they become a flooring failure.
What contractors see that most homeowners miss
The most common underlayment mistakes are not complicated. They are just easy to overlook when you are focused on getting the planks down.
Doubling up pads is the most frequent error. A homeowner buys a premium underlayment roll, lays it down, then installs planks that already have a factory pad. Within months, the click-lock joints start separating because the combined cushion is too soft. The fix is expensive: pull up the floor, remove the underlayment, and reinstall.
Skipping the moisture test on concrete is the second most common problem. The slab looks dry. The basement has never flooded. The homeowner skips the test and installs. Two winters later, the seams are lifting and there is mould under the planks. A $30 calcium chloride test kit would have caught it.
Using thick laminate underlayment under LVP is a third pattern that shows up regularly. Laminate underlayment is often 3mm or thicker, designed for a heavier, stiffer floor system. Under LVP’s thinner, more flexible planks, that thickness creates too much give at the joints.
What professionals do differently comes down to sequence and documentation. Moisture test first, always. Straightedge check before any underlayment goes down. Product selection matched to the specific plank brand’s installation instructions, not to what is on sale. And a written record of the moisture readings in case a warranty claim ever comes up.
Acoustic performance is another area where pros think differently. For upper-floor installs, the right underlayment choice is driven by the IIC target, not by price. Pairing a noise-reducing interior door with an acoustic-rated underlayment gives a much more complete sound-control result than underlayment alone.
Professional flooring installation in Durham Region
Selecting the right underlayment is straightforward once you know the rules. Getting the subfloor flat, the moisture test done, and the product matched to your plank’s warranty requirements is where most DIY installs run into trouble.
LA Rocks Renovations offers complete flooring installation in Durham Region, including subfloor assessment, moisture testing coordination, and underlayment selection matched to your specific plank product and building requirements. The team serves Bowmanville, Clarington, Oshawa, Whitby, Ajax, Pickering, and surrounding communities across Durham Region. Every install is done with the manufacturer’s installation instructions in hand, so your warranty stays intact. If the subfloor needs levelling, repairs, or waterproofing work before the flooring goes down, that is handled as part of the same project. Reach out for a quote and get a clear plan before you buy a single roll of underlayment.
Sources
The resources below are worth bookmarking before you buy underlayment or start your install.
-
Vinyl plank flooring underlayment: do you need it and best options - D and G Flooring
-
Underlayment for vinyl flooring: do you need it and which type works best? - D and G Flooring
-
Why luxury vinyl plank underlayment is crucial | Cavalieri Flooring
-
Preparing a concrete subfloor for hardwood or laminate flooring - Lowe’s
-
Do you need underlayment for vinyl plank flooring? | Potomac Floors
Before purchasing any product, download the installation instructions for your specific plank brand and confirm that the underlayment you are considering falls within the manufacturer’s permitted thickness, vapour barrier class, and compression rating. Local building codes and condo board rules in Ontario may also impose minimum IIC requirements that affect your product choice.